Desserts · Part 2 of 3: Instructions
Easy Strawberry Shortcake Sheet Cake Step-by-step instructions
- Prep
- Cook
- Total
- Serves
- 12
Before you start
Before beginning, ensure all ingredients are ready and at the appropriate temperatures. Hull and slice the strawberries evenly to ensure consistent texture.
If baking the sponge cake from scratch, complete this step well in advance so the cake can cool entirely; applying cream to a warm cake will cause it to slide off.
Clear enough space in your refrigerator to accommodate the finished sheet cake, as chilling helps the layers set properly before slicing.
Ingredients at a glance (3)
- 1 recipe store-bought or made ahead sponge cake
- 2 lbs fresh strawberries, hulled and sliced
- 2 cups heavy whipping cream, chilled
Instructions
Preparing the fruit
- Prepare the StrawberriesHull and slice the fresh strawberries. Place them in a medium bowl and set aside to allow the berries to release their natural juices.Look for The strawberries appear glossy and are surrounded by their own vibrant red juices.Tip Do not skip the resting time, as this step draws out the juices needed to moisten the cake layers.
The strawberries should be vibrant, glossy, and sitting in a pool of their own red juices. The fruit should look soft and ready to be layered onto the cake base.
Whipping the cream
- Whip the CreamIn a chilled bowl, beat the heavy whipping cream using an electric mixer on medium-high speed. Continue beating until stiff peaks form. Be careful not to over-whip, as the cream can quickly turn into butter.Look for The cream stands up in firm, stable peaks when the whisk is lifted.Tip Using a chilled mixing bowl helps the cream reach the desired volume more quickly.
The whipped cream should be smooth, thick, and hold its shape perfectly when the whisk is lifted. It should be light and airy, not heavy or dense, with a clean, fresh aroma.
Final assembly
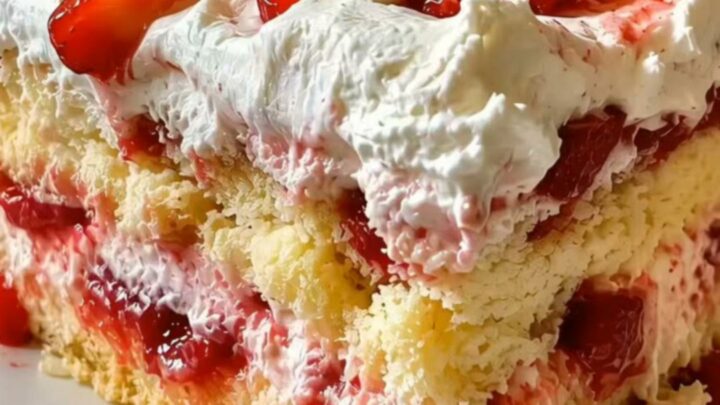
- Assemble the CakePlace the sponge cake on a serving platter. Spread a thick, even layer of whipped cream over the surface using an offset spatula. Arrange the sliced strawberries over the cream layer, drizzling with some of the accumulated juices.Look for The cream is spread evenly to the edges and the strawberries are distributed across the top.Tip If building multiple layers, repeat the process with additional sponge, cream, and berries, finishing with a generous dollop of cream on top.
The cake should be perfectly flat and covered in an even layer of cream. The strawberries should be distributed uniformly across the top, ensuring that every slice will have a generous amount of fruit.
Common mistakes
A common mistake is failing to allow the strawberries enough time to release their juices, which results in dry fruit that lacks the necessary moisture to enhance the cake. Another error is over-whipping the cream, which can lead to a grainy texture or the separation of fat into butter.
Avoid applying the whipped cream while the cake is still warm, as the heat will cause the cream to melt and the cake to become soggy rather than maintaining its light, pillowy structure.
How to tell it’s done
The dish is considered done when the whipped cream holds its shape in stiff peaks and the strawberries have released enough juice to appear glistening and soft. There are no proteins to cook, so no internal temperature is required.
Visually, the cake should look stable, with the cream layer providing a firm foundation for the fruit. Ensure the strawberries have softened slightly, as this indicates they are ready for serving.
Up next · Part 3 of 3
2 variations · storage & make-ahead · 3 answers · printable card
Tips, FAQ & printable recipe (Part 3)← Back to the ingredients (Part 1)