Dinner · Part 2 of 3: Instructions
Easy Smothered Shredded Pork Enchilada Bake Step-by-step instructions
- Prep
- Cook
- Total
- Serves
- 6
Before you start
Before beginning, ensure your oven is preheated to 375°F (190°C) to allow for consistent cooking. Have your shredded pork ready and at room temperature. If the pork is cold, it will take longer to heat through in the oven.
Prepare your workspace by laying out all ingredients, the baking dish, and your cheese grater, ensuring you have enough space to roll the tortillas comfortably.
This organized setup makes the assembly process fast and efficient.
Ingredients at a glance (4)
- 3 cups shredded cooked pork
- 12 corn tortillas
- 20 oz red enchilada sauce
- 2 cups shredded Monterey Jack cheese
Instructions
Assembly Phase
- Prepare the enchiladasArrange the shredded pork inside the corn tortillas and roll them tightly. Place each filled tortilla seam-side down into a 9x13-inch baking dish, nesting them snugly against one another until the dish is full.Look for The baking dish is filled with rows of tightly packed, seam-side down tortillas.Tip Warming the tortillas slightly before rolling prevents them from cracking.
The tortillas are tightly packed and filled with pork. The dish should look uniform, with no gaps between the rolls, which helps them maintain their structure throughout the cooking process.
Topping Phase
- Add sauce and cheesePour the red enchilada sauce evenly over the arranged tortillas, ensuring they are well-coated. Sprinkle the shredded Monterey Jack cheese generously over the top of the enchiladas to create an even layer.Look for The sauce covers the tortillas and the cheese forms a uniform layer over the dish.Tip Use a spoon to spread the sauce into the corners if needed.
The sauce is evenly distributed over the tortillas, and the cheese is spread across the entire surface. The dish is ready for the oven once the cheese layer is uniform.
Baking Phase
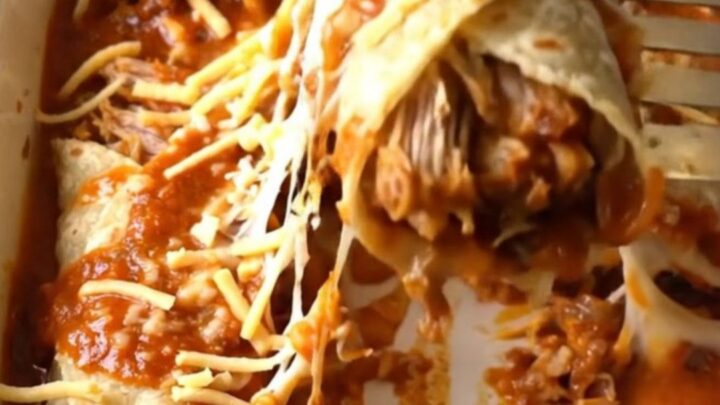
- Bake until goldenPlace the baking dish into a preheated 375°F (190°C) oven. Bake for approximately 25 minutes until the sauce is bubbling at the edges and the cheese is melted with golden spots. Ensure the center reaches an internal temperature of 145°F (63°C). Remove from the oven and let rest for 5 minutes before serving.Look for The cheese is bubbly and golden, and the sauce is simmering.Safe temperature 145°F (63°C) internal temperature (steaks, chops and roasts)Tip Serve immediately while the cheese is still warm and stretchy.
The edges are bubbling, and the cheese has achieved a beautiful, golden-brown finish. The kitchen should smell aromatic and savory, indicating that the enchiladas are cooked through and ready for consumption.
Common mistakes
A common mistake is using tortillas that are too cold, which leads to breakage during rolling. Always warm them slightly in a microwave or on a dry skillet first.
Another error is overcrowding the pan with too much sauce, which can make the tortillas soggy. Use just enough to coat the rolls, allowing the cheese to create a crispier top layer during the final minutes of baking.
How to tell it’s done
The enchiladas are ready when the edges of the red sauce are bubbling and the Monterey Jack cheese is completely melted with golden brown spots. The internal temperature of the pork filling should reach at least 145°F (63°C).
Let the dish stand for 5 minutes after removing it from the oven, as this helps the sauce set and makes it easier to lift individual servings with a spatula.
- Steaks, chops and roasts: 145°F (63°C) in the thickest part, then a 3-minute rest
Up next · Part 3 of 3
2 variations · storage & make-ahead · 3 answers · printable card
Tips, FAQ & printable recipe (Part 3)← Back to the ingredients (Part 1)