Dinner · Part 2 of 3: Instructions
Easy Slow Cooker Rotisserie-Style Chicken Step-by-step instructions
- Prep
- Cook
- Total
- Serves
- 4
Before you start
Before starting, ensure that your whole chicken is completely thawed if it was previously frozen. Pat the chicken dry with paper towels to help the seasoning adhere better to the skin.
Have your onions peeled and quartered, and your butter sliced into even pieces for easy distribution.
Clear a clean workspace to handle the raw poultry safely, and wash your hands and all surfaces thoroughly after the chicken is placed in the slow cooker to prevent cross-contamination.
Ingredients at a glance (4)
- 1 whole chicken (about 4 lbs)
- 1 large onion, quartered
- 2 tbsp poultry seasoning blend
- 4 tbsp unsalted butter, sliced
Instructions
Preparation and Aromatics
- Prepare the chickenPlace the whole chicken into the base of the slow cooker. Scatter the quartered onion pieces around the sides of the chicken to create a flavorful base.Look for The chicken sits flat in the bottom of the slow cooker.Tip Ensure the chicken is fully thawed before placing it in the slow cooker for even cooking.
The chicken is placed securely in the slow cooker, surrounded by the quartered onions. The aromatics are positioned to provide a stable base for the chicken, and all ingredients are ready for the seasoning phase.
Seasoning and Butter Application
- Season and butterEvenly sprinkle the poultry seasoning blend over the entire skin of the chicken. Arrange the butter slices directly on top of the seasoned chicken to melt during the cooking process.Look for The chicken is evenly coated with seasoning and butter slices.Tip Rub the seasoning lightly into the skin to ensure it adheres during the slow cooking phase.
The skin of the chicken is uniformly coated with the herb blend, and the butter slices are distributed across the top. The slow cooker is ready to be covered and started for the final cooking process.
Slow Cooking and Resting
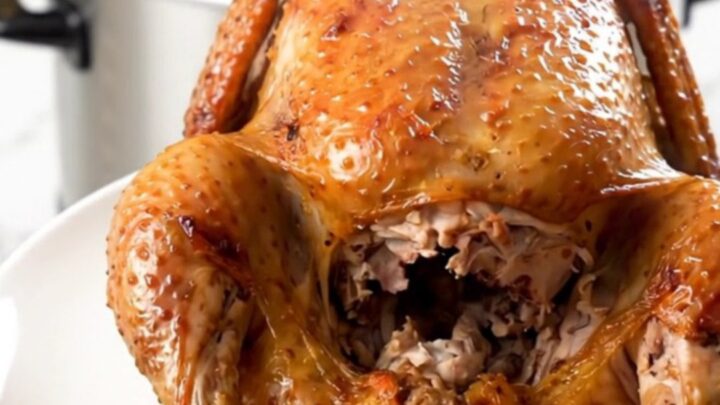
- Cook and serveCover the slow cooker and cook on low for 6 to 8 hours or on high for 3 to 4 hours. Ensure the internal temperature of the chicken reaches 165°F (74°C) at the thickest part. Remove the chicken, let it rest for 10 minutes, then serve.Look for The chicken is tender, golden-brown, and pulling away from the bone.Safe temperature 165°F (74°C) internal temperature (poultry)Tip Using a meat thermometer ensures the chicken is cooked safely while remaining juicy.
The chicken has reached a golden-brown color and is fully cooked to an internal temperature of 165°F (74°C). The meat is tender, and the resting period ensures it remains juicy before slicing.
Common mistakes
A common mistake is opening the lid too frequently, which releases trapped heat and extends the cooking time significantly. Avoid adding too much liquid, as the chicken and onions will naturally release their own juices during the long, slow cook.
Another error is failing to use a meat thermometer, which can lead to overcooking the chicken, causing the meat to become stringy and dry instead of tender and succulent.
How to tell it’s done
The chicken is done when the juices run clear when the thickest part of the thigh is pierced. Using a meat thermometer is the most reliable method; insert it into the thickest part of the breast or thigh without touching any bone.
The chicken must reach an internal temperature of 165°F (74°C). Once reached, turn off the slow cooker and allow the chicken to rest for at least 10 minutes before carving to allow the juices to redistribute.
- Poultry: 165°F (74°C) in the thickest part
Up next · Part 3 of 3
2 variations · storage & make-ahead · 3 answers · printable card
Tips, FAQ & printable recipe (Part 3)← Back to the ingredients (Part 1)