Desserts · Part 2 of 3: Instructions
Slow Cooker Pumpkin Pecan Cobbler Step-by-step instructions
- Prep
- Cook
- Total
- Serves
- 8
Before you start
Before starting, make sure the slow cooker is clean and dry. Measure out the pumpkin puree, and if it’s very thick, give it a quick stir to loosen it. Chop the pecans into small, even pieces if they aren’t already chopped.
Melt the butter in a small saucepan or microwave-safe bowl, and set it aside. Have the cake mix box ready to open. No need to preheat the slow cooker; it will heat up gradually as it cooks. This recipe requires minimal prep, so you can have everything ready in just a few minutes.
Ingredients at a glance (4)
- 1 1/2 cups pumpkin puree
- 1 box (15.25 oz) yellow cake mix
- 1 cup chopped pecans
- 1/2 cup unsalted butter, melted
Instructions
Layer the Ingredients
- Add the Pumpkin LayerSpread the pumpkin puree evenly over the bottom of the slow cooker, smoothing it into an even layer with a spatula. The puree should cover the entire base so the cobbler has a moist, flavorful foundation.Look for The pumpkin layer is smooth and covers the bottom completely.Tip Use a spatula to spread the puree gently, avoiding air pockets.
- Scatter the Cake MixSprinkle the yellow cake mix evenly over the pumpkin puree, covering the surface completely. Do not stir. The dry mix will form a crumbly topping as it cooks, absorbing the pumpkin and butter.Look for The cake mix forms a uniform, dry layer over the pumpkin.Tip Break up any large lumps of cake mix before scattering for even coverage.
- Sprinkle the PecansEvenly distribute the chopped pecans over the cake mix layer. The nuts will toast and add crunch as the cobbler cooks, creating a delightful contrast to the soft pumpkin and cake topping.Look for Pecans are scattered evenly across the dry mix.Tip Chop pecans into uniform pieces to ensure even toasting.
- Pour Over the ButterDrizzle the melted butter evenly over the entire surface, making sure to cover as much of the cake mix and pecans as possible. Do not stir. The butter will moisten the dry ingredients as it melts during cooking.Look for Butter is drizzled over the top, moistening the dry mix.Tip Pour the butter in a slow, steady stream to distribute it evenly.
After this phase, the slow cooker contains distinct layers: a smooth pumpkin base, an even blanket of yellow cake mix, a scattering of chopped pecans, and a drizzle of melted butter on top. The surface looks dry and crumbly, but the butter is beginning to soak in. No cooking has started yet, so the ingredients are still raw and separate. Check that the layers are even and that the butter covers most of the cake mix for even cooking.
Slow Cook to Golden
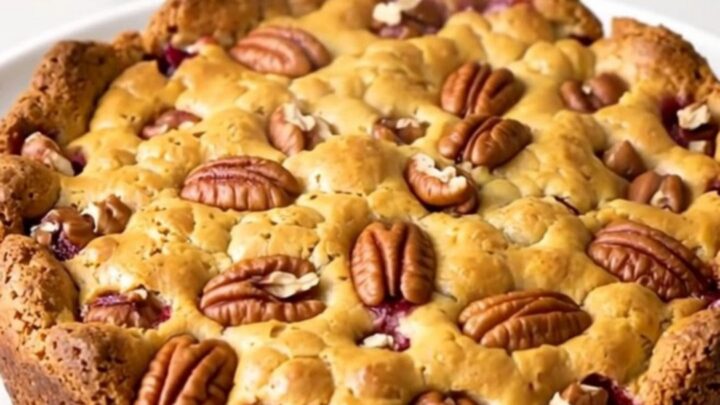
- Cook on LowCover the slow cooker with its lid and cook on low for 3 hours, or until the cobbler is set and the top is golden brown. The edges may look slightly darker and the center should be moist but not runny. Avoid lifting the lid during the first 2 hours to maintain steady heat.Look for The cobbler is golden brown at the edges and set in the center.Tip Cooking on low allows the cake mix to absorb the butter and pumpkin slowly, creating a tender topping.
As the cobbler cooks, the butter melts and the cake mix absorbs the moisture, turning into a soft, golden topping. The pumpkin layer heats through and becomes fragrant, and the pecans toast, releasing their nutty aroma.
The edges of the cobbler may brown slightly more than the center, which is normal. The top should look dry and set, with a few cracks where steam escapes. Avoid opening the lid during this phase to maintain consistent heat.
Rest and Serve
- Serve WarmOnce the cobbler is cooked, turn off the slow cooker and let it rest for 5 minutes. Spoon the cobbler onto plates or into bowls, making sure to include the soft pumpkin layer underneath and the crunchy pecan topping. Serve warm as is, or with a scoop of vanilla ice cream if desired.Look for The cobbler is steaming and golden, with a soft, spoonable texture.Tip Letting it rest for a few minutes helps the layers set slightly for easier serving.
After cooking, the cobbler is steaming and golden brown. The topping is firm but tender, and the pumpkin layer is hot and soft. Let it rest for a few minutes to allow the layers to set slightly, making it easier to serve. The aroma is rich with pumpkin, butter, and toasted pecans. Spoon it into bowls, making sure to get some of the pumpkin from the bottom. Serve warm for the best flavor and texture.
Common mistakes
A common mistake is stirring the layers after adding the cake mix. This recipe relies on the separate layers to create the right texture, so resist the urge to mix. Another mistake is lifting the lid too often to check on the cobbler, which releases heat and extends cooking time.
Also, using pumpkin pie filling instead of puree adds too much sugar and spice, making the dessert overly sweet and altering the texture. Finally, be sure to spread the cake mix evenly; clumps can remain dry and powdery.
How to tell it’s done
The cobbler is done when the top is golden brown and the edges look slightly caramelized. The center should be set but still moist, not runny. To check, insert a toothpick into the topping; it should come out mostly clean with a few moist crumbs.
The pumpkin layer underneath should be hot and bubbling slightly. If the top isn’t browned after 3 hours, cook for an additional 15-30 minutes, checking frequently. Remember that slow cooker temperatures vary, so rely on visual cues rather than exact time.
Up next · Part 3 of 3
4 variations · storage & make-ahead · 5 answers · printable card
Tips, FAQ & printable recipe (Part 3)← Back to the ingredients (Part 1)