Dinner · Part 2 of 3: Instructions
Easy Slow Cooker Cheesy Black Bean Chicken Step-by-step instructions
- Prep
- Cook
- Total
- Serves
- 4
Before you start
Before beginning, verify that the chicken breasts are fully thawed. If they are frozen, defrost them completely in the refrigerator overnight. Prepare the workspace by clearing the area around the slow cooker to ensure easy access to the ingredients. Have the measuring tools and shredding forks ready nearby.
Check that the slow cooker is plugged into a reliable outlet and is situated on a stable, heat-resistant surface away from any splashes or moisture that could interfere with the electrical components. Ensure you have enough space to work comfortably without the risk of knocking over ingredients or the slow cooker itself.
Ingredients at a glance (5)
- 1 1/2 lb boneless skinless chicken breasts
- 15 oz canned black beans, rinsed and drained
- 1 packet taco seasoning
- 1 cup tomato salsa
- 1 cup shredded Monterey Jack cheese
Instructions
Preparation and layering
- Assemble ingredientsPlace the raw chicken breasts into the base of the slow cooker. Do not rinse the raw chicken to avoid splashing bacteria onto surrounding surfaces; if you must clean it, pat it dry with paper towels and immediately discard them, then sanitize the sink and any nearby areas. Scatter the rinsed black beans over the chicken. Evenly sprinkle the taco seasoning packet over the beans and chicken, then pour the tomato salsa over the top.Look for The chicken should be arranged in a single layer at the bottom of the slow cooker insert.Tip Ensure the chicken is fully defrosted before adding it to the slow cooker to maintain even cooking temperatures.
At the start, the slow cooker contains the raw chicken and the dry seasonings, topped with the black beans and salsa. Everything is neatly layered, and the lid is securely positioned to begin the slow cooking process. The kitchen should remain clean, with all packaging discarded to allow for a streamlined workflow once the cooking is complete. Ensure that no ingredients are spilled on the exterior of the slow cooker insert, as this can burn during the long cooking time and create unwanted odors in the kitchen.
Slow cooking cycle
- Slow cook the chickenCover the slow cooker with its lid and set it to cook on low for 4 to 6 hours or on high for 2 to 3 hours, until the chicken reaches an internal temperature of 165°F (74°C).Look for The chicken should be tender and easily shredded with two forks once fully cooked.Safe temperature 165°F (74°C) internal temperature (poultry)Tip Avoid lifting the lid during the first few hours of cooking to ensure the slow cooker maintains a consistent internal temperature.
During the cooking phase, the slow cooker maintains a steady, low-temperature environment. The internal temperature of the chicken gradually rises as the salsa and bean juices integrate with the spices.
The smell of savory, spiced chicken begins to fill the kitchen, signaling that the proteins are breaking down and becoming tender. Check that the slow cooker is not placed near any flammable items or curtains, and ensure the cord is positioned safely to prevent accidental tugging or tripping while the appliance is hot.
Shredding and melting
- Shred and finish with cheeseOnce the chicken is cooked through, shred it directly in the slow cooker using two forks. Stir in the shredded Monterey Jack cheese until it is melted and combined with the chicken and beans. Let the dish rest for at least 3 minutes before serving.Look for The cheese should be completely melted and create a creamy, cohesive texture with the sauce and shredded chicken.Safe temperature 165°F (74°C) internal temperature (poultry)Tip If the sauce appears too thin after shredding, stir vigorously to incorporate the cheese, which acts as a thickening agent.
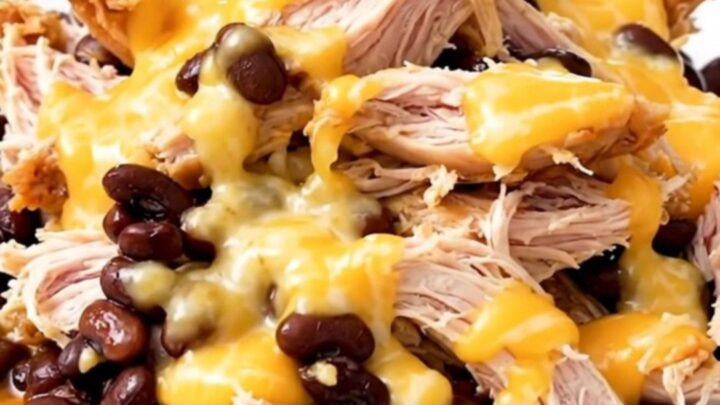
In the final phase, the chicken is shredded and the Monterey Jack cheese is incorporated. The dish transforms into a cohesive, cheesy mixture with a glossy sheen. The cheese should be completely melted, binding the black beans and chicken together. After a short rest, the dish is ready to be plated and served hot. Confirm that the cheese has fully emulsified into the sauce and that no large clumps of unmelted cheese remain before you begin plating the dish for your meal.
Common mistakes
A common mistake is overcrowding the slow cooker with multiple layers of chicken, which can lead to uneven cooking. Always keep the chicken in a single layer. Another error is removing the lid frequently during the cooking process; every time the lid is lifted, heat escapes, extending the total cooking time and potentially drying out the meat.
Finally, ensure the chicken is not overcooked, as even in a slow cooker, poultry can become stringy if left on high heat for too long past the safe temperature mark, so keep a close eye on the clock.
How to tell it’s done
The chicken is considered done when it reaches a safe internal temperature of 165°F (74°C). The meat should be opaque throughout and shred easily with a fork. The sauce, formed by the combination of salsa and cheese, should appear glossy and thick.
Because the chicken contains protein that must reach a safe temperature, always verify with a digital meat thermometer inserted into the thickest part of the meat before proceeding to the final shredding phase. This ensures the dish is safe to eat while maintaining the desired texture for the best possible experience.
- Poultry: 165°F (74°C) in the thickest part
Up next · Part 3 of 3
2 variations · storage & make-ahead · 3 answers · printable card
Tips, FAQ & printable recipe (Part 3)← Back to the ingredients (Part 1)