Dinner · Part 2 of 3: Instructions
Easy Slow Cooker Butternut Sage Pork Loin Step-by-step instructions
- Prep
- Cook
- Total
- Serves
- 4
Before you start
Before starting, ensure that the pork loin is patted dry with paper towels. Peel and seed the butternut squash before cutting it into uniform, one-inch cubes to ensure they cook at the same rate.
Have the butter melted and ready in a measuring cup, and prepare the sage by measuring it out into a small bowl. Ensure the slow cooker insert is clean and placed on a flat, heat-resistant surface away from any water sources or clutter.
Ingredients at a glance (5)
- 2 lb boneless pork loin roast
- 2 cups butternut squash cubes
- 1 tbsp fresh rubbed sage
- 4 tbsp unsalted butter, melted
- 1/2 cup vegetable broth
Instructions
Initial Setup
- Prepare the ingredientsPlace the boneless pork loin roast into the center of the slow cooker insert. Arrange the butternut squash cubes evenly around the sides of the pork loin to ensure even cooking throughout the process.Look for The pork should be centered and the squash distributed around it.Tip Ensure the pork is fully thawed before adding it to the cooker for consistent results.
The pork loin is centered, and the butternut squash cubes are tucked neatly around the sides. The ingredients should look clean and ready for the liquid components, with the meat lying flat in the center of the vessel, which allows for even heat distribution during the long, slow cooking process that follows.
Adding Aromatics
- Add aromatics and liquidSprinkle the rubbed sage uniformly over the pork loin and the squash. Combine the melted butter and vegetable broth in a measuring cup, then pour this mixture evenly over the pork and squash in the slow cooker.Look for The liquid should pool slightly at the bottom of the cooker.Tip Whisk the butter and broth together well before pouring to ensure the flavors are balanced.
The sage is evenly distributed over the surface of the pork and squash, and the buttery broth mixture has been poured over the top.
The ingredients should now be partially submerged in the liquid, which will provide the necessary moisture for the braising process, ensuring the meat remains tender and flavorful.
Cooking and Resting
- Cook and serveCover and cook on low for 4 to 6 hours. Once the pork reaches an internal temperature of 145°F (63°C), remove it from the cooker. Let the meat rest for at least 3 minutes before slicing and serving with the tender squash and pan juices.Look for The pork is tender and the squash is soft to the touch.Safe temperature 145°F (63°C) internal temperature (steaks, chops and roasts)Tip Do not skip the resting period as it keeps the pork succulent.
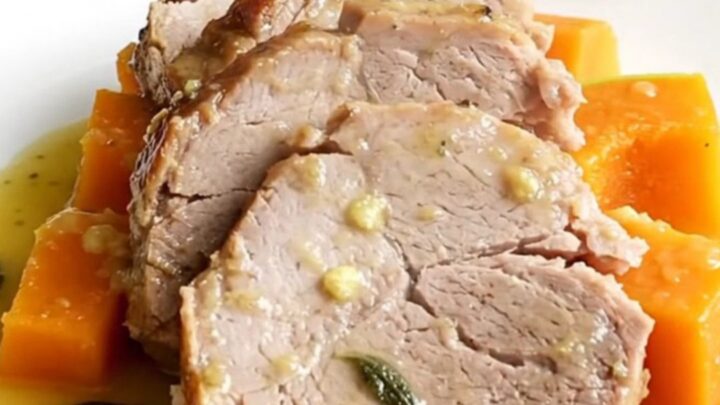
The pork is cooked through to the correct temperature, and the squash is tender enough to be pierced easily with a fork. The kitchen should smell fragrant and savory, and the meat should be rested and ready to be sliced into thick, uniform portions for immediate serving.
Common mistakes
Avoid overcooking the pork, as even a slow-cooked loin can become tough if left in the cooker for too long after it has reached the target temperature. Another common mistake is crowding the slow cooker too much; ensure there is enough space for the heat to circulate.
Finally, do not forget to let the meat rest, as skipping this step will result in juices running out onto the cutting board instead of staying inside the meat.
How to tell it’s done
The pork loin is properly cooked when it is opaque throughout and reaches an internal temperature of 145°F (63°C) when measured with a meat thermometer in the thickest part of the roast.
Once this temperature is reached, the meat must rest for at least 3 minutes on a cutting board before slicing. This resting time allows the juices to redistribute throughout the meat, ensuring that every slice remains tender, succulent, and perfectly juicy when served.
- Steaks, chops and roasts: 145°F (63°C) in the thickest part, then a 3-minute rest
Up next · Part 3 of 3
2 variations · storage & make-ahead · 3 answers · printable card
Tips, FAQ & printable recipe (Part 3)← Back to the ingredients (Part 1)