Dinner · Part 2 of 3: Instructions
Easy Queso Chicken Burrito Bake Step-by-step instructions
- Prep
- Cook
- Total
- Serves
- 6
Before you start
Before starting, ensure your oven is clear and preheated to 375°F (190°C). Have your baking dish ready on a clean workspace. If using refrigerated chicken, bring it to room temperature for about 15 minutes.
Drain and rinse the black beans thoroughly to prevent excess liquid from making the burritos soggy. Have your cheese shredded and ready to go so that the assembly process flows smoothly from start to finish.
Ingredients at a glance (5)
- 3 cups shredded cooked chicken
- 1 can (15 oz) black beans, drained and rinsed
- 6 flour tortillas
- 1 cup white queso dip
- 1 cup shredded Monterey Jack cheese
Instructions
Assembly of the burritos
- Assemble the burritosIn a medium bowl, combine the shredded chicken with the drained black beans. Spoon the mixture into the center of each flour tortilla. Roll each tortilla tightly and place them seam-side down in the rectangular baking dish. Ensure they fit snugly to keep their shape.Look for The tortillas should be rolled tightly and arranged closely in the baking dish.Tip Place the seam side down to prevent the burritos from unrolling while they bake in the oven.
The burritos should be tightly rolled and placed seam-side down in the baking dish. They should fill the dish nicely, touching each other to maintain their shape during the baking process. The chicken and bean mixture should be evenly distributed inside each tortilla.
Adding the cheesy layers
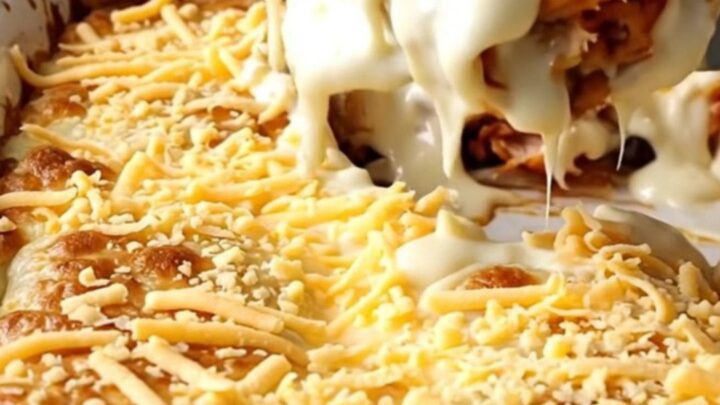
- Add sauce and cheesePour the white queso evenly over the arranged burritos, ensuring they are well-coated. Sprinkle the shredded Monterey Jack cheese over the top, making sure to cover the queso and the edges of the tortillas. This creates a golden, melted layer during the baking process.Look for The queso should be drizzled thoroughly over the entire surface of the burritos.Tip Spread the cheese evenly to ensure every bite has a perfect melt.
The white queso should be poured evenly over the top of the burritos, covering them completely. The shredded Monterey Jack cheese should be sprinkled uniformly, ensuring that it covers the queso and the exposed tortilla parts to create a consistent, melted surface.
Baking to perfection
- Bake until goldenPreheat the oven to 375°F (190°C). Bake the dish for 20 to 25 minutes until the queso is bubbling at the edges and the cheese is golden brown in spots. Ensure the center reaches 165°F (74°C). Remove from the oven and let rest for 5 minutes before serving.Look for The cheese should be melted and lightly browned, and the sauce bubbling.Safe temperature 165°F (74°C) internal temperature (poultry)Tip Allowing the dish to rest helps the flavors meld and makes serving much easier.
The finished dish should have a vibrant, bubbly queso sauce with golden, toasted cheese on top. The burritos should be heated through, and the kitchen should smell savory and cheesy. The center must reach 165°F (74°C) before taking it out of the oven to rest.
Common mistakes
A common mistake is using tortillas that are too cold or dry, which can cause them to crack when rolling. Always warm the tortillas slightly if they feel stiff.
Another error is overcrowding the dish, which prevents the heat from circulating properly; ensure the burritos are snug but not squashed.
Finally, failing to drain the black beans properly can result in a watery sauce, so ensure they are well-rinsed and patted dry before mixing.
How to tell it’s done
The dish is done when the queso is bubbling vigorously around the edges of the baking dish and the Monterey Jack cheese on top has melted completely, showing golden-brown spots.
The internal temperature of the chicken must reach at least 165°F (74°C). The tortillas should be soft but slightly firm at the edges. Let the dish rest for 5 minutes to allow the sauce to thicken slightly before you lift the burritos with a spatula.
- Poultry: 165°F (74°C) in the thickest part
Up next · Part 3 of 3
2 variations · storage & make-ahead · 3 answers · printable card
Tips, FAQ & printable recipe (Part 3)← Back to the ingredients (Part 1)