Desserts · Part 2 of 3: Instructions
Easy Pineapple Paradise Cake with Whipped Topping Step-by-step instructions
- Prep
- Cook
- Total
- Serves
- 8
Before you start
Before beginning the assembly, ensure all ingredients are ready and at the appropriate temperatures. The cake must be completely cooled to room temperature; if it is even slightly warm, the whipped topping will soften and slide off the cake.
Have the pineapple chunks drained thoroughly to avoid excess liquid, which could make the cake soggy. Ensure the workspace is clean and that the serving dish is ready to receive the cake.
Having all tools like the offset spatula within reach will streamline the process and help maintain the ideal temperature of the topping.
Ingredients at a glance (4)
- 1 layer yellow cake, store-bought or made ahead
- 2 cups whipped topping
- 1 cup pineapple chunks, drained
- 8 maraschino cherries
Instructions
Base Preparation
- Prepare the cake basePlace the prepared yellow cake layer into a clean, dry baking dish. Ensure the cake is completely cooled to room temperature if it was recently baked, as warm cake will cause the whipped topping to melt and lose its structure during the assembly process.Look for cake is level in the dishTip Use a cake with a flat surface for easier spreading of the topping.
The cake layer should be firmly settled in the baking dish with a flat, level surface. It should feel completely cool to the touch, indicating it is ready to receive the delicate whipped topping without any risk of melting or loss of structural integrity during the assembly process.
Topping Application
- Apply whipped toppingScoop the whipped topping onto the center of the cake layer. Using an offset spatula, gently spread the topping in an even layer across the entire surface of the cake, reaching all the way to the edges for full coverage.Look for topping is smooth and evenTip Dip the spatula in warm water and wipe dry for a smoother finish.
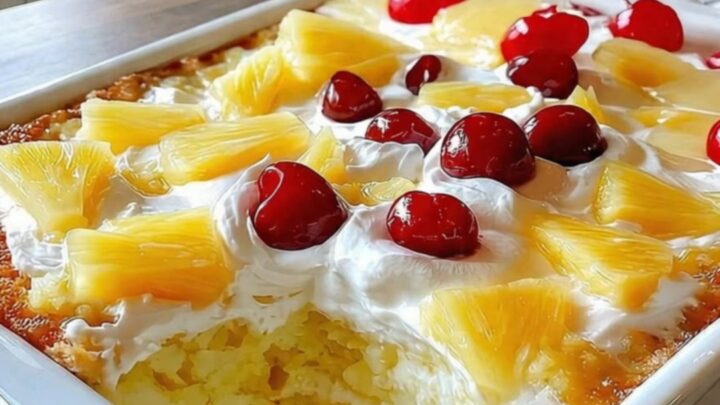
The whipped topping should be spread into a smooth, uniform layer that covers the entire top of the cake. It should look light, airy, and stable, with no visible streaks or gaps, providing a perfect, pristine canvas for the subsequent addition of the pineapple and cherry garnish.
Garnishing and Setting
- Garnish and chillEvenly distribute the pineapple chunks over the whipped topping. Place the maraschino cherries on top of the pineapple. If using homemade custard or egg-based components, ensure they reach 160°F (71°C) during their prior preparation. Refrigerate the assembled cake for at least 30 minutes before slicing to allow the flavors to meld and the topping to set properly.Look for cherries are placed symmetricallySafe temperature 160°F (71°C) internal temperature (egg dishes)Tip Pat the pineapple chunks dry with paper towels to prevent excess moisture.
The pineapple chunks and cherries should be arranged in a visually pleasing, even pattern. After the chill time, the topping should be firm to the touch, and the fruit should stay in place when the cake is tilted slightly, indicating the dessert is ready to be sliced and served.
Common mistakes
A common mistake is applying the topping to a cake that has not fully cooled, which results in a runny, unstable mess. Another error is failing to drain the pineapple chunks, which introduces too much moisture and ruins the texture of the topping.
Additionally, using a dull knife or an improper server can crush the cake layers; always use a sharp knife or a dedicated cake server to maintain the visual appeal of the finished dessert.
How to tell it’s done
The cake is ready when the whipped topping is spread in an even, smooth layer and the fruit garnishes are distributed symmetrically. There is no internal temperature to monitor for this assembly-only dessert, but the final product should look cohesive, with the topping holding its shape firmly.
The cake should be chilled for at least 30 minutes, which ensures that it is set and easy to slice into clean, beautiful portions for serving.
- Egg dishes: 160°F (71°C) in the thickest part
Up next · Part 3 of 3
2 variations · storage & make-ahead · 3 answers · printable card
Tips, FAQ & printable recipe (Part 3)← Back to the ingredients (Part 1)