Desserts · Part 2 of 3: Instructions
Easy Peanut Butter Chocolate Layer Dessert Step-by-step instructions
- Prep
- Cook
- Total
- Serves
- 12
Before you start
Before beginning the assembly, ensure the work surface is clean and all ingredients are measured and ready for use. Prepare the chocolate pudding according to the package directions, as it needs to be ready to spread.
If the peanut butter is too thick to spread easily, let it sit at room temperature for a few minutes or gently warm it until it reaches a spreadable consistency. Verify that the 9x13 glass dish is clean and dry to ensure a perfect base.
Ingredients at a glance (6)
- 1 box graham crackers
- 1 cup creamy peanut butter
- 2 packages chocolate pudding
- 2 cups whipped cream
- 1/2 cup chopped peanut butter cups
- 1/4 cup colorful candies
Instructions
Base assembly
- Layer the BaseArrange a single layer of graham crackers to cover the bottom of a 9x13 glass dish. Ensure the entire base is evenly covered so the subsequent layers remain stable.Look for The bottom of the dish should be completely covered by the crackers.Tip Break the crackers if necessary to fit the edges and corners of the dish.
The graham crackers should form a complete, level base covering the entire bottom of the dish.
There should be no significant gaps between the crackers, ensuring a stable foundation for the heavier filling layers that follow. Check that the crackers are dry and crisp before proceeding.
Filling layers
- Add Filling LayersSpread the peanut butter evenly over the graham cracker layer. Next, prepare the chocolate pudding according to package instructions and spread it carefully over the peanut butter layer to create a smooth, distinct finish.Look for The pudding layer should look smooth and cover the peanut butter completely.Tip Use an offset spatula to spread the layers without disturbing the base.
The peanut butter and chocolate pudding should be spread in smooth, even layers. The pudding should be thick enough to hold its own weight without bleeding into the peanut butter. Ensure the surface of the pudding is level before moving to the final topping phase.
Topping and setting
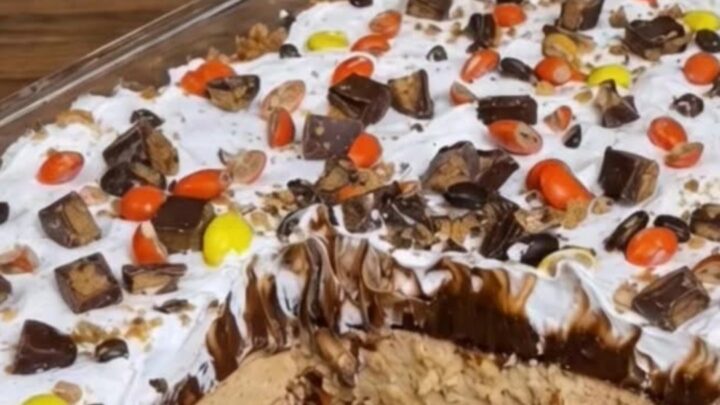
- Top and ChillSpread the whipped cream over the chocolate pudding layer. Sprinkle the chopped peanut butter cups and colorful candies on top. Refrigerate the dish for at least two hours before slicing.Look for The whipped cream should be set and the toppings evenly distributed.Tip Chill the dessert thoroughly to ensure clean, sharp slices when serving.
The whipped cream should cover the pudding completely, and the peanut butter cups and colorful candies should be distributed evenly across the top. The entire dessert should be placed in the refrigerator until it is firm to the touch, indicating it is ready to be sliced.
Common mistakes
Avoid spreading the chocolate pudding while it is still warm, as this can cause the whipped cream layer to melt or the peanut butter to become too soft. Ensure that each layer is spread to the very edges of the dish to create a uniform look.
Do not rush the chilling process, as an under-chilled dessert will not hold its shape when lifted with a spatula. Finally, ensure the crackers are placed firmly to create a solid, level foundation.
How to tell it’s done
The dessert is ready to serve once it has been chilled in the refrigerator for at least two hours. This time is necessary to firm up the pudding and whipped cream layers, allowing for precise slicing.
When a knife is inserted and removed, it should come out clean, and the layers should remain distinct and stable. The dessert is properly set when it no longer wobbles excessively upon movement and the toppings are securely adhered to the cream.
Up next · Part 3 of 3
2 variations · storage & make-ahead · 3 answers · printable card
Tips, FAQ & printable recipe (Part 3)← Back to the ingredients (Part 1)