Desserts · Part 2 of 3: Instructions
Easy No-Bake Chocolate Eclair Cake with Glossy Frosting Step-by-step instructions
- Prep
- Cook
- Total
- Serves
- 12
Before you start
Before you begin assembling your eclair cake, gather all your ingredients and equipment to ensure a smooth process. Clear a flat space in your refrigerator where the nine-by-thirteen-inch pan can sit level for several hours.
Ensure your whipped topping is fully thawed in the fridge, as frozen pockets will ruin the cream's texture. Measure out your vanilla pudding so it is ready to use immediately.
Ingredients at a glance (4)
- 3 cups vanilla pudding
- 8 oz whipped topping, thawed
- 14.4 oz graham crackers
- 16 oz chocolate frosting
Instructions
Creating the Fluffy Cream Filling
- Smooth the Pudding BaseIn a large mixing bowl, add the vanilla pudding. Stir it gently with a whisk or spatula for about one minute to ensure it is completely smooth, creamy, and free of any lumps before combining it with the other ingredients.Look for The pudding should be smooth and uniform in texture.Tip Using chilled pudding helps the mixture maintain its structure.
- Fold in the Whipped ToppingAdd the thawed whipped topping to the bowl with the smoothed vanilla pudding. Using a rubber spatula, gently fold the whipped topping into the pudding until the mixture is uniform in color and texture. Avoid over-mixing to keep the cream layer light and fluffy.Look for The cream should be light, fluffy, and uniform in color.Tip Make sure the whipped topping is fully thawed before folding.
At the end of this phase, the vanilla cream filling should be completely uniform, smooth, and free of any lumps. It will have a beautiful pale yellow color and a light, airy texture from the folded whipped topping.
The mixture should be thick enough to hold its shape slightly when scooped, smelling sweet and fragrant of vanilla, ready to be layered with the crackers.
Assembling the Graham Cracker Layers
- Layer the Graham Crackers and CreamArrange a single layer of graham crackers in the bottom of a nine-by-thirteen-inch metal baking pan, breaking them as needed to fit. Spread half of the prepared pudding cream evenly over the crackers. Repeat with a second layer of graham crackers and the remaining pudding cream, then top with a final layer of crackers.Look for The crackers should cover the surface completely.Tip Place the crackers close together to create sturdy, distinct cake layers.
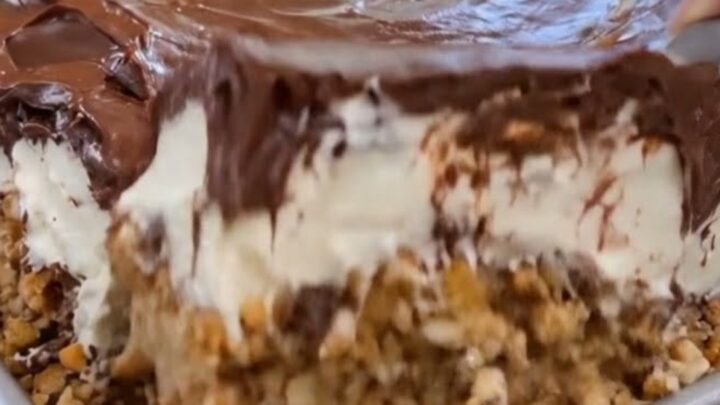
At this point, you should have three distinct layers of graham crackers sandwiching two thick, even layers of the vanilla cream filling. The top layer of crackers should sit level and flat, completely covering the cream beneath it. The assembly should look neat and structured, ready to receive the warm chocolate glaze without shifting or sliding.
Glazing and Chilling the Cake
- Spread the Frosting and ChillWarm the chocolate frosting in the microwave for fifteen seconds to make it easily spreadable. Pour the glossy frosting over the top layer of graham crackers, spreading it gently with an offset spatula to cover the entire surface. Cover the pan and refrigerate for at least four hours, or preferably overnight, before slicing.Look for The frosting should be smooth, glossy, and evenly distributed.Tip Chilling overnight allows the graham crackers to soften into a cake-like texture.
By the end of this final phase, the cake is topped with a smooth, glossy sheet of rich chocolate frosting that completely seals the top layer of graham crackers. After a thorough chill in the refrigerator, the frosting will have set to a semi-firm, lustrous finish, and the entire cake will feel solid and cohesive when the pan is gently nudged.
Common mistakes
The most common mistake is serving the cake too early. Cutting into the dessert before the crackers have fully softened results in a dry, crunchy texture instead of a tender, cake-like consistency.
Give it at least four hours, or ideally overnight, to set. Another frequent error is over-mixing the cream mixture after adding the whipped topping, which deflates the air and leads to a runny filling that will seep out when sliced.
How to tell it’s done
Because this is a no-bake dessert, doneness is determined by texture rather than temperature or color. The cake is fully set and ready to serve when a sharp knife slides effortlessly through all the layers, meeting no resistance from the graham crackers.
If you feel any firm or crunchy spots as you test it, the crackers need more time to hydrate. The chocolate frosting on top should also be firm to the touch and no longer sticky.
Up next · Part 3 of 3
2 variations · storage & make-ahead · 3 answers · printable card
Tips, FAQ & printable recipe (Part 3)← Back to the ingredients (Part 1)