Desserts · Part 2 of 3: Instructions
Easy Layered Oreo Dream Dessert Step-by-step instructions
- Prep
- Cook
- Total
- Serves
- 8
Before you start
Before beginning, ensure all ingredients are properly measured and ready. Have your 8-inch square glass dish clean and dry, as this is essential for showing off the layers.
If you are using homemade whipped cream, whip it until it reaches stiff peaks and keep it chilled until you are ready to assemble.
Having an offset spatula or a clean, flat-edged spoon will make the layering process much smoother and ensure the edges of your dessert look sharp and professional.
Ingredients at a glance (4)
- 20 whole chocolate sandwich cookies, crushed
- 2 cups chocolate pudding
- 2 cups whipped cream
- 1/2 cup mini chocolate chips
Instructions
Crust Preparation
- Prepare the Cookie CrustPlace the crushed chocolate sandwich cookies into the bottom of an 8-inch square glass dish. Use the back of a spoon to press the crumbs down firmly, creating a solid and even base for the dessert layers.Look for The crumbs should form an even, compacted layer across the entire bottom of the glass dish.Tip Ensure the crumbs are fine so the base stays together when you scoop out a serving.
The cookie crumbs should form a flat, compact layer covering the bottom of the dish completely. Pressing them down ensures they act as a solid base for the subsequent layers, which prevents the dessert from falling apart when you serve it.
Layering Components
- Layer the Cream and PuddingSpread a smooth, even layer of chocolate pudding over the crushed cookie base. Follow this by carefully spreading a layer of fluffy whipped cream over the pudding, ensuring the layers remain distinct and visually appealing.Look for The whipped cream should be spread gently to avoid mixing with the chocolate pudding layer beneath.Tip Use an offset spatula if available to get perfectly flat and professional-looking lines in your glass dish.
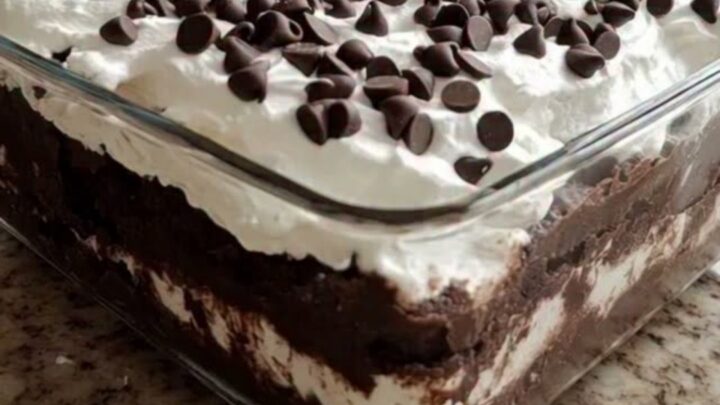
The pudding and whipped cream should be spread smoothly to create clean, visible horizontal bands. Check that the layers reach the edges of the glass dish, creating a consistent look that highlights the beauty of the different textures.
Chilling and Finishing
- Final Garnish and SettingSprinkle the mini chocolate chips evenly over the top layer of whipped cream. Place the dish in the refrigerator for at least two hours to allow the layers to set properly before serving chilled.Look for The dessert should feel firm and chilled after resting in the refrigerator, making it easier to scoop.Tip Cover the dish with plastic wrap if storing it in the fridge for longer than two hours to maintain freshness.
The top layer of whipped cream should be smooth and topped with an even scattering of chocolate chips. After the refrigeration period, the dessert should be firm to the touch and ready to be sliced or scooped into individual portions.
Common mistakes
Avoid over-mixing the layers when spreading the whipped cream over the pudding, as this can result in a muddy appearance. Ensure the cookie base is pressed down firmly; if the base is too loose, the dessert will crumble when scooped.
Do not skip the chilling time, as the dessert needs the cold temperature to firm up and allow the flavors to meld effectively.
How to tell it’s done
The dessert is ready when it has been chilled for at least two hours. The pudding layer should be set and firm, and the whipped cream should hold its shape when a spoon is inserted.
When you scoop, the layers should remain distinct rather than blending together, indicating the dessert has reached the proper consistency for serving.
Up next · Part 3 of 3
2 variations · storage & make-ahead · 3 answers · printable card
Tips, FAQ & printable recipe (Part 3)← Back to the ingredients (Part 1)