Dinner · Part 2 of 3: Instructions
Easy Hawaiian Ham and Rice Bake Step-by-step instructions
- Prep
- Cook
- Total
- Serves
- 6
Before you start
Before beginning, ensure all ingredients are measured and ready. Dice the ham into uniform pieces to ensure even cooking. Drain the pineapple tidbits thoroughly to prevent the dish from becoming too watery.
Preheat the oven to 375°F (190°C) well in advance to ensure the baking dish enters a hot environment, which is crucial for the rice to start absorbing the liquid immediately.
Ingredients at a glance (7)
- 2 cups long-grain white rice, dry
- 2 cups cooked ham, diced
- 2 cups chicken broth
- 1 cup pineapple tidbits, drained
- 3 tbsp soy sauce
- 1/4 cup brown sugar
- 1/4 cup green onions, sliced
Instructions
Layering the ingredients
- Prepare the BasePreheat the oven to 375°F (190°C). In a large rectangular ceramic baking dish, spread the dry long-grain white rice evenly across the bottom. Scatter the diced cooked ham over the layer of dry rice, ensuring it is distributed well throughout the dish to provide flavor in every bite.Look for The rice is spread in an even layer across the baking dish.Tip Ensure the baking dish is large enough to prevent the rice from overflowing during the cooking process.
The rice should form a flat, even bed at the bottom of the baking dish, with the ham pieces distributed uniformly on top. This setup is critical because it creates the foundation for the liquid to permeate the rice evenly, ensuring no dry patches remain after the baking process is complete.
Adding the sauce
- Mix and Add SauceIn a glass pitcher, combine the chicken broth, drained pineapple tidbits, soy sauce, and brown sugar. Stir the mixture well until the brown sugar has dissolved into the liquid. Pour this sauce mixture carefully over the rice and ham in the baking dish, ensuring all the rice is submerged in the liquid.Look for The liquid covers the rice completely and the brown sugar is fully incorporated.Tip Whisking the sauce in a pitcher before pouring helps ensure an even distribution of sweetness and saltiness.
The sauce mixture in the pitcher should be thoroughly combined, with the brown sugar fully dissolved in the broth. When poured, it should cover all the rice and ham. The mixture should look like a thin, amber-colored liquid that will transform into a rich, savory glaze as it bakes in the oven.
Baking and finishing
- Bake and GarnishPlace the baking dish into the preheated oven and bake for approximately 40 minutes, or until the rice is tender and the liquid has been absorbed. Once removed from the oven, sprinkle the sliced green onions over the top of the hot dish. Let it rest for 5 minutes before serving.Look for The rice is fluffy, the sauce is bubbling at the edges, and the pineapple is soft.Tip Avoid lifting the foil or cover if used, as keeping the steam inside is essential for perfectly cooked rice.
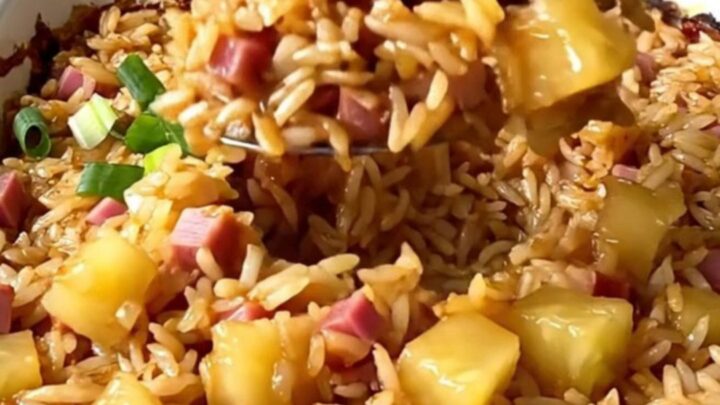
At the end of the baking time, the dish will have a fragrant aroma, with the sauce reduced to a perfect consistency that coats the rice and ham.
The green onions should be added immediately after taking the dish out of the oven to provide a fresh, crisp contrast to the warm, sweet, and savory elements.
Common mistakes
A common mistake is failing to ensure the rice is completely submerged in the sauce before baking, which can result in unevenly cooked, crunchy grains. Another error is using a dish that is too shallow, causing the liquid to boil over.
Finally, ensure the pineapple is well-drained, as excess syrup can make the final dish overly sweet or prevent the sauce from thickening properly during the baking process.
How to tell it’s done
The dish is ready when the rice is tender to the bite and the liquid has been almost entirely absorbed. The edges should show signs of bubbling, and the pineapple pieces should be soft and slightly translucent.
If the rice still seems hard or the liquid is excessive, extend the baking time by a few minutes. Always let the dish rest for at least 5 minutes before serving to allow the sauce to set and the rice to reach the perfect fluffy consistency.
Up next · Part 3 of 3
2 variations · storage & make-ahead · 3 answers · printable card
Tips, FAQ & printable recipe (Part 3)← Back to the ingredients (Part 1)