Desserts · Part 2 of 3: Instructions
Easy Crockpot Peach Cobbler Dump Cake Step-by-step instructions
- Prep
- Cook
- Total
- Serves
- 8
Before you start
Before starting, make sure the slow cooker is clean and dry. Gather the canned peaches, cake mix, butter, and cinnamon.
Cut the cold butter into small squares—about 12 pieces—and keep them chilled until ready to use. No need to preheat anything; the slow cooker does all the work.
Ingredients at a glance (4)
- 2 cans (15 oz each) sliced peaches in heavy syrup
- 1 box (15.25 oz) yellow cake mix
- 12 tbsp cold salted butter, cut into thin squares
- 1 tsp ground cinnamon
Instructions
Layer and Top
- Layer the PeachesPour both cans of sliced peaches with their heavy syrup into the bottom of a 6-quart slow cooker. Spread them into an even layer, making sure the syrup covers the bottom of the insert.Look for The peaches should be in a single layer with syrup pooling around them.Tip No need to drain the peaches; the syrup is essential for the cobbler's sauce.
- Sprinkle the Cake MixEvenly sprinkle the entire box of dry yellow cake mix over the peaches. Use a spoon to spread it gently so it covers the fruit completely, but do not stir.Look for The cake mix forms a dry, even blanket over the peaches.Tip Sprinkling slowly helps the cake mix absorb the syrup evenly as it cooks.
- Top with Butter and CinnamonArrange the cold butter squares evenly over the cake mix. Dust the top with ground cinnamon, covering the entire surface.Look for Butter pats are spaced evenly, and cinnamon dusts the top.Tip Cold butter melts slowly, creating steam that makes the cobbler tender.
The slow cooker is loaded with peaches in syrup, a dry layer of cake mix, and butter pats dusted with cinnamon. The surface looks dry and crumbly, but that's exactly what you want. The butter is starting to soften at room temperature, but nothing is cooking yet.
Slow Cook
- Cook on LowCover the slow cooker and cook on low for 3 hours. Do not open the lid during cooking, as this releases heat and extends the cooking time.Look for The edges will start to bubble and the top will look golden and set.Tip Set a timer to resist the urge to peek; the steam does the work.
- Check for DonenessAfter 3 hours, check the cobbler. The cake mix should be cooked through, no longer dry on top, and the peach syrup should be bubbling around the edges. If the top is still dry, cook for another 30 minutes.Look for Bubbling syrup at the edges and a golden-brown crust signal it's ready.Tip A toothpick inserted into the cake layer should come out clean.
After a few hours, the slow cooker is filled with the aroma of peaches and cinnamon. The cake mix has turned golden and puffed slightly, with syrup bubbling around the edges.
The top is set and no longer dry. Everything looks like a rustic cobbler straight from the oven.
Serve
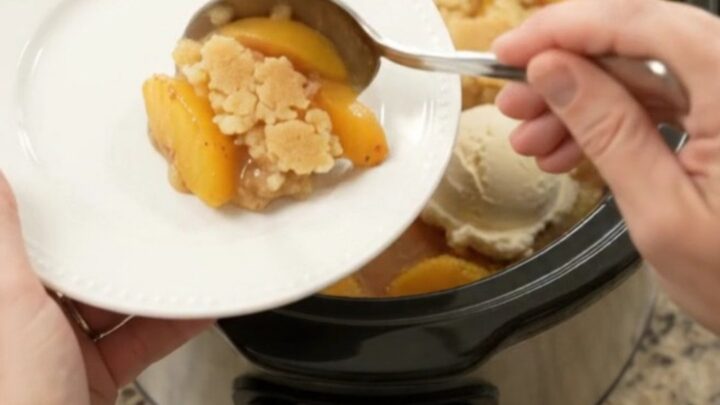
- Serve WarmSpoon the warm peach cobbler into bowls. For the best texture, let it sit for 5 minutes before serving so the sauce thickens slightly.Look for The cobbler is steaming and the syrup is thick enough to coat a spoon.Tip Serve with vanilla ice cream or whipped cream if desired.
The cobbler is steaming and the syrup is thick enough to coat a spoon. The cake layer is tender and moist, and the peaches are soft but hold their shape. Serve warm with ice cream or on its own.
Common mistakes
One common mistake is opening the lid during cooking, which lets out heat and extends the cooking time. Another is stirring the mixture—this ruins the layering and can make the cobbler gummy.
Also, using a slow cooker that's too small can cause overflow, so stick to a 6-quart model. Finally, don't substitute fresh peaches without adjusting the liquid; they won't release enough syrup.
How to tell it’s done
The cobbler is done when the cake mix layer is cooked through and no longer dry on the surface. The edges should be bubbling with thick, syrupy peach juice, and the top should be golden brown.
A toothpick inserted into the cake layer should come out clean, with no wet batter. If the top looks pale or doughy, cook for another 30 minutes and check again.
Up next · Part 3 of 3
4 variations · storage & make-ahead · 5 answers · printable card
Tips, FAQ & printable recipe (Part 3)← Back to the ingredients (Part 1)