Dinner · Part 2 of 3: Instructions
Effortless Crockpot Lemon Garlic Herb Chicken Step-by-step instructions
- Prep
- Cook
- Total
- Serves
- 6
Before you start
Before you start, juice and slice the lemons, smash the garlic cloves, and measure the chicken stock and butter. The capers should be drained and the parsley chopped.
If you plan to serve the chicken over pasta, bring a large pot of salted water to a boil just before the chicken is finished cooking. Have a slow cooker with at least a 6-quart capacity ready. No other prep is needed—this is a true dump-and-go recipe.
Ingredients at a glance (10)
- 6 boneless, skinless chicken thighs
- 2 lemons, juiced and sliced
- 6 cloves garlic, smashed
- 1/2 cup chicken stock
- 4 tbsp unsalted butter, cut into pieces
- 2 tbsp non-pareil capers, drained
- 1/4 cup fresh parsley, chopped
- 12 oz angel hair pasta
- Freshly grated parmesan cheese, for serving
- Lemon zest, for serving
Instructions
Layer and cook
- Layer the chicken and aromaticsPlace the chicken thighs in the slow cooker insert in a single layer. Pour the lemon juice over the chicken, then tuck the lemon slices, smashed garlic cloves, and butter pieces around and on top. Pour the chicken stock around the edges. Do not stir—the butter will melt and combine with the juices as it cooks.Look for The chicken should be nestled under the lemon slices and butter; the liquid should come about a third of the way up the chicken.Tip If the chicken thighs are very thick, trim any excess fat but keep them whole—they will shred more easily after slow cooking.
- Cover and cook on lowCover the slow cooker with the glass lid and set it to LOW. Cook for 4 hours, undisturbed. The chicken should be fork-tender and easily pull apart when done. Do not open the lid during the first 3 hours to keep the heat steady.Look for The sauce will look pale and buttery; the chicken will be submerged in a lemony broth.Safe temperature 165°F (74°C) internal temperature (poultry)Tip If your slow cooker runs hot, check at 3 1/2 hours. The chicken is done when it shreds easily with a fork.
At the end of this phase, the slow cooker will be filled with the scent of lemon and garlic, and the butter will have melted into a golden pool around the chicken.
The chicken should be submerged in a fragrant broth, and the lemon slices will have softened. The chicken should be fork-tender and easily pull apart, with an internal temperature of at least 165°F (74°C).
Shred and brighten
- Shred the chickenTurn off the slow cooker. Using two forks, shred the chicken directly in the pot, pulling the meat apart into thick, juicy strands. Leave any large pieces that resist shredding—they will continue to break down as they sit in the hot sauce.Look for The chicken should shred with almost no resistance, and the sauce should look glossy and emulsified.Tip For chunkier shreds, use a fork and a pair of tongs; for finer shreds, use two forks and pull in opposite directions.
- Swirl in capers and parsleyAdd the drained capers and the chopped fresh parsley to the slow cooker. Stir gently to combine, letting the capers distribute through the sauce and the parsley wilt slightly. The sauce should be bright, briny, and full of lemon fragrance.Look for The capers will be soft but still whole; the parsley will be bright green and the sauce will smell intensely lemony.Tip If you prefer a stronger caper presence, add an extra tablespoon of capers at this point.
After shredding and adding the capers and parsley, the chicken will be in thick, juicy strands, and the sauce will be glossy with tiny green flecks of parsley and the occasional caper. The aroma is intensely lemony and herbal, with a hint of brine. The sauce should taste bright and balanced—if it tastes too acidic, add a pinch of salt to round it out.
Pasta and serve
- Cook the pastaBring a large pot of salted water to a boil. Add the angel hair pasta and cook according to package directions until al dente, usually about 4 to 5 minutes. Reserve about 1/2 cup of pasta water, then drain the pasta well.Look for The pasta should be tender but still have a slight bite in the center.Tip Angel hair cooks quickly—set a timer to avoid overcooking. Save a little pasta water to loosen the sauce if needed.
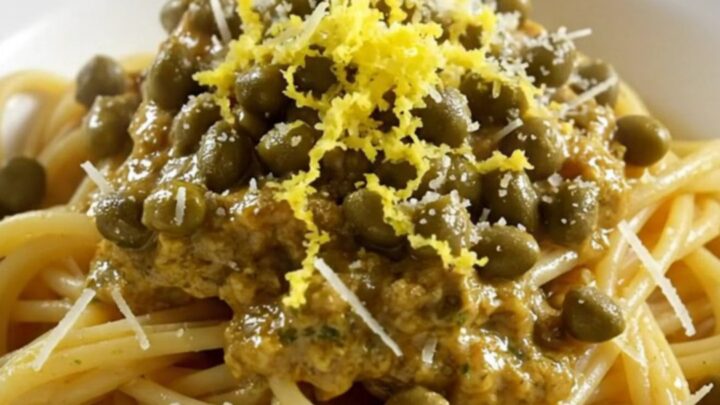
- Serve over pasta with lemon and parmesanSpoon the lemon garlic herb chicken and its sauce over the hot angel hair pasta. Finish with a generous grating of fresh lemon zest and a shower of freshly grated parmesan cheese. Serve immediately while hot.Look for The pasta should be coated in the buttery sauce, and the parmesan should melt slightly on contact.Tip For extra brightness, add a squeeze of fresh lemon juice at the table, if desired.
When served, the angel hair pasta will be coated in the silky sauce, with shreds of chicken nestled among the strands. The lemon zest and parmesan add a final burst of brightness and umami. The dish should look vibrant and inviting, with the golden sauce glistening and the fresh herbs adding color. Serve immediately to enjoy the best texture.
Common mistakes
One common mistake is opening the slow cooker lid too often, which releases heat and extends the cooking time. Keep the lid on for the first three hours. Another is using chicken breasts instead of thighs—they dry out more easily and can become tough.
If you do use breasts, check for doneness at two hours. Finally, don't skip the capers; they add a crucial briny note that balances the butter and lemon. If you omit them, the dish will taste flat.
How to tell it’s done
The chicken is done when it shreds easily with a fork and registers 165°F (74°C) in the thickest part. Because the thighs are cooked on low for four hours, they will be well past this temperature, but the texture should be tender and juicy, not dry.
The sauce should be glossy and slightly thickened, and the lemon slices will have softened and released their flavor. If the chicken resists shredding, cook for an additional 30 minutes and check again.
- Poultry: 165°F (74°C) in the thickest part
Up next · Part 3 of 3
4 variations · storage & make-ahead · 5 answers · printable card
Tips, FAQ & printable recipe (Part 3)← Back to the ingredients (Part 1)