Dinner · Part 2 of 3: Instructions
Easy Crockpot Fajita Shredded Beef for Simple Dinners Step-by-step instructions
- Prep
- Cook
- Total
- Serves
- 6
Before you start
Before starting, ensure your slow cooker is clean and placed on a stable, heat-resistant surface. Wash, core, and slice the bell peppers and onions into strips. Have your seasoning packet and diced tomatoes ready to go.
Because this is a raw meat preparation, ensure you wash your hands thoroughly after handling the beef chuck roast and sanitize all surfaces that came into contact with the raw meat to prevent cross-contamination.
Ingredients at a glance (5)
- 3 lb beef chuck roast
- 3 bell peppers, sliced
- 1 onion, sliced
- 1 packet fajita seasoning
- 1 cup diced tomatoes
Instructions
Initial assembly
- Prepare the slow cookerPlace the raw beef chuck roast into the bottom of the slow cooker. Ensure the meat is positioned flat to allow for even cooking throughout the process.Look for Beef is placed at the bottomTip If the roast is very large, cut it into two or three large chunks to ensure it fits comfortably and cooks more evenly.
The beef is positioned at the bottom, creating a solid base for the rest of the ingredients. Ensure the meat is not frozen, as this can affect the food safety and cooking time.
Seasoning and aromatics
- Add aromatics and seasoningScatter the sliced bell peppers and onions over the beef. Sprinkle the fajita seasoning evenly across the vegetables and meat, then pour the diced tomatoes over the top.Look for Vegetables and seasoning are addedTip Distribute the seasoning evenly to ensure every part of the roast gets flavor.
The peppers, onions, seasoning, and tomatoes are evenly layered on top of the beef. The slow cooker should be about two-thirds full, allowing enough room for the ingredients to cook properly.
Slow cooking and shredding
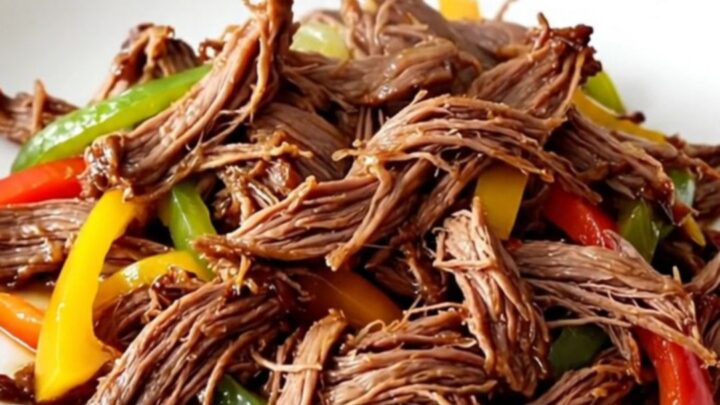
- Cook and shredCover and cook on low for 8 hours until the beef is fork-tender. Once cooked, check that the internal temperature reaches 145°F (63°C). Let the meat rest for at least 5 minutes before shredding with two forks directly in the slow cooker juices.Look for Beef shreds easily with a forkSafe temperature 145°F (63°C) internal temperature (steaks, chops and roasts)Tip Shredding while the meat is still hot and in the juices keeps it moist and flavorful.
The beef is cooked until it reaches 145°F (63°C) and shreds easily. The final texture should be tender and moist, with the vegetables softened but still holding their shape.
Common mistakes
A common mistake is overcrowding the slow cooker with too many vegetables, which can release too much liquid and dilute the flavor of the seasoning.
Another error is checking the meat too frequently; every time the lid is lifted, heat escapes and adds time to the cooking process.
Finally, failing to let the meat rest after cooking can result in a loss of juices, making the shredded beef feel slightly drier than intended.
How to tell it’s done
The beef is done when it is fork-tender and pulls apart easily with minimal resistance. Use an instant-read thermometer to ensure the thickest part of the meat has reached an internal temperature of at least 145°F (63°C).
Once it reaches this temperature, let the roast rest for at least 5 minutes before shredding it. This resting period allows the juices to redistribute, resulting in a more tender and juicy final dish.
- Steaks, chops and roasts: 145°F (63°C) in the thickest part, then a 3-minute rest
Up next · Part 3 of 3
2 variations · storage & make-ahead · 3 answers · printable card
Tips, FAQ & printable recipe (Part 3)← Back to the ingredients (Part 1)