Desserts · Part 2 of 3: Instructions
Easy Crockpot Butterscotch Apple Dump Cake Step-by-step instructions
- Prep
- Cook
- Total
- Serves
- 8
Before you start
Before you start, ensure your slow cooker is clean and dry. Gather all your ingredients and have a knife and cutting board ready for slicing the butter. Since this is a dump-and-go recipe, having everything prepared on your counter will make the assembly process take less than five minutes.
If you are using a slow cooker liner, place it in the insert now to save time on cleanup later. The most important step is simply ensuring you have enough space on your kitchen counter to assemble the layers easily.
Ingredients at a glance (4)
- 2 cans apple pie filling
- 1 cup butterscotch chips
- 1 box yellow cake mix
- 1/2 cup unsalted butter, sliced
Instructions
Layering the base
- Layering the basePour the apple pie filling into the bottom of the slow cooker, spreading it out into an even layer with a spoon to create a consistent base for the cake. Ensure the filling covers the bottom surface completely to prevent burning during the longer cooking time.Look for the apples are distributed evenly across the bottomTip Using a non-stick liner makes cleanup significantly easier.
The base layer should consist of the apple pie filling spread evenly across the bottom of the slow cooker insert. There should be no dry spots of the slow cooker base showing through the apples. This layer serves as the foundation for the entire dessert, so take a moment to ensure it is level before proceeding to add the subsequent dry components.
Adding components
- Adding componentsScatter the butterscotch chips over the apple layer. Next, pour the dry yellow cake mix over the chips, ensuring it is spread out to cover the apples entirely. Finally, arrange the thin slices of cold butter evenly across the top of the dry cake mix to ensure even melting.Look for the butter slices are evenly spaced on top of the dry mixTip Keep the butter slices thin so they melt evenly across the surface.
The butterscotch chips should be scattered uniformly over the apples, followed by a level layer of dry cake mix. The butter slices must be placed carefully on top, covering as much of the cake mix surface as possible. This arrangement is crucial for the final texture, as the butter will melt and integrate with the cake mix to form the crust.
Slow cooking
- Slow cookingCover the slow cooker with its lid and cook on high for three hours. The cake is ready when the edges are golden brown, the center is bubbling, and the fruit is tender and warm throughout. Allow the cake to rest for ten minutes before serving to let the sauce thicken slightly.Look for the edges are golden brown and the center is bubblingTip Avoid lifting the lid frequently to maintain the internal temperature.
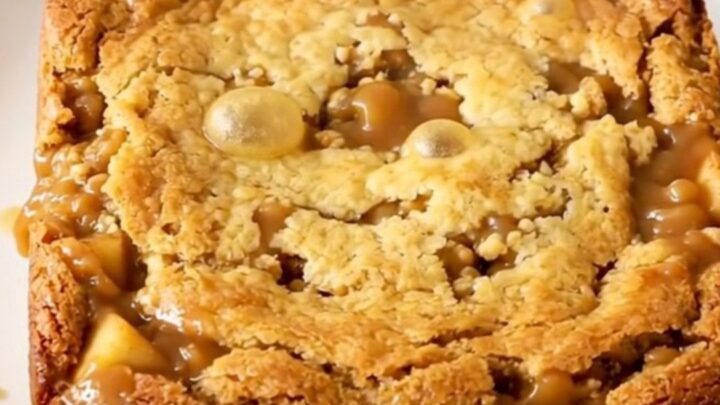
At the end of the cooking time, the entire surface should appear golden and the edges should be bubbling vigorously. The cake mix should no longer look powdery and should have absorbed the moisture from the fruit and melted butter.
If the center still appears very dry, allow it to cook for an additional fifteen minutes to ensure the topping is fully cooked.
Common mistakes
A common mistake is stirring the ingredients together. This recipe relies on the layers remaining distinct during the initial part of the cooking process to create the right texture.
Another error is using too much butter or placing it in large, thick chunks, which can lead to greasy spots rather than a uniformly golden crust. Always slice the butter thinly and distribute it evenly across the entire surface of the cake mix to ensure every part of the dessert cooks perfectly.
How to tell it’s done
The cake is perfectly done when the top has turned a beautiful golden brown and the fruit filling is bubbling around the edges. A toothpick inserted into the center of the cake portion should come out relatively clean, though it may have some moist crumbs due to the fruit base.
The aroma will be a clear indicator, as the warm smell of butterscotch and cinnamon will fill the kitchen when it is ready to be served.
Up next · Part 3 of 3
2 variations · storage & make-ahead · 3 answers · printable card
Tips, FAQ & printable recipe (Part 3)← Back to the ingredients (Part 1)