Dinner · Part 2 of 3: Instructions
Easy Crockpot Beijing Chicken for a Simple Weeknight Dinner Step-by-step instructions
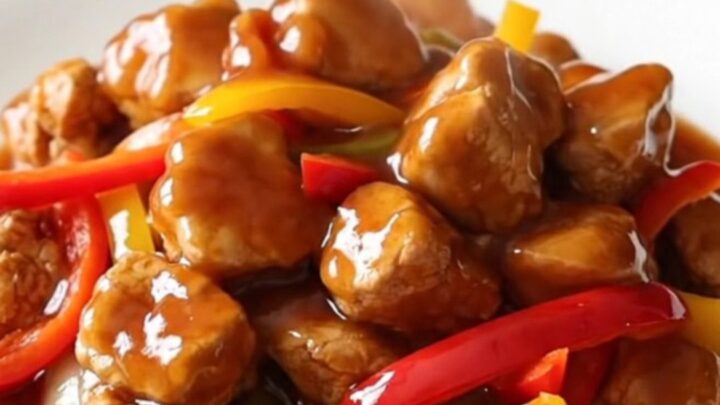
- Prep
- Cook
- Total
- Serves
- 4
Before you start
Before starting, ensure all vegetables are washed and sliced into even strips. Mince the garlic finely to ensure the flavor distributes throughout the sauce. Have all your ingredients measured and ready to go.
The slow cooker insert should be clean and dry. Make sure the chicken breast is trimmed of any excess fat and cut into uniform bite-size pieces to ensure even cooking throughout the process.
Ingredients at a glance (5)
- 1 1/2 lb boneless skinless chicken breast, cut into bite-size pieces
- 2 medium red bell peppers, cut into strips
- 1 medium yellow onion, sliced
- 3 cloves garlic, minced
- 1 cup sweet chili sauce
Instructions
Assembly and Preparation
- Assemble the ingredientsPlace the bite-size chicken breast pieces into the base of the slow cooker. Add the sliced red bell peppers, sliced yellow onion, and minced garlic over the chicken. Pour the sweet chili sauce evenly over the top of the mixture.Look for Ensure the chicken is in an even layer at the bottom of the insert.Tip Cut the chicken into uniform pieces to ensure they cook through at the same rate.
At this stage, the slow cooker should be filled with the chicken at the bottom, topped with the vibrant red bell peppers, onions, and garlic, and finished with the sweet chili sauce.
Ensure the ingredients are well-distributed so the flavors can meld correctly during the heating process. Everything should look clean, organized, and ready for the long, slow cook.
Slow Cooking
- Slow cook the chickenCover the slow cooker with the lid and cook on the low heat setting for approximately 4 hours, or until the chicken is fully cooked and tender.Look for The sauce should be bubbling gently and the chicken should appear opaque throughout.Tip Avoid lifting the lid during the cooking process to maintain the internal temperature.
During this phase, the aroma of the garlic and sweet chili sauce will begin to fill the kitchen. The chicken will transition from raw to cooked, and the vegetables will soften. Check that the slow cooker is set to the correct heat and that the lid is securely in place to trap the moisture and heat necessary for the process.
Finishing and Serving
- Check temperature and serveEnsure the chicken reaches an internal temperature of 165°F (74°C). Once cooked, let the dish rest for 5 minutes before serving to allow the sauce to thicken slightly.Look for The chicken should pull apart easily with a fork and the sauce should coat the pieces well.Safe temperature 165°F (74°C) internal temperature (poultry)Tip Test the thickest piece of chicken with a digital thermometer for accuracy.
The final stage involves verifying that the chicken has reached the safe temperature of 165°F (74°C). The sauce should be rich and bubbling, and the vegetables should be tender. After resting for 5 minutes, the dish is ready to be plated and served while hot, ensuring the best possible texture and flavor for the meal.
Common mistakes
A common mistake is overcrowding the slow cooker with too many ingredients, which can prevent the sauce from thickening properly and lead to uneven cooking.
Another error is cutting the chicken into uneven sizes, which results in some pieces becoming overcooked and dry while others remain undercooked. Avoid opening the lid frequently during the cooking cycle, as this releases heat and significantly increases the required cooking time.
How to tell it’s done
The chicken is considered done when it has reached an internal temperature of 165°F (74°C). The meat should be opaque throughout and pull apart easily when tested with a fork.
The sauce will have thickened slightly and appear glossy, coating the chicken and vegetables evenly. Always verify the temperature with a meat thermometer in the center of the largest piece to ensure safety.
- Poultry: 165°F (74°C) in the thickest part
Up next · Part 3 of 3
2 variations · storage & make-ahead · 3 answers · printable card
Tips, FAQ & printable recipe (Part 3)← Back to the ingredients (Part 1)