Desserts · Part 2 of 3: Instructions
Crockpot Banana Caramel Walnut Dump Cake Step-by-step instructions
- Prep
- Cook
- Total
- Serves
- 8
Before you start
Before starting, ensure you have a 6-quart Crockpot and all the ingredients ready. Butter the insert generously to prevent sticking. Slice the bananas into even coins, about 1/4-inch thick.
Measure out the dulce de leche, walnuts, and butter. Have the spice cake mix box open and ready. No need to preheat anything – the slow cooker does the work. This recipe is truly dump-and-go, so the prep is minimal.
Ingredients at a glance (7)
- 5 overripe bananas, sliced
- 3/4 cup dulce de leche caramel
- 1 box spice cake mix
- 1 cup walnut halves
- 14 tbsp cold butter, cut into pats
- vanilla ice cream, for serving
- extra dulce de leche caramel, warmed, for serving
Instructions
Layering the Ingredients
- Butter the Crockpot and Layer the BananasGenerously butter the bottom and sides of a 6-quart Crockpot insert. Slice the overripe bananas into 1/4-inch coins and arrange them in an even layer over the bottom of the Crockpot. Drizzle the dulce de leche caramel evenly over the banana slices, covering them as much as possible.Look for The bananas form a single layer, coated with caramel.Tip Use ripe bananas with brown spots for the sweetest flavor and softest texture.
- Sprinkle the Cake Mix and WalnutsEvenly sprinkle the entire box of spice cake mix over the caramel-covered bananas, making sure to cover the surface completely. Scatter the walnut halves over the cake mix in a single layer.Look for The dry cake mix and walnuts form a crumbly top layer.Tip Do not stir after adding the cake mix – the layers are what create the dump cake texture.
- Dot with ButterPlace the cold butter pats evenly over the top of the cake mix and walnuts, spacing them about 1 inch apart. Cover the Crockpot with its glass lid.Look for Butter pats are distributed across the surface.Tip Cold butter melts slowly, creating steam pockets that help the cake mix become tender.
At the end of this phase, you should have a neat layer of banana slices covered with caramel, then a layer of dry cake mix, then walnuts, and finally butter pats. The layers should be distinct, with the butter evenly distributed. The Crockpot is covered and ready to cook. The visual is a crumbly, buttery top that will transform during cooking.
Slow-Cooking and Caramelizing
- Slow-Cook on HighTurn the Crockpot to HIGH and cook for 2.5 hours without lifting the lid. The bananas will melt into a jam-like consistency, and the cake mix will absorb the moisture from the fruit and butter, forming a golden, toasted crust.Look for The top looks golden and slightly crispy, and the edges are bubbling with caramel.Tip Resist the urge to peek – opening the lid releases heat and extends the cooking time.
- Check for DonenessAfter 2.5 hours, carefully remove the lid. The cake should be set around the edges and slightly gooey in the center. Insert a toothpick into the center; it should come out with a few moist crumbs, not raw batter. If the center is still very wet, cook for an additional 15 minutes and check again.Look for The top is deep golden brown, and the banana caramel is bubbling around the edges.Tip The center may look softer than the edges – that's the desired gooey texture.
After 2.5 hours, the top should be golden brown and slightly crispy, with caramelized banana juices bubbling around the edges. The kitchen will smell of warm spices and caramel.
The center may look slightly soft, but it should not be runny. A toothpick inserted into the center should come out with moist crumbs, not wet batter. If it's too wet, cook for 15 more minutes.
Serving and Topping
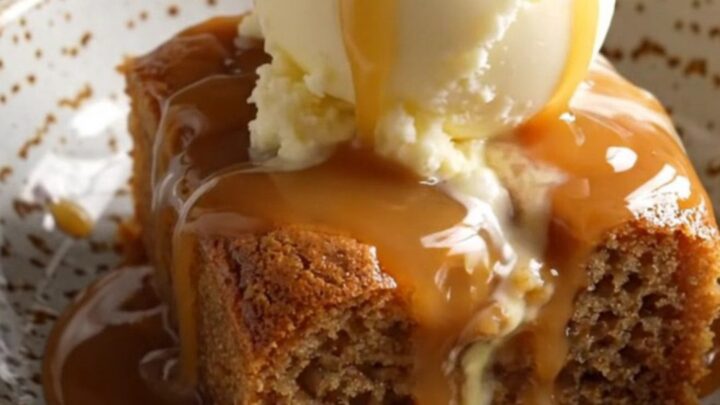
- Serve Warm with Ice CreamScoop the warm banana walnut cake into bowls while it's still hot from the Crockpot. Top each serving with a generous scoop of vanilla ice cream and drizzle with extra warmed dulce de leche caramel. Serve immediately.Look for The ice cream melts slightly over the warm cake, creating a creamy contrast.Tip For clean scoops, dip the ice cream scoop in hot water before each use.
The dump cake is ready to be scooped into bowls. It should be warm, with a gooey banana caramel layer underneath a tender cake crust. The vanilla ice cream melts slightly over the warm cake, creating a creamy sauce. Extra caramel drizzle adds a final touch of sweetness. The texture contrasts are perfect: crunchy top, soft cake, and jammy fruit.
Common mistakes
One common mistake is lifting the lid too often to peek, which releases heat and extends the cooking time. Another is using a slow cooker that's too large – if the layers are too shallow, the cake may cook too quickly and dry out.
Using overripe bananas is essential; underripe ones won't break down properly. Also, don't skip the butter – it's crucial for creating a moist, tender topping. Finally, resist the urge to stir the layers, as that will turn the cake into a mush.
How to tell it’s done
The dump cake is done when the top is golden brown and slightly crispy, and the edges are bubbling with caramelized banana juice. A toothpick inserted into the center should come out with a few moist crumbs but no raw batter.
The center may look slightly gooey, which is perfect. If the top is browning too quickly but the center is still wet, reduce the heat to low and cook for an additional 15 minutes. The internal temperature of the cake should reach at least 200°F (93°C) for a fully set crumb.
Up next · Part 3 of 3
4 variations · storage & make-ahead · 5 answers · printable card
Tips, FAQ & printable recipe (Part 3)← Back to the ingredients (Part 1)