Dinner · Part 2 of 3: Instructions
Easy Creamy White Chicken Enchiladas Step-by-step instructions
- Prep
- Cook
- Total
- Serves
- 8
Before you start
Gather all ingredients and measure them out before starting. Shred the cheese for the topping if you are using a block.
If your tortillas are cold, wrap them in a damp paper towel and microwave them for 20 seconds so they are soft, warm, and highly pliable. Lightly grease your light blue fluted baking dish and preheat your oven to 375°F (190°C).
Ingredients at a glance (4)
- 3 cups shredded cooked chicken (store-bought or made ahead)
- 8 flour tortillas
- 2 cups white cheese sauce (store-bought or made ahead)
- 2 cups shredded cheese
Instructions
Assembling the Chicken Tortillas
- Roll the Chicken TortillasLay out the flour tortillas on a clean work surface. Divide the shredded cooked chicken evenly among the tortillas, placing it down the center of each. Roll up each tortilla tightly around the chicken filling and place them seam-side down in a lightly greased light blue fluted baking dish.Look for The rolled tortillas should fit snugly in a single layer without unraveling.Tip Warming the tortillas in the microwave for 20 seconds makes them pliable and prevents tearing.
The shredded cooked chicken should be evenly divided and rolled tightly inside the flour tortillas.
The rolled tortillas must be placed snugly in a single layer at the bottom of the light blue fluted baking dish, with the seams facing down to prevent them from unrolling during the assembly and baking process.
Adding the Sauce and Cheese
- Pour the White Cheese SaucePour the rich white cheese sauce evenly over the rolled tortillas in the baking dish. Use a spatula or spoon to spread the sauce, ensuring that the tortillas are completely covered from end to end and that no dry edges are left exposed.Look for The tortillas should be fully submerged in a smooth, velvety layer of white sauce.Tip Ensure the edges of the tortillas are well-coated so they do not dry out during baking.
- Top with Shredded CheeseSprinkle the shredded cheese evenly over the top of the white cheese sauce. Distribute the cheese carefully to cover the entire surface, creating an even blanket that will melt beautifully in the oven.Look for The cheese should form a uniform layer over the sauce.Tip Using a blend of cheeses like Monterey Jack and Cheddar adds great flavor and color.
The rich white cheese sauce should completely cover the rolled tortillas, leaving no dry spots exposed. The shredded cheese topping should be distributed in an even, flat layer across the entire surface of the sauce, preparing it to melt into a beautiful, cohesive blanket.
Baking to Golden Perfection
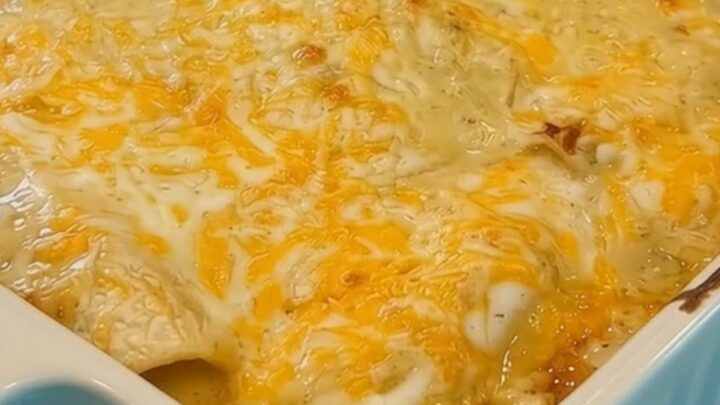
- Bake and RestBake in the preheated oven at 375°F (190°C) for 20 to 25 minutes. The cheese should be melted, browned, and bubbling around the edges. Remove from the oven and let the dish rest for 10 minutes before serving with a spatula.Look for The sauce should bubble vigorously and the cheese topping should be golden brown.Tip Letting the dish rest helps the sauce set, making it much easier to slice and serve.
The enchiladas are ready when the white cheese sauce is bubbling intensely around the fluted edges of the baking dish. The cheese topping should be fully melted, bubbly, and beautifully browned, with a light steam rising from the hot dish as it is removed from the oven.
Common mistakes
One common mistake is overfilling the tortillas with shredded chicken, which makes them difficult to roll tightly and causes them to burst open during baking.
Another error is failing to cover the ends of the rolled tortillas with the white cheese sauce, which can cause the exposed edges of the tortillas to become hard and dry in the oven.
How to tell it’s done
The finished casserole is perfectly done when the white cheese sauce is bubbling vigorously around the edges of the baking dish and the shredded cheese topping is completely melted and speckled with golden-brown spots.
Let the dish rest for 10 minutes after removing it from the oven so the sauce sets slightly, allowing you to lift clean, intact portions.
Up next · Part 3 of 3
2 variations · storage & make-ahead · 3 answers · printable card
Tips, FAQ & printable recipe (Part 3)← Back to the ingredients (Part 1)