Dinner · Part 1 of 3: Ingredients
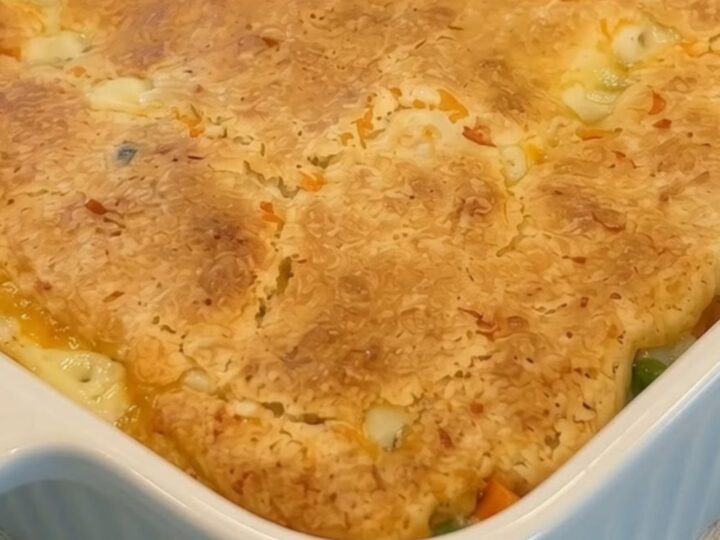
Easy Creamy Chicken Cobbler with Golden Biscuits
- Prep
- Cook
- Total
- Serves
- 6
Discover the ultimate comfort food with this simple chicken cobbler recipe. Combining savory, shredded chicken and crisp vegetables in a velvety cream sauce, this dish is crowned with a fluffy, golden biscuit crust that bakes perfectly in one pan. It is the ideal meal for chilly evenings when a warm, hearty dinner is needed to satisfy everyone at the table without spending hours in the kitchen.
This chicken cobbler transforms basic pantry and refrigerated staples into a sophisticated, comforting main course. By using pre-cooked chicken and store-bought biscuit dough, the preparation time is significantly reduced, making this recipe accessible for busy weeknights. The contrast between the crunchy, buttery biscuit top and the tender, creamy interior creates a satisfying texture profile.
This dish is designed to be served directly from the baking dish, providing a rustic and inviting presentation that highlights the golden-brown crust and the rich, bubbling sauce beneath. It is a reliable, crowd-pleasing dinner option that minimizes cleanup while maximizing flavor, ensuring that every portion is packed with hearty ingredients and comforting, savory notes.
Ingredients
Filling
- 2 lbs chicken breasts, cooked and shredded
- 1 cup frozen peas
- 1 cup carrots, diced
- 2 cups heavy cream
Topping
- 1 can refrigerated biscuit dough
Why this recipe works
The method of layering the creamy chicken base beneath the biscuit dough allows the biscuits to absorb the savory steam from the filling while baking. As the biscuits rise, they create a crisp, golden crust that contrasts beautifully with the tender, sauce-laden chicken and vegetables underneath.
This technique ensures the biscuits remain fluffy on the inside while becoming perfectly toasted on the surface, resulting in a cohesive dish where every component enhances the others.
Using a single baking dish for both the filling and the topping streamlines the cooking process and minimizes the amount of equipment needed. The heavy cream acts as a thickener that binds the chicken, peas, and carrots together, creating a luxurious consistency that mimics a classic pot pie without the need for a tedious pastry crust. The high-heat baking environment ensures the filling bubbles through the spaces between the biscuits, infusing them with savory flavor.
Notes and substitutions
For the best results, use high-quality heavy cream, as its fat content provides the necessary body for the sauce. While frozen peas and carrots are specified for their convenience and consistent texture, fresh vegetables can be used if they are parboiled beforehand to ensure they reach the correct tenderness during the baking process.
Ensure the chicken is shredded into uniform pieces so it integrates well with the creamy sauce and does not clump together in the baking dish.
The choice of baking vessel is important; a fluted ceramic or glass dish provides even heat distribution and an attractive presentation. If a standard metal pan is used, monitor the edges closely to prevent over-browning.
The refrigerated biscuit dough should be fresh to ensure the best rise. If the dough seems too soft, place it in the refrigerator for a few minutes before arranging it on the filling, which will help it hold its shape during the initial stage of baking.
- heavy cream: half-and-half for a slightly different sauce texture
- chicken breasts: rotisserie chicken for a faster preparation
Equipment
- 9x13-inch baking dish
- mixing bowl
- spatula
- chef knife
Up next · Part 2 of 3
3 steps · 45 min of cooking · what to look for at each stage
Step-by-step instructions (Part 2)