Dinner · Part 2 of 3: Instructions
Easy Cranberry Orange Chicken for a Festive Dinner Step-by-step instructions
- Prep
- Cook
- Total
- Serves
- 4
Before you start
Before beginning, ensure all ingredients are measured and ready to go. Wash the orange thoroughly and slice it into thin, uniform rounds to ensure even cooking.
Pat the chicken breasts dry with paper towels and season them lightly with salt and pepper if desired. Have your tongs and a serving plate within reach so you can move quickly once the searing begins, which helps keep the cooking process smooth and organized.
Ingredients at a glance (4)
- 4 chicken breasts, boneless and skinless
- 1 cup fresh cranberries
- 1 orange, sliced into thin rounds
- 1/2 cup cranberry orange sauce, store-bought or made ahead
Instructions
Searing the chicken
- Sear the chickenPlace the skillet over medium-high heat. Once hot, add the chicken breasts. Cook until golden brown on both sides, ensuring the surface is well-seared to lock in the juices.Look for The chicken should develop a deep golden crust on the exterior and move easily from the bottom of the pan.Tip Do not overcrowd the skillet, as this prevents proper browning and can lead to steaming rather than searing.
The chicken should be beautifully browned on both sides, creating a deep golden crust. The edges will feel firm to the touch, and the skillet should have a light layer of browned bits, known as fond, which will contribute significantly to the depth of the finished cranberry orange sauce.
Simmering with fruit
- Simmer with glazeReduce the heat to medium. Pour the cranberry orange sauce over the chicken. Add the fresh cranberries and orange slices into the skillet, tucking them around the chicken pieces.Look for The sauce should begin to bubble gently, coating the chicken and softening the cranberries slightly.Tip Spoon the sauce over the chicken breasts repeatedly to ensure the meat absorbs the flavor while it finishes cooking.
At the end of this phase, the cranberries will have softened and the orange slices will be infused with the sauce.
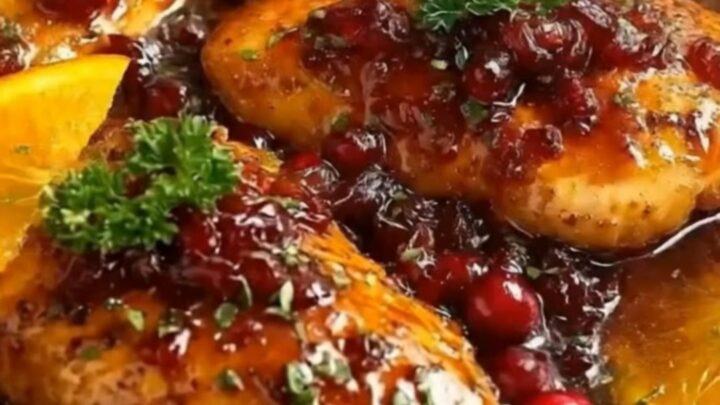
The liquid should be bubbling steadily, transforming from a thin consistency into a thicker, more vibrant glaze that coats the chicken pieces evenly without being overly runny.
Final resting and plating
- Finish and restContinue cooking until the internal temperature of the chicken reaches 165°F (74°C). Remove the skillet from the heat and transfer the chicken to a warm plate. Let the chicken rest for 5 minutes before serving to allow the juices to redistribute.Look for The sauce will thicken into a glossy, syrup-like consistency that clings to the back of a spoon.Safe temperature 165°F (74°C) internal temperature (poultry)Tip Use an instant-read thermometer inserted into the thickest part of the breast to confirm it is fully cooked.
The chicken is ready when it is tender and fully cooked through. The sauce should be syrupy and glossy. After the resting period, the meat will be moist and easy to slice, with the glaze clinging perfectly to every piece, ready to be served immediately on a warm ceramic plate.
Common mistakes
A common mistake is using a pan that is not hot enough, which leads to pale chicken that sticks to the surface instead of developing a nice sear. Another error is rushing the simmering process; allow the sauce enough time to reduce and thicken into a glossy glaze.
Finally, do not slice into the chicken too early, as this allows the juices to escape, resulting in dry meat instead of the succulent texture desired.
How to tell it’s done
The chicken is perfectly cooked when the exterior is golden brown and the internal temperature reaches 165°F (74°C). The meat should be opaque throughout with no signs of pink.
When pierced with a fork, the juices should run clear. Ensure you let the chicken rest for at least five minutes after removing it from the heat to maintain its moisture and tenderness before serving.
- Poultry: 165°F (74°C) in the thickest part
Up next · Part 3 of 3
2 variations · storage & make-ahead · 3 answers · printable card
Tips, FAQ & printable recipe (Part 3)← Back to the ingredients (Part 1)