Desserts · Part 2 of 3: Instructions
Easy Cookies and Cream Dump Cake Step-by-step instructions
- Prep
- Cook
- Total
- Serves
- 8
Before you start
Before beginning, ensure the oven is fully preheated to 350°F (175°C), as this is crucial for the cake to start baking immediately upon entry. Gather all four ingredients and ensure the butter is cold enough to slice easily but not frozen.
Prepare a clean, dry 9x13-inch baking dish on a stable workspace. Having all ingredients within reach makes the assembly process fast and seamless. Since the assembly is straightforward, having the oven ready is the most important step for a successful result.
Ingredients at a glance (4)
- 20 whole chocolate sandwich cookies
- 14 oz sweetened condensed milk
- 15 oz white cake mix
- 1/2 cup unsalted butter, thinly sliced
Instructions
Layering the cookies
- Layer the basePreheat the oven to 350°F (175°C). Arrange the chocolate sandwich cookies in a single layer to cover the bottom of the 9x13-inch baking dish.Look for The bottom of the pan is completely covered.Tip Ensure the cookies are snug to create a solid base layer.
The cookies should form a uniform, single layer across the entire bottom of the baking dish. They should be placed snugly against each other to provide a solid base for the liquids and dry mix that follow. Check that no large gaps remain at the bottom of the dish before adding the next ingredient.
Adding milk and mix
- Add liquids and dry mixPour the sweetened condensed milk evenly over the cookies. Sprinkle the dry white cake mix over the milk, covering the cookies entirely.Look for The cake mix forms an even layer over the milk.Tip Use a spoon to gently spread the cake mix if needed.
The sweetened condensed milk must be poured evenly to ensure every cookie is moistened. The dry cake mix should be spread to create a level, even layer that completely hides the cookies. If any clumps of cake mix appear, gently break them up with a spoon to ensure a smooth, uniform crust.
Baking to perfection
- Top with butter and bakeDot the surface with thin slices of butter. Place in the oven and bake for 35 minutes until the top is golden brown and the edges are bubbling.Look for The top is golden and the edges bubble.Tip Let the cake cool for 10 minutes before serving.
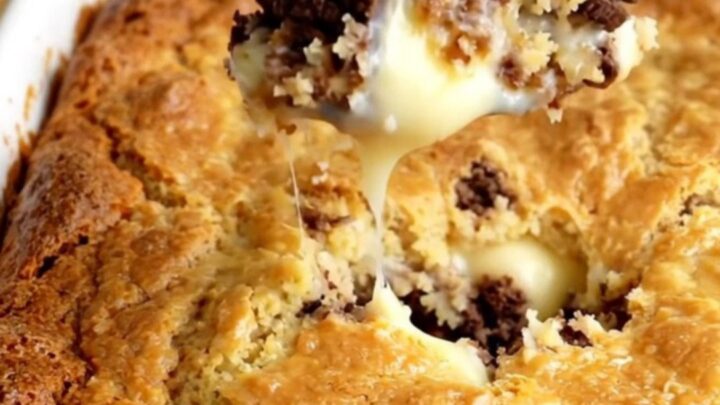
The surface should be beautifully golden brown, and the edges should be bubbling with a rich, caramelized appearance. The cake will smell sweet and buttery. Ensure the cake has cooled for at least 10 minutes, as this allows the hot, syrupy center to thicken slightly, making the cake easier to portion and serve.
Common mistakes
A common mistake is using butter that is too soft or melted, which can lead to uneven distribution and soggy patches of cake mix. Ensure the butter is cold and sliced thinly for the best results.
Another error is not covering the cookies completely with the cake mix; if the cookies are exposed, they may become too hard or burnt. Finally, avoid rushing the cooling period.
Letting the cake rest for at least 10 minutes is vital for the condensed milk to thicken and for the layers to stabilize before serving.
How to tell it’s done
The cookies and cream dump cake is done when the top has turned a deep golden brown and the edges of the dish show active, bubbling liquid. The crust should feel firm to the touch but yield slightly when pressed.
Because there are no raw proteins involved, the visual cues of a golden crust and bubbling edges are the primary indicators of doneness. Once these signs are achieved, remove the dish from the oven and allow it to rest, which helps the layers set and makes serving much easier.
Up next · Part 3 of 3
2 variations · storage & make-ahead · 3 answers · printable card
Tips, FAQ & printable recipe (Part 3)← Back to the ingredients (Part 1)