Dinner · Part 2 of 3: Instructions
Easy Coconut Lime Shrimp Curry for a Quick Dinner Step-by-step instructions
- Prep
- Cook
- Total
- Serves
- 4
Before you start
Before beginning, ensure all vegetables are washed and sliced into uniform pieces to ensure even cooking. If you are using frozen shrimp, make sure they are completely thawed and patted dry to avoid excess water in the slow cooker.
Have your measuring tools ready and confirm that your slow cooker is plugged in and set on a stable, heat-resistant countertop. Organizing your workspace will make the assembly process seamless and efficient.
Ingredients at a glance (5)
- 1 lb raw shrimp, peeled and deveined
- 1 cup sliced red peppers
- 1 cup sliced onions
- 2 tbsp yellow curry paste
- 1 can (13.5 oz) coconut milk
Instructions
Layering the ingredients
- Prepare the slow cooker basePlace the raw shrimp at the bottom of the slow cooker. Scatter the sliced red peppers and onions evenly over the top of the shrimp to ensure even steaming during the cooking process.Look for The shrimp are spread in a single layer at the base.Tip Ensure the shrimp are thawed completely if using frozen stock.
The base of the dish is set with the shrimp at the bottom, topped with a colorful arrangement of sliced peppers and onions. Everything is ready to receive the aromatic curry paste and creamy coconut milk.
Infusing the flavors
- Add aromatics and liquidAdd the yellow curry paste to the slow cooker, placing it directly over the vegetables. Pour the coconut milk over the entire mixture, ensuring all ingredients are well-coated and submerged.Look for The coconut milk covers the curry paste and vegetables completely.Tip Whisk the curry paste into the coconut milk slightly before pouring if desired for more even distribution.
The curry paste is incorporated and the coconut milk is added to create a uniform, flavorful liquid base. The ingredients are now submerged and ready to be sealed within the slow cooker for the cooking phase.
Final cooking stage
- Cook and serveCover the slow cooker and cook on low for 2 hours. Once the shrimp are opaque and reach an internal temperature of 145°F (63°C), the curry is ready to be served in bowls.Look for The shrimp are pink, opaque, and cooked through.Safe temperature 145°F (63°C) internal temperature (shellfish)Tip Do not overcook the shrimp, as they can become tough if left in the heat too long.
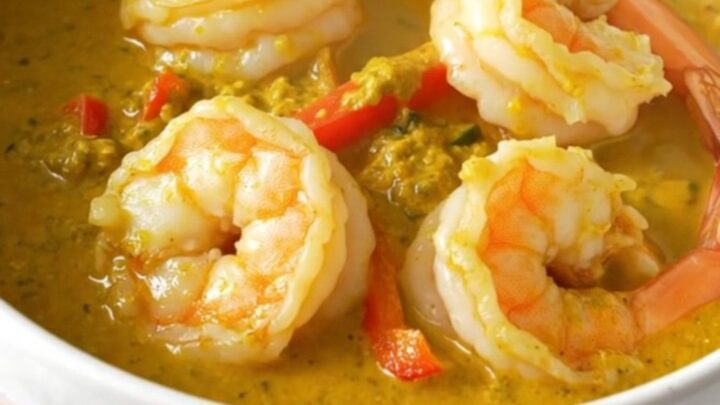
The curry has been slow-cooked until the shrimp are perfectly opaque and the sauce has reduced to a glossy, rich consistency. The dish is now ready to be portioned into bowls for serving.
Common mistakes
A common mistake is overcooking the shrimp, which leads to a rubbery texture. Keep a close eye on the cooking time, as shrimp cook much faster than other proteins.
Another error is failing to distribute the curry paste properly, which can leave pockets of intense spice in the dish.
Finally, ensure you use full-fat coconut milk, as it provides the necessary consistency to create a stable, creamy sauce base that coats the ingredients properly.
How to tell it’s done
The shrimp are done when they are completely opaque, firm to the touch, and have turned a bright pink color. The sauce should be thickened and fragrant, with the coconut milk and curry paste fully integrated.
Using a kitchen thermometer, ensure the shrimp reach an internal temperature of 145°F (63°C). If the shrimp are still translucent in the center, continue cooking for a few more minutes until they are fully opaque.
- Shellfish: 145°F (63°C) in the thickest part
Up next · Part 3 of 3
2 variations · storage & make-ahead · 3 answers · printable card
Tips, FAQ & printable recipe (Part 3)← Back to the ingredients (Part 1)