Desserts · Part 2 of 3: Instructions
Easy Cherry Pineapple Dump Cake Step-by-step instructions
- Prep
- Cook
- Total
- Serves
- 8
Before you start
Before starting, ensure your oven is preheated to 350°F (175°C) to ensure an even bake. Gather your baking dish and ensure your butter is cold, as it is much easier to slice into thin, uniform pieces when chilled.
Have all your cans opened and ready, and clear a workspace on your counter to assemble the layers quickly. This simple preparation ensures that the assembly process remains smooth and efficient, allowing you to get the dessert into the oven without delay.
Ingredients at a glance (4)
- 2 cans cherry pie filling
- 1 can crushed pineapple, drained
- 1 box yellow cake mix
- 1 cup unsalted butter, thinly sliced
Instructions
Layering the fruit
- Prepare the fillingPreheat your oven to 350°F (175°C). Pour the two cans of cherry pie filling into a 9x13 inch baking dish. Spread the drained crushed pineapple evenly over the cherry layer using a large spoon to ensure consistent flavor in every bite.Look for The dish is evenly coated with the fruit mixture.Tip Ensure the pineapple is well-drained to prevent the cake from becoming too soggy during the baking process.
The fruit should be spread in an even, uniform layer across the bottom of the baking dish. Ensure there are no large clumps of pineapple and that the cherry filling is distributed consistently. This foundation is crucial for the moisture levels of the final cake, so take a moment to smooth it out before moving on to the dry ingredients.
Adding the dry mix and butter
- Assemble the cakeSprinkle the dry yellow cake mix directly over the fruit layers. Use a spoon to gently distribute the mix so it covers the fruit completely. Arrange the thinly sliced cold butter evenly across the top of the cake mix, ensuring most of the surface is covered.Look for The cake mix is covered with a layer of butter slices.Tip Covering as much of the cake mix as possible with butter helps ensure all the dry mix becomes moist during baking.
The yellow cake mix should appear as a smooth, even layer over the fruit. The butter slices should be placed across the surface, covering as much of the dry mix as possible.
This arrangement ensures that as the butter melts, it covers the entire top surface, which is essential for developing the characteristic golden, buttery crust during the baking phase.
Baking to perfection
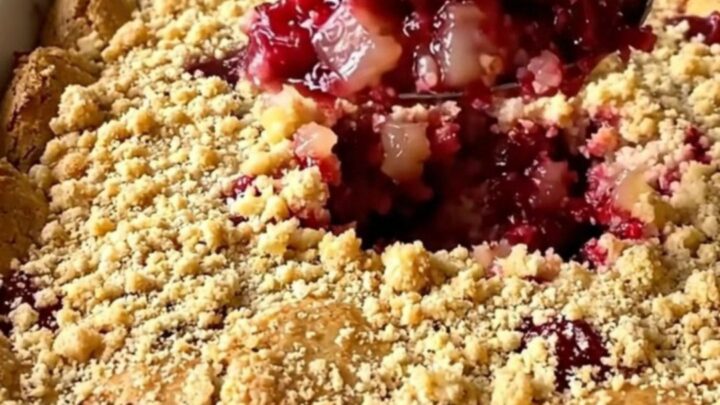
- Bake and servePlace the baking dish in the preheated oven and bake for 45 minutes, or until the top is golden brown and the fruit filling is bubbling around the edges. Remove from the oven and let it rest for 10 minutes before serving warm.Look for The top is golden brown and the fruit is bubbling.Tip Serving this warm with a scoop of vanilla ice cream makes for an excellent contrast in temperatures.
The dessert is ready when the edges are bubbling vigorously and the top has turned a beautiful, rich golden brown. The aroma of baked fruit and toasted cake should be prominent. If the center still looks dry or pale, give it a few extra minutes in the oven until you are confident the butter has fully penetrated the cake mix.
Common mistakes
A common mistake is failing to drain the crushed pineapple properly, which can lead to an overly liquid or soggy dessert. Another error is not covering enough of the cake mix with butter; if patches of dry mix remain, they will not cook into the golden crust you desire.
Additionally, avoid stirring the layers after assembly, as this disrupts the intended structure and prevents the distinct layers of fruit and cake from forming correctly during the bake.
How to tell it’s done
The dump cake is done when the top has achieved a deep golden brown color and the fruit filling is visibly bubbling, particularly around the edges of the baking dish.
The cake mix should be fully moistened by the fruit juices and melted butter, with no dry, powdery spots remaining on the surface. A light tap on the top should reveal a slightly crisp crust that gives way to the warm, soft fruit layer underneath.
Up next · Part 3 of 3
2 variations · storage & make-ahead · 3 answers · printable card
Tips, FAQ & printable recipe (Part 3)← Back to the ingredients (Part 1)