Desserts · Part 2 of 3: Instructions
Easy Cherry Cheesecake Dump Cake Step-by-step instructions
- Prep
- Cook
- Total
- Serves
- 8
Before you start
Before beginning, ensure your oven is fully preheated to 350°F (175°C) to ensure an even bake. Have your baking dish ready on a stable surface. Cut the cream cheese into small, uniform cubes to ensure even melting throughout the dish.
Slice the cold butter into thin, consistent pieces, as this will help it cover the cake mix layer effectively. Gather all ingredients so that the assembly process is seamless and efficient.
Ingredients at a glance (4)
- 2 cans (21 oz each) cherry pie filling
- 8 oz cream cheese, cut into small cubes
- 1 box (15.25 oz) yellow cake mix
- 1/2 cup unsalted butter, thinly sliced
Instructions
Layering the base
- Layer the fillingPreheat the oven to 350°F (175°C). Pour the cans of cherry pie filling into a 9x13 inch baking dish and spread it into an even layer. Evenly distribute the small cubes of cream cheese over the top of the cherry filling.Look for The cherry filling should cover the bottom of the pan completely, with cream cheese cubes spaced out evenly across the surface.Tip Ensure the cream cheese cubes are small and uniform to allow them to melt properly into the cherries during the baking process.
The baking dish should be prepared with an even layer of cherry filling, with cubes of cream cheese distributed uniformly. The cherries should be spread to the edges to ensure they do not dry out during the baking process, and the cream cheese should be visible on top, ready to be covered by the cake mix.
Adding the topping
- Add cake and butterSprinkle the dry yellow cake mix evenly over the cherry filling and cream cheese layer, ensuring no large clumps remain. Top the dry cake mix layer with the thin slices of butter, arranging them to cover as much of the surface as possible.Look for The surface should be covered with an even layer of dry cake mix, followed by the butter slices tiled across the top.Tip Using a fine-mesh sieve to sprinkle the cake mix helps create a more uniform powdery layer, preventing lumpy areas in the final cake.
The cake mix must be distributed evenly to cover the fruit and cheese, leaving no dry pockets or mounds. The butter slices should be placed strategically to cover as much of the surface as possible, ensuring that every part of the dry cake mix will be moistened by the melting fat while it bakes in the oven.
Baking to perfection
- Bake the cakePlace the baking dish into the preheated oven and bake for 45 minutes, or until the top is golden brown and the cherry filling is bubbling around the edges. Remove from the oven and let it rest for 10 minutes before serving warm.Look for The top should be crumbly and golden, and the fruit filling should be visible and bubbling at the sides of the pan.Tip Do not stir the ingredients before baking; the magic of a dump cake relies on the layers remaining undisturbed to create the crust.
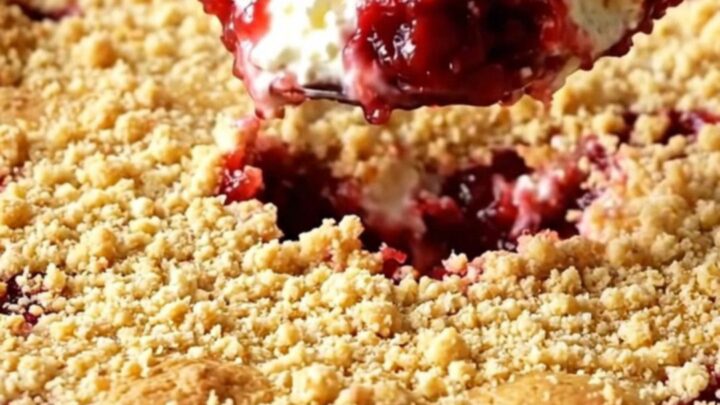
The finished cake should be bubbling enthusiastically at the edges, with the top layer transformed into a golden, crumbly crust.
The aroma of baked fruit and vanilla cake should be present in the kitchen. Let the cake rest for ten minutes to allow the filling to set slightly before serving to ensure the best texture.
Common mistakes
A common mistake is stirring the ingredients together; the layers must remain separate to achieve the correct texture. Another error is using butter that is too thick, which prevents it from melting and soaking into the cake mix uniformly.
Additionally, failing to preheat the oven properly can result in a gummy texture rather than a light, crumbly crust. Finally, ensure the pan is not overfilled, as the bubbling fruit can overflow in the oven if the dish is too small.
How to tell it’s done
The dump cake is done when the topping has achieved a deep golden-brown color and feels firm and crumbly to the touch. You should clearly see the cherry filling bubbling vigorously around the edges of the baking dish, indicating that the juices have reached the necessary temperature to thicken slightly.
The cream cheese pockets should be soft and integrated with the fruit, creating a cohesive, warm, and bubbling dessert that is ready to be served.
Up next · Part 3 of 3
2 variations · storage & make-ahead · 3 answers · printable card
Tips, FAQ & printable recipe (Part 3)← Back to the ingredients (Part 1)