Dinner · Part 2 of 3: Instructions
Easy Bisquick Impossible Pizza Pie with Seasoned Beef Step-by-step instructions
- Prep
- Cook
- Total
- Serves
- 6
Before you start
Before beginning, gather all the necessary kitchen tools and preheat the oven to four hundred degrees Fahrenheit. Lightly grease a nine-inch deep-dish pie plate or a suitable baking pan with non-stick cooking spray to prevent sticking.
Measure out the prepared Bisquick batter, shredded mozzarella cheese, and sliced pepperoni. Ensure the ground beef is nearby, and have the meat sauce ready for the skillet phase. Organizing these components beforehand guarantees a smooth and efficient cooking process.
Ingredients at a glance (5)
- 1 lb ground beef
- 1/2 cup meat sauce
- 1 1/2 cups Bisquick batter, made ahead
- 1 cup shredded mozzarella cheese
- 1/2 cup sliced pepperoni
Instructions
Searing the Seasoned Beef
- Brown and Season the BeefHeat a large skillet over medium-high heat. Add the ground beef and cook, breaking it apart with a wooden spoon, for about six to eight minutes. Cook until the meat is completely browned and no pink remains, ensuring it reaches an internal temperature of 160°F (71°C). Drain any excess grease from the skillet, then stir in the meat sauce until the beef is evenly coated.Look for The beef should be fully browned and fragrant.Safe temperature 160°F (71°C) internal temperature (ground meat)Tip Drain the grease thoroughly to prevent a soggy crust.
- Layer the Beef in the PanTransfer the seasoned ground beef mixture into a lightly greased nine-inch deep-dish pie plate. Use a spatula to spread the meat into an even, flat layer across the bottom of the dish, pressing down gently to compact it slightly so it forms a sturdy base for the batter.Look for An even layer covering the bottom of the dish.Tip Ensure the pie plate is greased well to prevent sticking.
At the end of this phase, the ground beef should be fully browned with no pink remaining, sizzling gently in the skillet. The savory aroma of rich meat sauce should fill the kitchen. The meat mixture will appear thick, glossy, and evenly coated in the sauce, ready to be transferred into the greased pie plate as a solid, flavorful base layer.
Pouring the Batter and Initial Bake
- Pour the BatterSlowly pour the prepared Bisquick batter evenly over the seasoned ground beef layer in the pie plate, allowing it to naturally seep down into the meat and cover it completely.Look for The batter should cover the meat completely.Tip Pour slowly to avoid disturbing the beef layer.
- Bake the BasePlace the pie plate in the preheated oven at 400°F (204°C). Bake for twenty to twenty-five minutes. The center of the pie must set completely and look firm. The edges should look firm and slightly golden.Look for The center should be set and firm when gently shaken.Tip Check the center with a toothpick to ensure it is set.
At the end of this phase, the center of the pie should be set and no longer jiggly when gently shaken. The edges of the crust will appear lightly golden and firm to the touch. The batter will have baked around and under the seasoned beef, creating a stable, fragrant foundation that is ready to support the heavy cheese and pepperoni toppings.
Melting the Cheese and Pepperoni Topping
- Top with Cheese and PepperoniCarefully remove the hot pie from the oven. Sprinkle the shredded mozzarella cheese evenly over the top of the baked base, covering it from edge to edge. Arrange the sliced pepperoni in a single layer over the melted cheese blanket.Look for The cheese should completely cover the baked surface.Tip Spread the cheese all the way to the edges for a crispy border.
- Final Bake and MeltReturn the pie to the oven and bake for an additional eight to ten minutes. Cook until the mozzarella cheese is completely melted, bubbly, and lightly browned in spots, and the pepperoni slices are hot and slightly curled at the edges. Remove from the oven and let rest for ten minutes before slicing.Look for Bubbly cheese and curled pepperoni edges.Tip Letting the pie rest makes slicing much easier.
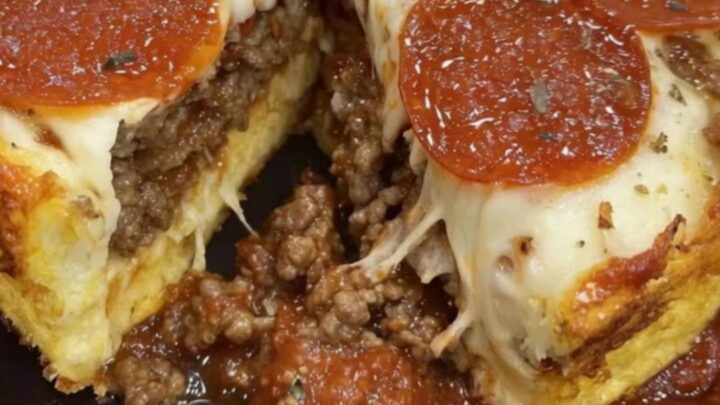
At the end of this final phase, the mozzarella cheese will be completely melted, bubbly, and dotted with golden-brown spots.
The pepperoni slices will have curled slightly at the edges, releasing a small amount of savory oil onto the cheese. The entire pie should look incredibly rich and deeply golden, smelling intensely of baked cheese and toasted spices.
Common mistakes
A common mistake is failing to drain the cooked ground beef thoroughly before adding the meat sauce. Excess grease will prevent the baking mix batter from setting properly, resulting in a soggy, oily crust.
Another error is adding the cheese and pepperoni too early in the baking process, which can cause the toppings to burn before the interior batter is fully cooked. Lastly, ensure the batter is poured evenly to avoid uneven baking.
How to tell it’s done
To ensure the impossible pizza pie is perfectly done, insert a toothpick or a knife into the center; it should come out clean without any wet batter. The top should be a deep golden brown, and the cheese should be completely melted and bubbling vigorously around the edges of the pan.
The ground beef must reach an internal temperature of one hundred sixty degrees Fahrenheit (seventy-one degrees Celsius) during the browning phase to ensure food safety. Let the pie rest before slicing to allow the layers to firm up.
- Ground meat: 160°F (71°C) in the thickest part
Up next · Part 3 of 3
2 variations · storage & make-ahead · 3 answers · printable card
Tips, FAQ & printable recipe (Part 3)← Back to the ingredients (Part 1)