Dinner · Part 2 of 3: Instructions
Easy Beef Enchilada Casserole with Gooey Cheese Step-by-step instructions
- Prep
- Cook
- Total
- Serves
- 6
Before you start
Before beginning, ensure all ingredients are measured and ready for assembly. Preheat your oven to 375°F (190°C) so it reaches the optimal temperature by the time the assembly is complete.
Have your 9x13 inch baking dish on a stable workspace, and ensure you have a spatula ready for browning the meat and serving. Clear enough space to organize your ingredients, as this makes the layering process significantly smoother and more efficient for the cook.
Ingredients at a glance (5)
- 1 lb ground beef
- 8 flour tortillas
- 15 oz enchilada sauce
- 1 cup shredded cheddar cheese
- 1 cup shredded monterey jack cheese
Instructions
Browning the beef
- Prepare the beef fillingHeat a large skillet over medium-high heat. Add the ground beef and cook, breaking it apart with a spatula, until it is browned and reaches an internal temperature of 160°F (71°C). Drain any excess fat from the pan before proceeding with the assembly.Look for The beef should be browned and no longer pink.Safe temperature 160°F (71°C) internal temperature (ground meat)Tip Ensure the beef is cooked thoroughly to provide the best texture for the casserole layers.
The beef should be completely browned with no pink remaining. It should smell savory and slightly caramelized from the pan heat. Ensure all excess fat is drained carefully to keep the final casserole from being oily, as this is vital for the correct texture of the sauce and tortilla layers.
Layering the ingredients
- Assemble the casseroleIn a 9x13 inch baking dish, spread a small amount of enchilada sauce on the bottom. Arrange a layer of tortillas, followed by a portion of the seasoned ground beef and more sauce. Repeat the layers until all ingredients are used, finishing with a final layer of sauce.Look for The dish should be filled with uniform layers of beef and tortilla.Tip Lightly overlapping the tortillas ensures a cohesive slice when serving later.
The layers should be uniform, with sauce spread evenly to coat the tortillas. Ensure each layer of beef is distributed consistently across the dish.
The final result before baking should look like a well-organized stack of ingredients, with the sauce visible around the edges of the tortillas to prevent drying.
Baking to perfection
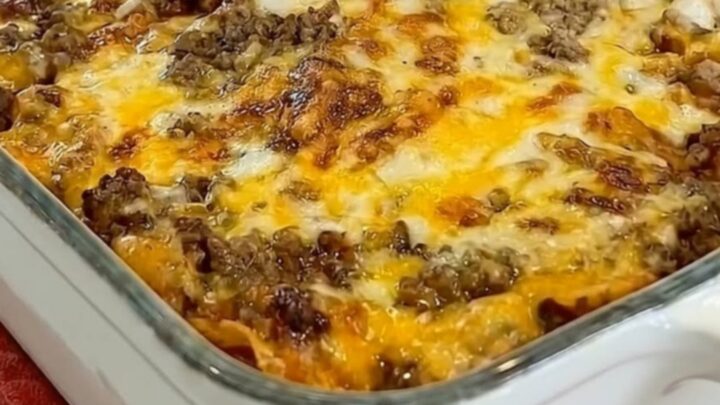
- Bake and serveSprinkle the shredded cheddar and monterey jack cheese generously over the top of the casserole. Bake in a preheated oven at 375°F (190°C) for 20 minutes or until the cheese is melted and bubbly. Let the dish rest for 5 minutes before slicing and serving.Look for The cheese should be melted, golden, and bubbling at the edges.Tip Resting the casserole is crucial for cleaner slices and better structural integrity.
The top layer of cheese must be fully melted, with bubbling sauce visible around the sides of the baking dish. The surface should be golden and fragrant. Check that the center is heated through before removing the dish from the oven to ensure a consistent temperature throughout the casserole.
Common mistakes
A common mistake is failing to drain the excess fat from the browned beef, which can result in a greasy casserole. Another error is rushing the assembly or baking without allowing the cheese to properly melt and brown, which misses out on the essential textures.
Additionally, skipping the resting period after removing the dish from the oven will make it difficult to serve neat portions, as the layers will not have had time to set.
How to tell it’s done
The casserole is finished when the cheese on top is fully melted, bubbling, and exhibits a light golden-brown hue in spots. The internal temperature of the beef should have reached 160°F (71°C) during the browning stage.
When you insert a spatula to serve, the layers should feel soft and cohesive, with the cheese pull indicating the sauce and cheese have integrated perfectly into the tortilla layers.
- Ground meat: 160°F (71°C) in the thickest part
Up next · Part 3 of 3
2 variations · storage & make-ahead · 3 answers · printable card
Tips, FAQ & printable recipe (Part 3)← Back to the ingredients (Part 1)