Dinner · Part 2 of 3: Instructions
Easy Baked Ham and Cheese Rolls for Dinner Step-by-step instructions
- Prep
- Cook
- Total
- Serves
- 6
Before you start
Before beginning the assembly, ensure the oven is fully preheated to the required temperature. Clear a clean workspace on the counter and gather all ingredients, including the refrigerated dough and chilled ham and cheese slices.
Have the baking dish ready nearby so that the rolls can be transferred immediately once assembled. If the dough is particularly sticky, lightly flour the surface to make rolling easier.
Properly organizing these components beforehand ensures a smooth, efficient process from start to finish.
Ingredients at a glance (3)
- 1 can refrigerated crescent roll dough
- 6 slices deli ham
- 6 slices cheddar cheese
Instructions
Assembly of the rolls
- Prepare the dough and fillingPreheat the oven to 375°F (190°C). Unroll the crescent roll dough and separate it into triangles. Place one slice of ham and one slice of cheese onto each triangle of dough. Carefully roll each triangle starting from the wide end toward the tip to enclose the ham and cheese filling securely.Look for The rolls should be tightly wrapped with the cheese and ham tucked inside the dough.Tip Ensure the cheese is fully covered by the dough to prevent excessive leaking while baking.
At the end of this phase, the rolls should be tightly wrapped and arranged in the baking dish. Each roll must be sealed securely to contain the ham and cheese inside. Ensure there is enough space between the rolls in the dish to allow for expansion while they bake in the oven.
Baking until golden
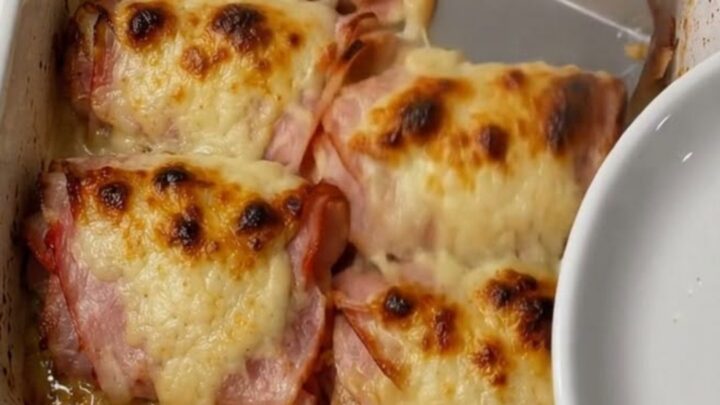
- Arrange and bakeArrange the prepared rolls in a baking dish, ensuring they are not touching too tightly. Place the dish in the preheated oven and bake for approximately 15 to 20 minutes. Watch for the dough to turn a deep golden-brown and the cheese to become bubbly and melted throughout the rolls.Look for The tops should be golden brown and the cheese clearly visible as melted and bubbling.Tip If the tops brown too quickly, lightly cover the dish with aluminum foil for the final few minutes.
The rolls are ready to be removed when the aroma of toasted pastry fills the kitchen and the tops are golden brown. The cheese should be bubbling and fully melted. Check that the bottom of the rolls are firm and not overly soft, indicating the pastry has cooked through completely.
Resting and serving
- Rest and serveRemove the baking dish from the oven and allow the rolls to rest for 5 minutes. This cooling period helps the cheese set slightly so it does not run out immediately when cut. Use a metal spatula to lift each roll onto a plate and serve warm.Look for The rolls should be firm enough to lift without falling apart.Tip Serve immediately while the cheese is still warm and stretchy for the best texture.
After resting for five minutes, the rolls should be easier to handle and the cheese should be slightly set. When lifted with a spatula, the rolls should hold their shape well. The final product should be warm, with a flaky exterior and a gooey, savory center ready for serving.
Common mistakes
A common error is overfilling the rolls, which can lead to excessive cheese leakage and difficulty in sealing the dough properly. Ensure that the ham and cheese are placed well within the boundaries of the dough triangles.
Another mistake is baking at too low a temperature, which prevents the pastry from becoming flaky and instead results in a dense, doughy texture. Always verify the oven temperature with an external thermometer to ensure accuracy during the baking process.
How to tell it’s done
The rolls are considered done when the pastry has achieved a deep, uniform golden-brown color across the top and sides. The cheese should be visibly melted, bubbling, and potentially leaking slightly from the seams of the dough.
The internal texture of the roll should be soft and cooked through, with no raw dough remaining in the center. Allow the rolls to cool for at least five minutes to ensure the structure holds together upon serving.
Up next · Part 3 of 3
2 variations · storage & make-ahead · 3 answers · printable card
Tips, FAQ & printable recipe (Part 3)← Back to the ingredients (Part 1)