Desserts · Part 2 of 3: Instructions
Easy 2-Ingredient Chocolate Mousse Step-by-step instructions
- Prep
- Cook
- Total
- Serves
- 2
Before you start
Before starting the preparation, ensure all equipment is clean and dry. Chop the chocolate finely to guarantee quick and even melting.
Measure out the heavy whipping cream, keeping the bulk of it in the refrigerator until the exact moment of whipping to ensure it remains as cold as possible. Select your serving glasses ahead of time so the mousse can be portioned immediately after mixing.
Ingredients at a glance (2)
- 4 oz semi-sweet chocolate, finely chopped
- 1 cup heavy whipping cream, divided
Instructions
Melting the Chocolate Base
- Melt the ChocolatePlace the finely chopped semi-sweet chocolate and two tablespoons of the heavy whipping cream in a microwave-safe bowl. Heat in fifteen-second intervals, stirring thoroughly between each burst, until the chocolate is completely melted and smooth. Set the bowl aside to cool slightly to room temperature before combining with the rest of the cream.Look for The chocolate should be completely liquid and smooth with no solid lumps remaining.Tip Avoid overheating the chocolate, as it can easily burn or seize.
At the end of this phase, the chocolate should be completely melted, glossy, and smooth. There should be no visible lumps or unmelted pieces.
The mixture must feel warm but not hot to the touch, allowing it to incorporate smoothly into the whipped cream without melting the delicate fat structure.
Whipping the Cream to Stiff Peaks
- Whip the CreamPour the remaining cold heavy whipping cream into a medium mixing bowl. Use an electric hand mixer on medium-high speed to whip the cream until stiff peaks form. Be careful not to over-whip the cream, as it can quickly turn grainy and separate into butter.Look for The cream should hold its shape firmly when the beaters are lifted.Tip Chilling the mixing bowl and beaters beforehand helps the cream whip faster.
The whipped cream should be thick, billowy, and hold sharp, stiff peaks when the beaters are lifted straight up. It should look smooth and matte, not dry or grainy. If it begins to look curdled, it has been over-whipped, so stop immediately once stiff peaks are achieved.
Folding and Chilling the Mousse
- Combine the IngredientsGently fold a third of the whipped cream into the cooled melted chocolate to lighten the mixture. Once incorporated, gently fold in the remaining whipped cream using a silicone spatula until a uniform, airy chocolate mousse forms with no white streaks remaining.Look for The mixture should be light, fluffy, and completely uniform in color.Tip Use a gentle folding motion to keep from deflating the whipped cream.
- Portion and ChillSpoon the chocolate mousse evenly into two serving glasses. Place the glasses in the refrigerator to chill for at least thirty minutes to allow the texture to set completely before serving cold.Look for The mousse should feel firm and set to the touch after chilling.Tip Cover the glasses with plastic wrap to prevent any refrigerator odors from absorbing.
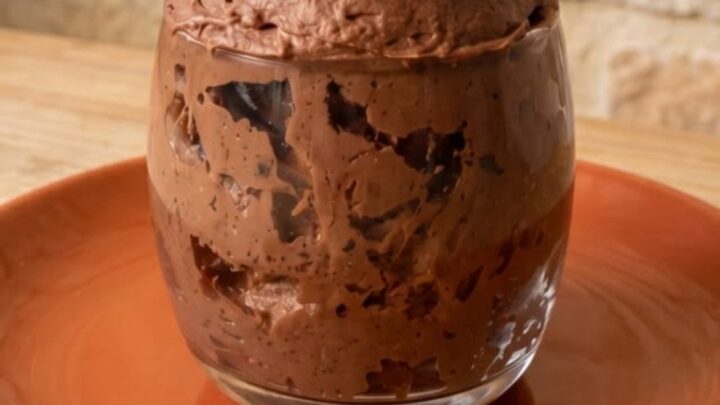
The final mousse should be completely uniform in color, with no white streaks of cream remaining. It should look incredibly airy, light, and hold its shape when spooned. After chilling, the mousse should be firm yet yield easily to a spoon, offering a velvety texture.
Common mistakes
The most common mistake is folding warm chocolate into cold whipped cream. If the chocolate is too hot, it will instantly melt the whipped cream, resulting in a flat, liquid mixture.
Conversely, if the chocolate is too cold, it will solidify into hard flecks upon contact with the cold cream, creating a gritty texture. Always ensure the melted chocolate has cooled to a comfortable room temperature before folding.
How to tell it’s done
The mousse is done when it has been chilled for at least thirty minutes and has set to a firm, scoopable consistency.
When a spoon is dipped into the dessert, it should glide through a thick, aerated structure that holds its shape on the spoon. Serve immediately once the desired texture is reached.
Up next · Part 3 of 3
2 variations · storage & make-ahead · 3 answers · printable card
Tips, FAQ & printable recipe (Part 3)← Back to the ingredients (Part 1)