Dinner · Part 2 of 3: Instructions
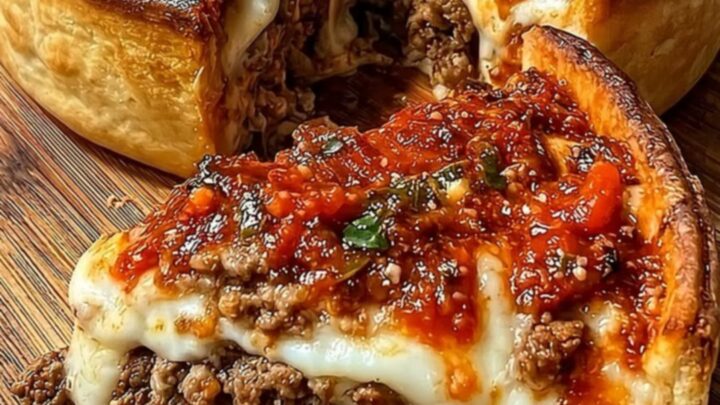
Deep-Dish Cheesy Meat Pie for a Hearty Dinner Step-by-step instructions
- Prep
- Cook
- Total
- Serves
- 8
Before you start
Before beginning, ensure all ingredients are at the correct temperature. Take the pie crust out of the refrigerator about 10 minutes before you plan to roll it out to prevent cracking.
Have your 9-inch deep-dish pie pan ready on a stable surface. Ensure the oven is fully preheated to 375°F (190°C) before the pie goes in, as a hot oven is necessary to get the crust crisp before the filling gets too hot.
Ingredients at a glance (5)
- 2 sheets pie crust, store-bought or made ahead
- 1.5 lb ground beef
- 2 cups shredded mozzarella cheese
- 1 cup marinara sauce
- 1 tbsp fresh herbs, chopped
Instructions
Browning the beef
- Prepare the meat fillingHeat a large skillet over medium-high heat. Add the ground beef and cook, breaking it apart with a spatula, until it is fully browned and no pink remains. The internal temperature must reach 160°F (71°C) to ensure it is safe to eat. Drain any excess grease from the pan.Look for The beef should be deeply browned and crumbled into small, uniform pieces.Safe temperature 160°F (71°C) internal temperature (ground meat)Tip Season the meat generously with salt and pepper while it browns to build a strong flavor base.
The ground beef should be cooked until it is no longer pink and has achieved a deep, caramelized brown color. The fat should be mostly rendered out, leaving the meat moist but not swimming in liquid, which ensures the pie crust stays crisp during the baking phase.
Assembling the layers
- Assemble the piePreheat your oven to 375°F (190°C). Line a 9-inch pie dish with one sheet of the pie crust. Layer the cooked ground beef evenly into the crust, followed by a thick, generous layer of the shredded mozzarella cheese. Cover the pie with the second sheet of crust, crimping the edges to seal it tightly. Cut a few small slits in the top to allow steam to escape during the baking process.Look for The cheese should be packed densely to ensure a consistent, stretchy pull throughout the filling.Tip Ensure the edges are well-sealed so the cheese does not leak out while the pie bakes.
The bottom crust should be pressed firmly into the corners of the pie dish. The beef should be spread in an even layer, and the cheese should be distributed uniformly to the edges.
Ensure the top crust covers the filling completely and the edges are crimped tightly to create a sealed unit.
Baking until golden
- Bake and finishPlace the pie in the preheated oven and bake for 30 to 35 minutes, or until the crust is golden brown and flaky. Remove the pie from the oven and let it rest for 10 minutes. Top the warm pie with the marinara sauce and fresh herbs before serving.Look for The crust should be deep golden brown and the filling should be bubbling slightly around the edges.Tip The resting period is essential to allow the cheese filling to set slightly, which makes serving much cleaner.
The pie should look puffed and golden brown on top. The edges of the crust should be firm to the touch. If the crust starts to brown too quickly, you can loosely cover the edges with a thin strip of foil to prevent burning while the center continues to cook.
Common mistakes
Avoid over-crowding the pie dish with too much sauce, as this can make the bottom crust soggy and prevent it from crisping properly. Another common mistake is failing to let the pie rest after baking.
Cutting into the pie immediately will cause the molten cheese to spill out, destroying the structure of the slice and making it difficult to serve.
How to tell it’s done
The pie is considered done when the crust is a deep, uniform golden brown color.
You can test the center by inserting a small knife; it should pass through the filling with slight resistance, indicating the cheese is fully melted and the beef is heated through. The internal temperature of the beef layer should be at least 160°F (71°C).
- Ground meat: 160°F (71°C) in the thickest part
Up next · Part 3 of 3
2 variations · storage & make-ahead · 3 answers · printable card
Tips, FAQ & printable recipe (Part 3)← Back to the ingredients (Part 1)