Desserts · Part 2 of 3: Instructions
Decadent Two-Layer Chocolate Cake with Cream and Ganache Step-by-step instructions
- Prep
- Cook
- Total
- Serves
- 8
Before you start
Prepare the workspace by ensuring the cake stand is stable and clean. Have all components ready at room temperature, except for the ganache, which should be warm but not hot. Place the cake layers on a flat surface to prepare for assembly.
Ensure the offset spatula is clean and that the dark chocolate sprinkles are easily accessible in a small bowl. Having these elements organized before starting prevents the need to scramble for items while the ganache is setting, allowing for a focused and efficient assembly process.
Ingredients at a glance (4)
- 2 pieces chocolate cake layers, store-bought or made ahead
- 1 cup fluffy white cream filling
- 1/2 cup warm chocolate ganache
- 2 tbsp dark chocolate sprinkles
Instructions
Layering and filling
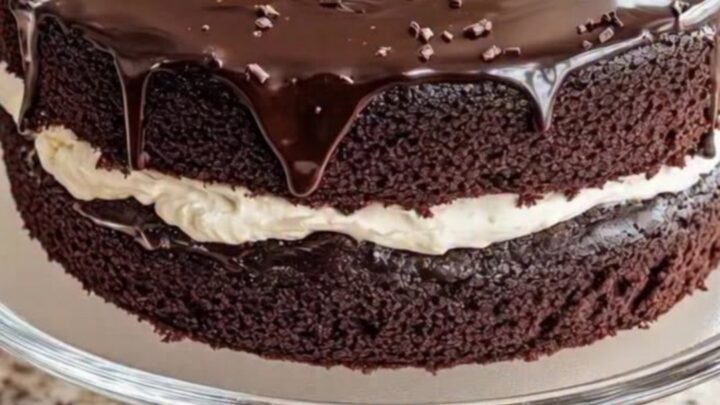
- Layering the cakePlace the first chocolate cake layer onto the cake stand. Using an offset spatula, spread an even, generous layer of the fluffy white cream filling over the surface of the cake, ensuring it reaches the edges for a clean look.Look for The cream should be spread smoothly and evenly across the cake layer.Tip Ensure the cake layer is completely cool before applying the cream to prevent melting.
The cream should be spread in a perfectly flat, even layer that reaches the very edge of the cake. The layer should look uniform, and the cake should be centered on the stand. Ensure the cream is not overflowing significantly, as this will affect the way the ganache drips later in the process. A clean edge is essential for a professional appearance.
Stacking and pouring
- Stacking and glazingCarefully place the second chocolate cake layer on top of the cream filling. Slowly pour the warm, glossy chocolate ganache over the center of the top layer, allowing it to naturally cascade down the sides of the cake for a beautiful finish.Look for The ganache should coat the top and drip down the sides of the cake.Tip Pour the ganache slowly to maintain control over the drips.
The second cake layer should be perfectly aligned with the first. When pouring the ganache, the flow should be steady and start from the center, moving outward.
The ganache should look smooth, glossy, and thick enough to coat the top without pooling excessively. If the drips are too fast, wait a few moments for the ganache to cool further before continuing.
Final decoration
- Finishing touchesWhile the ganache is still warm and tacky, scatter the dark chocolate sprinkles over the glazed surface of the cake. Allow the cake to rest for 15 minutes to let the ganache set slightly before serving.Look for The ganache should appear set and the sprinkles should adhere to the surface.Tip Use a gentle hand when scattering the sprinkles to ensure an even distribution.
The sprinkles should be scattered while the ganache is still tacky to ensure they stick. The final product should look cohesive, with the ganache covering the entire top and cascading down the sides. The cake should appear stable and ready for the final 15-minute rest period, during which it will firm up to the perfect serving consistency.
Common mistakes
A common mistake involves using ganache that is too hot, which will cause it to run off the cake entirely rather than creating the desired drips. Always test the consistency on a small plate first.
Another error is applying the cream filling while the cake layers are still warm, which will cause the cream to melt and the cake to lose its structural stability. Finally, do not rush the setting time, as cutting into the cake too early will result in messy layers and uneven slices.
How to tell it’s done
The cake is considered finished when the ganache has cooled to a semi-firm, glossy state and the sprinkles are securely set on the surface. The layers should feel stable to the touch, and there should be no visible movement of the cream filling when the cake is slightly tilted.
The ganache should have a rich, deep color and a smooth, reflective surface that indicates it has reached the ideal consistency for serving. No specific internal temperature is required as all components are ready for consumption.
Up next · Part 3 of 3
2 variations · storage & make-ahead · 3 answers · printable card
Tips, FAQ & printable recipe (Part 3)← Back to the ingredients (Part 1)