Desserts · Part 2 of 3: Instructions
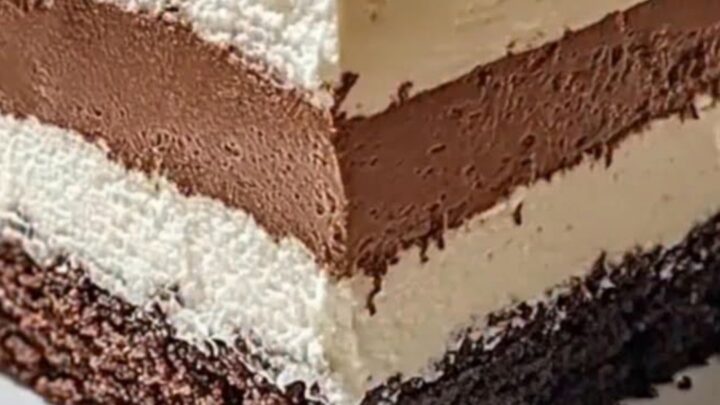
Decadent Three-Layer Chocolate Mousse Slab Cake Step-by-step instructions
- Prep
- Cook
- Total
- Serves
- 12
Before you start
Ensure the chocolate sponge is at room temperature and cut to fit the pan. Have the heavy cream well-chilled, as it whips more effectively when cold.
Melt the dark chocolate in advance and allow it to cool to room temperature; if it is too hot, it will melt the cream, and if it is too cold, it will seize into clumps.
Ingredients at a glance (5)
- 1 sheet chocolate sponge cake, store-bought or made ahead
- 2 cups heavy cream, chilled
- 8 oz dark chocolate, melted and cooled
- 1 cup whipped topping
- 2 tbsp dark chocolate shavings
Instructions
Foundation Preparation
- Prepare the BasePlace the chocolate sponge cake sheet into the bottom of a 9x13 inch baking pan. Ensure the surface is flat and even to provide a stable foundation for the subsequent layers of cream and mousse.Look for sponge is flush against the pan edgesTip Trim the sponge if necessary to fit the pan perfectly.
The sponge base must be perfectly flat and securely placed in the pan. Check for any gaps between the cake and the edges of the pan, filling them with small pieces of sponge if necessary to create a seamless surface for the cream.
Mousse Assembly
- Layer the MousseWhip the heavy cream until stiff peaks form. Gently fold in the melted and cooled dark chocolate until the mixture is uniform and airy. Spread this mousse mixture evenly over the sponge layer using an offset spatula.Look for mousse appears smooth and velvetySafe temperature 160°F (71°C) internal temperature (egg dishes)Tip Do not over-mix once the chocolate is added to maintain the airiness.
The mousse should be light, airy, and uniform in color. When you lift the whisk, the mixture should hold its shape without drooping. Ensure there are no streaks of unmixed cream, as this indicates the chocolate was not fully incorporated.
Final Chilling
- Top and ChillSpread the whipped topping over the mousse layer. Sprinkle the dark chocolate shavings over the top. Place the cake in the refrigerator for at least two hours before slicing into pristine squares with a clean, hot knife.Look for toppings are evenly distributed and setTip Run the knife under hot water and wipe dry between cuts for clean edges.
The surface should appear firm to the touch, and the chocolate shavings should be evenly distributed.
Before serving, the cake must feel cold, signaling that the fats in the chocolate and cream have solidified, providing the necessary structure for clean slices.
Common mistakes
Avoid adding warm chocolate to the whipped cream, as this will result in a runny mixture that fails to set.
Another common mistake is failing to chill the cake long enough; rushing this step will make the slices impossible to serve cleanly. Finally, ensure the whipped topping is spread gently to avoid disturbing the mousse layer beneath.
How to tell it’s done
The mousse is done when it holds stiff peaks and is spreadable.
The final cake is ready when it has chilled for at least two hours, allowing the mousse to set sufficiently so that a knife can pass through cleanly without sticking or dragging, ensuring perfect layers.
- Egg dishes: 160°F (71°C) in the thickest part
Up next · Part 3 of 3
2 variations · storage & make-ahead · 3 answers · printable card
Tips, FAQ & printable recipe (Part 3)← Back to the ingredients (Part 1)