Desserts · Part 2 of 3: Instructions
Decadent Peanut Butter Cup Dump Cake Step-by-step instructions
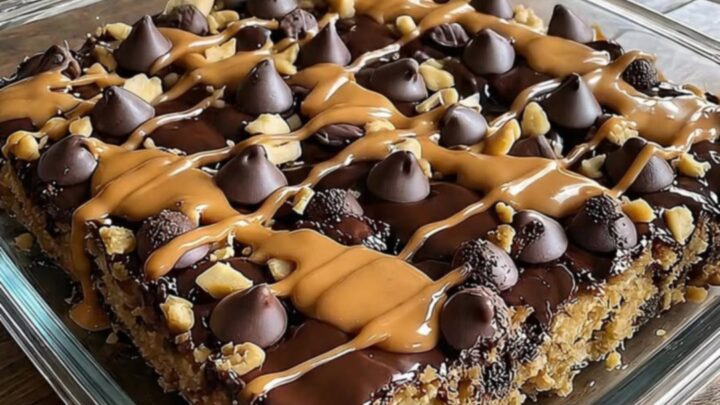
- Prep
- Cook
- Total
- Serves
- 9
Before you start
Before beginning, ensure all ingredients are at room temperature to allow for even melting. Chop the peanut butter cups into uniform pieces so they melt consistently.
Preheat the oven fully to 350°F (175°C) and prepare your baking dish with a thin layer of butter or non-stick spray to prevent the edges from burning during the long bake time.
Ingredients at a glance (4)
- 1 box chocolate cake mix
- 12 standard size peanut butter cups, chopped
- 3/4 cup unsalted butter, melted
- 1 cup semi-sweet chocolate chips
Instructions
Base Preparation
- Prepare the basePreheat your oven to 350°F (175°C). Lightly grease a 9x9 inch square baking dish. Pour the dry chocolate cake mix evenly into the bottom of the prepared dish, smoothing it out with a spatula to create an even layer.Look for The cake mix should form a flat, even layer across the entire bottom of the baking dish.Tip Ensure the corners are covered to prevent any sticking during the baking process.
The dry cake mix should be spread evenly across the bottom of the dish. There should be no large clumps of mix remaining, and the layer should be perfectly level to ensure uniform baking across the entire surface of the dish before adding the toppings.
Layering Process
- Layer the fillingsScatter the chopped peanut butter cups uniformly over the dry cake mix. Next, sprinkle the semi-sweet chocolate chips over the top. Slowly and evenly drizzle the melted butter over the entire surface, ensuring the dry mix is well saturated.Look for The melted butter should moisten the cake mix and chocolate chips, creating a rich base for the bake.Tip Do not stir the ingredients; the layering is essential for the characteristic texture of a dump cake.
The peanut butter cups and chocolate chips should be distributed in a single, even layer.
When the melted butter is poured over, it should cover as much of the dry mix as possible, creating a dark, saturated appearance that signals the ingredients are ready for the oven.
Baking Finish
- Bake and servePlace the dish in the preheated oven and bake for 40 to 45 minutes, or until the edges are bubbling and the center is set. Remove from the oven and allow it to rest for at least 10 minutes before serving warm.Look for The edges should look bubbling and glossy, while the center will be firm but moist.Tip Serving while warm ensures the peanut butter and chocolate remain molten and gooey.
At the end of the baking cycle, the edges of the cake will be dark and bubbly. The entire surface should look integrated, with the chocolate and peanut butter having melded into the cake mix. The kitchen will be filled with a rich, warm aroma of baked chocolate.
Common mistakes
A common mistake is stirring the ingredients after adding the butter. This will ruin the layered effect and create a standard cake batter rather than the distinct textures of a dump cake.
Another error is using cold butter; it must be completely liquid to ensure that all parts of the dry cake mix become hydrated, otherwise, you will have pockets of dry, powdery mix throughout the finished dessert.
How to tell it’s done
The dump cake is done when the edges appear deeply golden and are actively bubbling. The center should be set but still appear slightly glossy and moist.
If you insert a toothpick into the center, it should come out with a few moist crumbs, but not raw batter. Allow the cake to rest for at least 10 minutes to let the filling solidify slightly before you attempt to serve it.
Up next · Part 3 of 3
2 variations · storage & make-ahead · 3 answers · printable card
Tips, FAQ & printable recipe (Part 3)← Back to the ingredients (Part 1)