Desserts · Part 2 of 3: Instructions
Nutella Ferrero Rocher Cheesecake: Decadent No-Bake-Style Treat Step-by-step instructions
- Prep
- Cook
- Total
- Serves
- 12
Before you start
Before starting, make sure the cream cheese and eggs are at room temperature. This ensures a smooth, lump-free filling. If using a homemade crust, prepare it in advance and press it into a 9-inch springform pan.
Preheat the oven to 325°F (165°C). Have all ingredients measured and ready. The cheesecake needs to chill for at least 4 hours after baking, so plan accordingly. For best results, prepare it a day ahead to allow it to set fully.
Ingredients at a glance (10)
- 600 g cream cheese, softened
- 1 jar (400 g) Nutella
- 100 g powdered sugar
- 3 large eggs
- 150 ml sour cream
- 1 prepared hazelnut wafer crust (store-bought or made ahead)
- 6 Ferrero Rocher truffles, halved
- 1/2 cup toasted Piedmont hazelnuts, roughly chopped
- 1/2 cup Nutella
- 1/4 cup heavy cream
Instructions
Mixing the Filling
- Prepare the Crust and FillingIf using a store-bought crust, ensure it is ready in a 9-inch springform pan. For a homemade crust, press the prepared hazelnut wafer mixture into the bottom of the pan. In a large mixing bowl, beat the softened cream cheese with an electric mixer until smooth and creamy. Add the Nutella and powdered sugar, beating until well combined. Mix in the eggs one at a time, beating well after each addition. Finally, blend in the sour cream until the mixture is velvety and smooth.Look for The filling should be completely smooth with no lumps. The mixture will be thick but pourable.Tip Make sure the cream cheese is fully softened to avoid lumps. Beat on medium speed for a silky texture.
- Pour Over CrustPour the cheesecake filling over the prepared hazelnut wafer crust in the springform pan. Use a spatula to spread it evenly, smoothing the top. Tap the pan gently on the counter to release any air bubbles.Look for The filling should cover the crust completely and have a level surface.Tip Tap the pan just a few times; over-tapping can cause cracks.
At the end of this phase, the filling should be smooth and velvety, with no lumps of cream cheese. The mixture will be thick and glossy. It should easily pour over the crust.
The crust should be evenly distributed in the pan, with no gaps. The filling should cover the crust completely and be level on top. Tap the pan gently to release air bubbles, but avoid overdoing it.
Baking and Chilling
- Bake the CheesecakePreheat the oven to 325°F (165°C). Place the springform pan on a baking sheet to catch any drips. Bake the cheesecake for 50 minutes, or until the edges are set and the center is slightly moist but not jiggly. The cheesecake will continue to set as it cools.Look for The edges will look firm, and the center will have a slight wobble. A toothpick inserted near the center should come out with moist crumbs, not wet batter.Safe temperature 160°F (71°C) internal temperature (egg dishes)Tip Avoid opening the oven door during baking to prevent cracking. Use a water bath if desired for extra moisture, but it's not necessary.
- Cool and ChillRemove the cheesecake from the oven and let it cool on a wire rack for 1 hour. Then, refrigerate for at least 4 hours, or overnight, until fully chilled and set. This step is crucial for clean slicing.Look for The cheesecake should be firm to the touch and completely cool before removing from the pan.Tip Chilling overnight yields the best texture and flavor. Cover the pan with plastic wrap to prevent absorbing fridge odors.
After baking, the cheesecake will look puffed around the edges and the center will be slightly wobbly. It will firm up as it cools. The kitchen will smell of toasted hazelnuts and chocolate. Once fully chilled, the cheesecake should be firm and hold its shape. The top should be smooth and free of cracks. If cracks do appear, they can be covered with ganache.
Finishing Touches
- Make the GanacheIn a small saucepan, heat the heavy cream over medium heat until it just begins to simmer. Remove from heat and pour over the Nutella in a bowl. Whisk until smooth and glossy. Allow the ganache to cool slightly until it thickens to a pourable consistency.Look for The ganache should be smooth, shiny, and slightly thickened but still pourable.Tip If the ganache is too thin, let it cool a few more minutes. If it thickens too much, gently reheat with a splash of cream.
- Assemble and ServeOnce the cheesecake is fully chilled, remove it from the springform pan. Pour the warm ganache over the top, spreading it to the edges. Immediately garnish with halved Ferrero Rocher truffles and toasted chopped hazelnuts. Slice with a warm knife for clean cuts.Look for The ganache should flow gently over the top, and the truffles and nuts should stick to it as it sets.Tip Dip a sharp knife in hot water and wipe dry before each slice for perfect pieces.
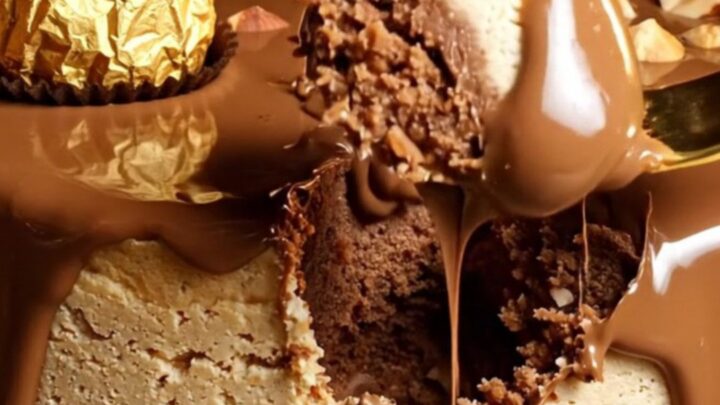
The ganache should be pourable but not too thin. When poured over the cheesecake, it should flow to the edges and create a smooth, glossy layer. The truffles and hazelnuts should be arranged evenly on top. The final cheesecake should look elegant and inviting, with a beautiful contrast of dark chocolate, gold wrappers, and crunchy nuts.
Common mistakes
One common mistake is overmixing the filling, which incorporates too much air and can cause cracks. Mix just until combined. Another issue is opening the oven door during baking, which can cause the cheesecake to collapse.
Also, skipping the chilling step can result in a soft, messy cheesecake that doesn't slice well. Be patient and let it chill overnight for the best texture.
How to tell it’s done
The cheesecake is done when the edges are set and the center is slightly moist but not jiggly. A toothpick inserted near the center should come out with a few moist crumbs, not wet batter.
The internal temperature should reach 160°F (71°C) for the eggs to be safe. Let the cheesecake cool completely on a wire rack, then refrigerate until fully chilled. This ensures clean slices and a firm texture.
- Egg dishes: 160°F (71°C) in the thickest part
Up next · Part 3 of 3
4 variations · storage & make-ahead · 5 answers · printable card
Tips, FAQ & printable recipe (Part 3)← Back to the ingredients (Part 1)