Desserts · Part 2 of 3: Instructions
Decadent Layered Chocolate Pudding Dessert Step-by-step instructions
- Prep
- Cook
- Total
- Serves
- 6
Before you start
Ensure all ingredients are prepared and measured before assembly begins. Have the chocolate pudding chilled, the whipped cream freshly whipped or bought, and the chocolate ganache at a pourable room temperature.
The chocolate cookie crumble should be prepared by crushing the cookies into small, uniform pieces. Clear enough space in the refrigerator for the finished dish to set, as chilling is a vital step for achieving the perfect consistency required for clean, beautiful scoops of the finished dessert.
Ingredients at a glance (5)
- 2 cups chocolate pudding, prepared
- 1 cup chocolate cookie crumble
- 1 cup whipped cream
- 1/2 cup chocolate ganache
- 1/4 cup chocolate chunks
Instructions
Base assembly
- Layering the baseSpread a generous layer of chocolate pudding into the bottom of the square glass dish. Smooth the surface with a spatula to create an even foundation for the subsequent layers.Look for The pudding should form an even, smooth layer across the bottom of the dish.Tip Use a chilled dish to help the pudding set slightly faster during the assembly process.
The pudding should be spread evenly across the bottom of the dish, creating a level surface. Check that there are no gaps near the corners of the dish to ensure a uniform appearance when the dessert is sliced and served.
The texture should look smooth and consistent, providing a solid foundation for the subsequent layers.
Adding texture and cream
- Adding texture and creamSprinkle the chocolate cookie crumble over the pudding layer. Follow this with a layer of fluffy whipped cream, spreading it carefully to ensure the layers remain distinct and visually appealing.Look for The cream should be spread gently so it does not mix into the chocolate crumble layer.Tip If the cream is too soft, refrigerate it for a few minutes before spreading to make it easier to handle.
The chocolate crumble should be evenly distributed, and the whipped cream should be spread gently on top. Check that the cream layer is uniform in thickness and does not disturb the crumble layer underneath. The appearance should be a clean, white layer resting perfectly on the dark base.
Final glaze and finish
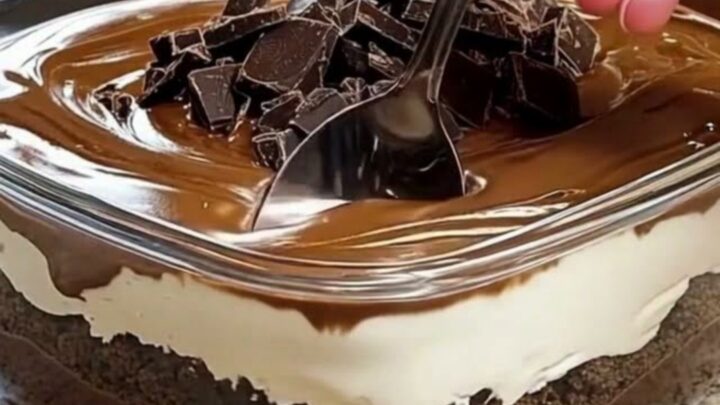
- Final glaze and finishPour the glossy chocolate ganache over the whipped cream layer, tilting the dish slightly if necessary to cover the surface. Finish by scattering the chocolate chunks across the top for extra texture and flavor.Look for The ganache should be glossy and smooth, covering the entire surface of the cream layer.Tip Wait for the ganache to reach room temperature before pouring so it does not melt the whipped cream layer.
The ganache should create a smooth, mirror-like finish on top of the cream. Check for any bubbles or uneven spots and smooth them out with the back of a spoon if necessary. The chocolate chunks should be scattered evenly to provide a final touch of texture and visual interest.
Common mistakes
A common mistake is using whipped cream that is too soft or warm, which leads to the layers bleeding into one another during assembly. Always ensure the cream is cold and properly whipped to a stiff peak.
Another error is pouring the ganache while it is too hot, which will melt the cream and ruin the visual separation of the layers. Finally, failing to chill the dessert sufficiently will make it difficult to scoop clean, distinct portions for serving.
How to tell it’s done
The dessert is considered done when the layers are firmly set and the ganache has slightly thickened. While there is no cooking involved in the assembly, proper chilling is the key to achieving the desired texture.
The dessert should be refrigerated for at least one hour before serving. When the spoon cuts through, it should encounter a slight resistance from the set layers, indicating that the dessert has reached the perfect temperature and consistency for serving.
Up next · Part 3 of 3
2 variations · storage & make-ahead · 3 answers · printable card
Tips, FAQ & printable recipe (Part 3)← Back to the ingredients (Part 1)