Desserts · Part 2 of 3: Instructions
Decadent Layered Chocolate Pavê with Rich Ganache Step-by-step instructions
- Prep
- Cook
- Total
- Serves
- 8
Before you start
Before beginning, ensure all ingredients are measured and ready. If making the custard or ganache from scratch, complete these components in advance and allow them to reach the appropriate temperatures.
Prepare a clean workspace and ensure your glass baking dish is dry. Having your tools, such as the offset spatula and shallow bowl for milk, within reach will make the assembly process efficient and stress-free, ensuring the layers are perfectly uniform.
Ingredients at a glance (5)
- 1 package tea biscuits
- 1 cup whole milk
- 2 cups chocolate custard, store-bought or made ahead
- 1 cup chocolate ganache, warm
- optional chocolate shavings for garnish
Instructions
Base assembly
- Prepare the base layersPour the milk into a shallow bowl. Quickly dip each tea biscuit into the milk, ensuring it is moistened but not soggy. Arrange a single layer of the soaked biscuits at the bottom of the glass baking dish, breaking them if necessary to cover the entire surface evenly.Look for The biscuits should be slightly softened but still holding their shape.Tip Do not soak the biscuits too long, or they will fall apart when assembling.
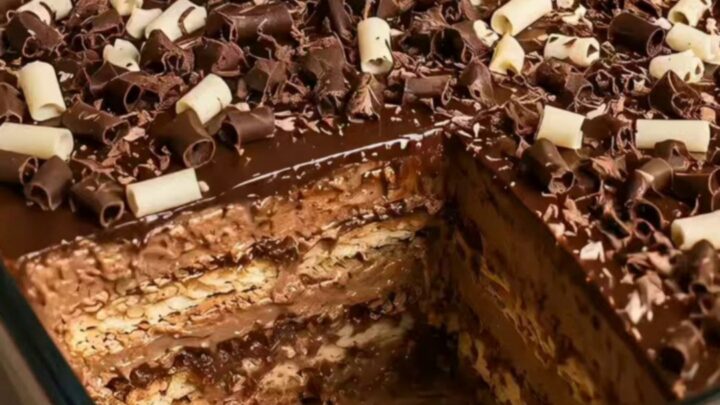
The biscuits should be arranged in a tight, uniform layer covering the bottom of the dish. Each biscuit must be adequately moistened to ensure a cohesive base that acts as the foundation for the heavier custard layers above, preventing the dessert from collapsing when cut.
Layering the custard
- Layer the custardSpread a generous, even layer of the chocolate custard over the biscuit base using a spatula. Ensure the custard reaches the corners of the dish. Repeat the process with alternating layers of soaked biscuits and chocolate custard until the dish is filled, finishing with a final layer of custard on top.Look for The surface should be smooth and even across the top of the dish.Safe temperature 160°F (71°C) internal temperature (egg dishes)Tip Use an offset spatula to achieve a perfectly flat and professional finish for the layers.
The layers should be distinct and level, with each custard addition being spread evenly to the edges.
The visual contrast between the biscuit lines and the dark custard indicates a successful assembly that will provide the characteristic look and texture of a traditional pavê.
Finishing with ganache
- Add ganache and garnishPour the warm, glossy chocolate ganache over the top layer of the custard. Use the back of a spoon to spread it gently to the edges. Sprinkle with chocolate shavings for an elegant finish. Refrigerate the dish for at least two hours before slicing to allow the layers to set properly.Look for The ganache should be smooth and mirror-like across the entire surface.Tip Warm the ganache slightly to ensure it pours smoothly and creates a perfect glossy layer.
The top layer of ganache should be perfectly smooth, glossy, and free of bubbles. After chilling, the entire dessert should look firm and solid, with clean, sharp lines visible through the side of the glass dish, signaling that it is ready for slicing and serving.
Common mistakes
A common mistake is over-soaking the biscuits, which can lead to a mushy texture. Dip them quickly for just a second to maintain their structural integrity.
Another error is failing to allow enough refrigeration time; rushing this step will result in layers that slide when sliced. Ensure the ganache is not too hot when poured, as it could melt the custard layer beneath it if not handled with care.
How to tell it’s done
The dessert is ready when it has been refrigerated for at least two hours, allowing the custard and ganache to set firmly. The ganache should feel cool to the touch and hold its shape when a spoon or knife is pressed against it.
Because the custard contains eggs, ensure it has been cooked properly to 160°F (71°C) if prepared from scratch, ensuring a safe and thick consistency.
- Egg dishes: 160°F (71°C) in the thickest part
Up next · Part 3 of 3
2 variations · storage & make-ahead · 3 answers · printable card
Tips, FAQ & printable recipe (Part 3)← Back to the ingredients (Part 1)