Desserts · Part 2 of 3: Instructions
Decadent Layered Chocolate Mousse Cake Step-by-step instructions
- Prep
- Cook
- Total
- Serves
- 8
Before you start
Before beginning the assembly, ensure the chocolate sponge cake is trimmed to fit the cake ring perfectly. Have the mousse prepared and kept cool.
Prepare a clean workspace with a wire rack and a tray underneath to catch any excess glaze. Ensure the dessert knife is clean and that a small bowl of hot water is nearby for warming the knife during the final slicing stage.
Ingredients at a glance (3)
- 1 layer chocolate sponge cake, store-bought or made ahead
- 2 cups chocolate mousse, prepared
- 1 cup dark chocolate ganache, warm
Instructions
Base Assembly
- Assemble the basePlace the prepared chocolate sponge cake layer inside an 8-inch cake ring on a flat surface. Spread the chocolate mousse evenly over the sponge layer using an offset spatula, ensuring the top is perfectly level for the final glaze.Look for The mousse surface should be perfectly flat and smooth.Tip Chill the sponge and mousse assembly in the refrigerator for at least two hours to ensure it sets firmly before glazing.
The cake ring should be firmly in place on the base. The mousse should be spread into a perfectly flat, level layer across the sponge, with no air pockets visible against the sides of the ring. Check that the assembly is sturdy and ready for its time in the refrigerator to solidify before the glazing phase.
Glazing Process
- Glaze the cakeRemove the chilled cake from the refrigerator and place it on a wire rack over a tray. Pour the warm dark chocolate ganache over the center of the cake, allowing it to flow naturally over the edges to create a smooth, glossy mirror effect.Look for The ganache should coat the entire top and sides of the cake evenly.Tip Pour the ganache in one continuous motion for the cleanest finish.
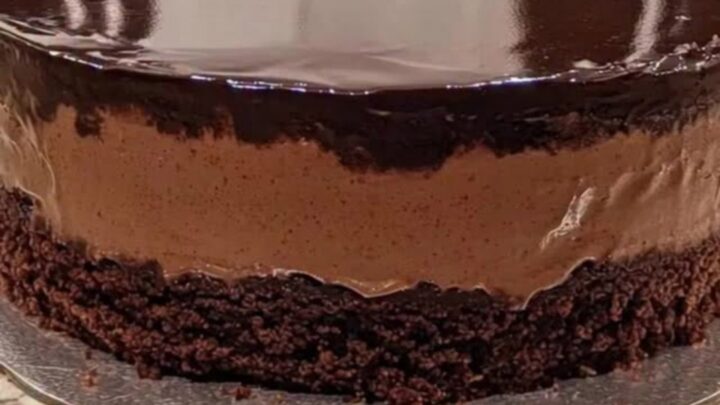
The ganache should coat the entire surface of the cake in a smooth, continuous layer. It should be glossy and reflective, with no visible streaks or gaps. Ensure the excess ganache has dripped off and the edges are neat before moving the cake to the final chilling stage to let the glaze set completely.
Final Presentation
- Final set and sliceAllow the ganache to set at room temperature for 15 minutes before transferring to the refrigerator to firm up completely. When ready to serve, use a warm dessert knife to slice through the layers carefully, ensuring a clean cut through the glaze and mousse.Look for The ganache should be set and no longer tacky to the touch.Safe temperature 160°F (71°C) internal temperature (egg dishes)Tip Wipe the knife clean with a hot, damp cloth between each slice for professional results.
The cake should be perfectly chilled and the glaze firm to the touch. When slicing, the knife should glide through the layers with minimal resistance, revealing distinct, clean lines of sponge, mousse, and ganache.
Each slice should hold its shape on the plate without sagging or losing the integrity of the individual layers.
Common mistakes
A common mistake is pouring the ganache while it is too hot, which will melt the mousse and ruin the mirror effect. Always test the temperature of the ganache; it should feel barely warm to the touch.
Another error is failing to chill the cake sufficiently; if the mousse is soft, the layers will lose their definition and the cake may collapse when sliced.
How to tell it’s done
The cake is complete when the ganache has set into a firm, glossy shell that does not smear when touched lightly. The internal structure should be stable, with the mousse fully set and bonded to the sponge base.
The eggs within the mousse must be cooked to an internal temperature of 160°F (71°C) during the initial preparation of the mousse mixture to ensure food safety.
- Egg dishes: 160°F (71°C) in the thickest part
Up next · Part 3 of 3
2 variations · storage & make-ahead · 3 answers · printable card
Tips, FAQ & printable recipe (Part 3)← Back to the ingredients (Part 1)