Desserts · Part 2 of 3: Instructions
Decadent Layered Chocolate Mousse Cake Step-by-step instructions
- Prep
- Cook
- Total
- Serves
- 8
Before you start
Before beginning assembly, ensure all components are fully prepared and chilled. The brownie base must be completely cool to the touch to prevent the cream and mousse from melting.
Have the offset spatula, piping bag, and serving stand ready on your workspace. Clear enough space in your refrigerator to accommodate the cake stand so the dessert can set undisturbed for the required time.
Ingredients at a glance (4)
- 1 layer brownie base, store-bought or made ahead
- 1 cup whipped cream, light and airy
- 2 cups chocolate mousse, velvety texture
- 1/2 cup fudge frosting, for rosettes
Instructions
Base preparation
- Prepare the basePlace the prepared brownie layer onto a flat cake stand or serving plate. Ensure the surface is level so the subsequent layers remain even.Look for The brownie base should be completely cooled.Tip If the brownie is domed, trim the top with a serrated knife for a flat surface.
The brownie base should be level and centered on the serving stand. If the edges are uneven, trim them carefully with a serrated knife. The surface must be clean and dry to ensure the cream layer adheres properly without sliding off during the assembly or serving process.
Layering components
- Assemble the mousse and creamSpread the light whipped cream evenly over the brownie base using an offset spatula. Carefully pipe or spread the chocolate mousse on top of the cream layer, smoothing it gently to maintain the distinct layers.Look for The layers should be visually distinct.Tip Chill the spatula in ice water to keep the mousse from sticking while smoothing.
The cream and mousse should be spread in uniform, even layers. Check that the mousse reaches the edges of the brownie base without dripping down the sides. The surface should be smooth and flat, providing a stable foundation for the decorative fudge rosettes that will be added next.
Setting and finishing
- Decorate and setUsing a piping bag fitted with a star tip, pipe decorative fudge rosettes around the perimeter of the cake. Place the cake in the refrigerator for at least two hours to ensure the mousse and cream layers set properly before slicing.Look for The mousse should feel firm to the touch.Safe temperature 160°F (71°C) internal temperature (egg dishes)Tip Use a warm, dry knife for clean, professional-looking slices.
After piping the rosettes, the cake must be refrigerated until completely set. Verify that the mousse is no longer soft or tacky.
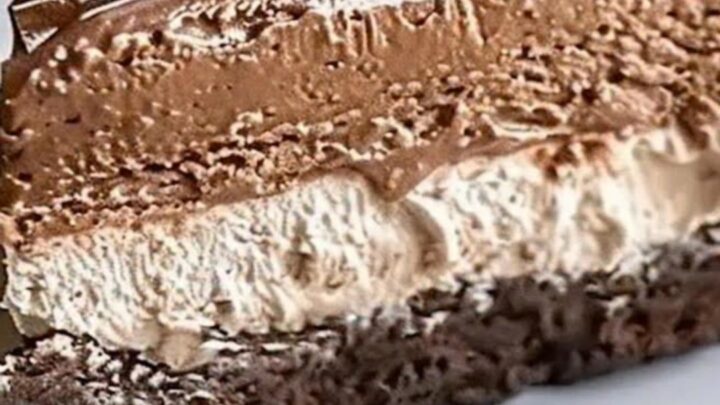
Once chilled, the cake should look firm and professional, with clear, distinct boundaries between the brownie, cream, and mousse layers, ready for clean slicing.
Common mistakes
A common mistake is attempting to layer the mousse onto a brownie that is still warm, which causes the cream and mousse to slide off.
Another error is rushing the chilling process; if the cake is sliced too early, the layers will lose their definition. Ensure the knife is cleaned between every single slice to prevent chocolate smears across the different layers.
How to tell it’s done
The cake is considered done when the mousse layer has firmed sufficiently to hold its shape when sliced.
Because the mousse contains eggs, it is important that the mixture was prepared to reach 160°F (71°C) during the initial cooking phase of the mousse preparation. The final cake should feel stable and cool, with the fudge rosettes holding their piped shape.
- Egg dishes: 160°F (71°C) in the thickest part
Up next · Part 3 of 3
2 variations · storage & make-ahead · 3 answers · printable card
Tips, FAQ & printable recipe (Part 3)← Back to the ingredients (Part 1)