Desserts · Part 2 of 3: Instructions
Decadent Double-Layer Chocolate Cake with Vanilla Cream Step-by-step instructions
- Prep
- Cook
- Total
- Serves
- 12
Before you start
Before beginning assembly, ensure your cake layers are completely cooled to room temperature. Prepare your vanilla cream and ganache ahead of time, allowing them to reach the correct consistency for spreading and pouring.
Clear a flat workspace and have your cake stand and offset spatula ready, as the assembly process moves quickly once you begin layering the components to ensure the best aesthetic results.
Ingredients at a glance (4)
- 2 layers chocolate cake layers, store-bought or made ahead
- 1 1/2 cups vanilla cream, prepared
- 1/2 cup chocolate ganache, prepared
- sprinkles, for serving
Instructions
Layering the base
- Prepare the layersPlace one chocolate cake layer onto a serving stand. Spread the vanilla cream evenly over the top surface of the cake layer using an offset spatula, ensuring it reaches the edges for a clean look.Look for The cream is spread into a smooth, even layer across the cake surface.Tip Ensure the cake is completely cool before adding the cream to prevent melting.
The first chocolate cake layer is securely positioned on the stand with a perfectly smooth, even layer of vanilla cream covering the top, creating a stable foundation for the final piece.
Securing the structure
- Assemble the cakeCarefully place the second chocolate cake layer on top of the vanilla cream. Press down very gently to secure the layers together while maintaining the fluffy texture of the filling.Look for The top layer is centered and stable.Tip Use a light touch to avoid squishing the cream filling out the sides.
The second chocolate cake layer is perfectly aligned with the base, creating a symmetrical profile that is stable and ready to receive the final rich chocolate ganache topping for decoration.
Final finishing
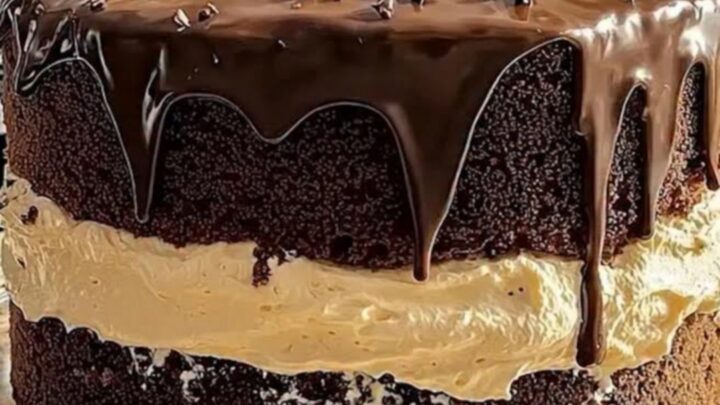
- Finish with ganachePour the chocolate ganache over the top of the cake, allowing it to drip naturally down the sides. Sprinkle the top with decorative sprinkles while the ganache is still tacky for the best finish. Ensure the egg-based cream filling is prepared using pasteurized eggs and heated to 160°F (71°C) to ensure it is safe to serve.Look for The ganache creates a glossy coating and drips elegantly down the sides.Safe temperature 160°F (71°C) internal temperature (egg dishes)Tip Let the ganache set for a few minutes before slicing to ensure clean cuts.
The ganache has been poured, creating a beautiful, glossy drip down the sides, and the sprinkles provide a final decorative touch to the finished dessert, which is now ready for serving.
Common mistakes
Avoid assembling the cake while the layers are still warm, as this will cause the vanilla cream to melt and the layers to slide apart. Do not over-pour the ganache, as it may overwhelm the delicate balance of the cake.
Ensure you do not press down too hard during assembly, which can compromise the fluffy texture of the cream and lead to an uneven, squashed appearance in the final slice.
How to tell it’s done
The cake is ready when the ganache has set to a glossy, firm finish that holds its shape when sliced.
The vanilla cream should remain stable between the layers, and the cake should yield easily to a fork without crumbling.
The egg-based filling must reach a safe internal temperature of 160°F (71°C) to ensure it is fully cooked and safe for consumption.
- Egg dishes: 160°F (71°C) in the thickest part
Up next · Part 3 of 3
2 variations · storage & make-ahead · 3 answers · printable card
Tips, FAQ & printable recipe (Part 3)← Back to the ingredients (Part 1)