Desserts · Part 2 of 3: Instructions
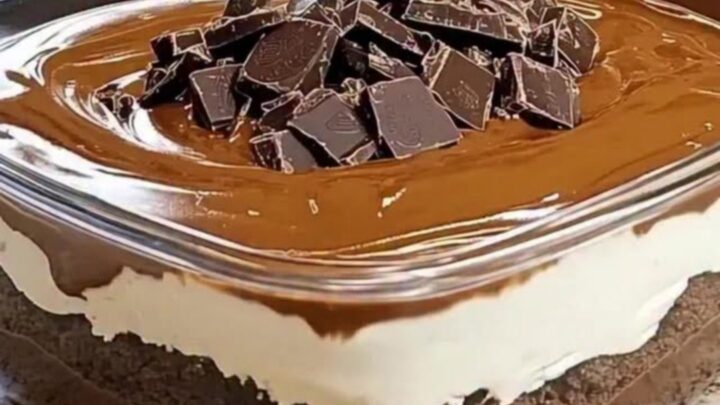
Decadent Cold Chocolate Layered Dessert Step-by-step instructions
- Prep
- Cook
- Total
- Serves
- 9
Before you start
Before beginning assembly, ensure all your components are ready. The cake should be crumbled into uniform pieces. If you are making your own whipped cream, ensure it is whipped to stiff, stable peaks. Your ganache should be at a spreadable, pourable consistency.
If it has been refrigerated, gently warm it over a double boiler or in short bursts in the microwave until it flows smoothly. Have your square glass dish clean and ready on your workspace to facilitate a quick and efficient assembly process.
Ingredients at a glance (4)
- 2 cups moist cake crumbs, store-bought or made ahead
- 1 1/2 cups heavy whipped cream, chilled
- 1 cup silky chocolate ganache, store-bought or made ahead
- 1/4 cup chopped dark chocolate chunks
Instructions
Layering the Base
- Prepare the Base LayerEvenly spread the moist cake crumbs across the bottom of the square glass dish. Press down gently with a spatula to create a firm, level base for the dessert layers.Look for The crumbs should cover the bottom completely and feel somewhat compressed.Tip Using a flat-bottomed measuring cup can help achieve a perfectly level cake layer.
The cake crumbs must be distributed evenly and pressed firmly into the bottom of the dish. A uniform base is crucial for structural integrity, so take a moment to ensure there are no gaps and that the surface is level before proceeding to add the subsequent layers.
Adding Cream and Ganache
- Add Cream and GanacheSpread the fluffy whipped cream over the prepared cake base using a spatula. Once smooth, pour the silky chocolate ganache over the whipped cream layer, spreading it carefully to the edges to ensure full coverage.Look for The ganache should be glossy and create a smooth, reflective surface over the cream.Tip Ensure the whipped cream is cold so it does not melt when the ganache is poured.
The whipped cream should be spread gently to avoid disturbing the cake crumbs. The ganache should be poured slowly to create a smooth, mirror-like finish.
Check that the ganache reaches all corners of the dish, creating a consistent thickness across the entire top surface.
Chilling and Finishing
- Finish and ChillSprinkle the chopped dark chocolate chunks evenly over the top of the ganache. Place the dessert in the refrigerator for at least two hours to allow the layers to set properly before serving.Look for The ganache should feel firm to the touch after chilling.Tip Cut into clean squares using a warm knife for the best presentation.
The final chilling phase is essential for setting the fats. Verify that the dish is placed on a level surface in the refrigerator to prevent the layers from becoming uneven. Once set, the dessert should be firm and ready for final garnishing with the chocolate chunks.
Common mistakes
A common mistake is failing to allow the cake base to cool completely if it was baked fresh; warm cake will melt the whipped cream immediately. Another error is over-whipping the cream, which can lead to a grainy texture instead of the desired smooth, airy finish.
Ensure the ganache is not too hot when pouring, as it must be cool enough to sit on top of the cream without creating a messy, blended layer that ruins the aesthetic of the dessert.
How to tell it’s done
The dessert is done when the ganache layer has firmed up significantly after the recommended chilling time. When you touch the surface, it should feel stable and not tacky, indicating that the fats have properly set.
The layers should be clearly defined when viewed from the side of the glass dish, and the entire structure should be firm enough to be sliced into clean, individual squares without the layers sliding apart or losing their distinct shape.
Up next · Part 3 of 3
2 variations · storage & make-ahead · 3 answers · printable card
Tips, FAQ & printable recipe (Part 3)← Back to the ingredients (Part 1)