Desserts · Part 1 of 3: Ingredients
Decadent Chocolate Peanut Butter Banana Trifle
- Prep
- Cook
- Total
- Serves
- 6
Discover the art of creating a stunning, multi-layered dessert that is as impressive to look at as it is delicious to eat. This chocolate peanut butter banana trifle combines classic flavors in a sophisticated format, making it the perfect centerpiece for any gathering, casual evening, or special occasion.
With simple ingredients and minimal effort, you can transform pantry staples into a decadent treat that offers a harmonious balance of creamy, crunchy, and fruity elements in every single spoonful.
A trifle is the ultimate dessert for those who appreciate variety in texture and flavor. This specific version highlights the timeless combination of chocolate and peanut butter, elevated by the natural sweetness of ripe bananas and the crunch of graham crackers.
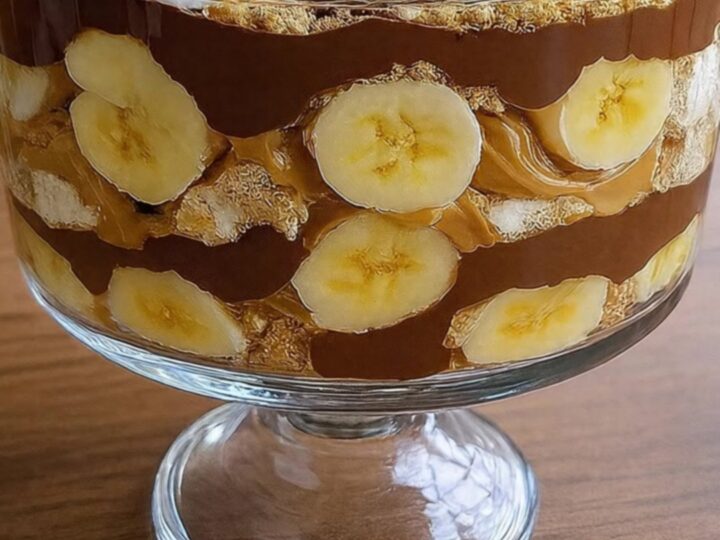
By layering these components in a clear glass bowl, you showcase the beautiful distinctions between each element. Whether you are preparing a quick dessert for family or hosting friends, this trifle provides a reliable and elegant solution that requires no baking and minimal preparation time, allowing you to focus on enjoying the final product.
Ingredients
Layers
- 2 cups chocolate pudding, prepared
- 1 cup peanut butter cream
- 3 large bananas, sliced
- 1 cup graham cracker crumbs
Topping
- 1 cup whipped cream
- 2 tbsp chocolate syrup for drizzling
- 2 tbsp chopped peanuts
Why this recipe works
The method of layering ingredients in a glass vessel allows the different components to meld their flavors while maintaining their distinct textures. The chocolate pudding provides a dense, rich base, while the peanut butter cream adds a lighter, airy contrast. Placing the graham crumbs between the pudding and fruit keeps them from becoming overly soggy immediately, preserving that essential crunch that makes the trifle so enjoyable to eat.
Using a glass pedestal bowl is essential for the visual appeal of the trifle, as it highlights the vibrant layers of color and texture. The assembly process is designed to be sequential, ensuring that each bite contains a bit of every component. By chilling the trifle before serving, you allow the flavors to harmonize and the structure to firm up, which makes serving individual portions much easier and cleaner for your guests.
Notes and substitutions
When choosing ingredients, opt for high-quality chocolate pudding to ensure the best flavor profile. If using store-bought pudding, choose a variety that has a smooth consistency and a deep cocoa flavor.
For the peanut butter cream, ensure it is whipped to a light and fluffy consistency, as this will prevent the trifle from feeling too heavy. Fresh, ripe bananas are crucial, but they should not be overly soft, as they need to hold their shape when sliced.
The equipment required is minimal, but a long-handled spoon is recommended for assembly to reach the bottom of deep bowls. If a pedestal bowl is unavailable, any clear glass bowl will suffice.
For substitutions, feel free to replace graham cracker crumbs with crushed digestive biscuits or even vanilla wafers. If peanuts are a concern, toasted almonds or walnuts can provide a similar crunch, though they will change the overall nutty character of the dessert.
- graham cracker crumbs: crushed chocolate sandwich cookies for a deeper cocoa flavor
- peanut butter cream: whipped cream folded with smooth peanut butter
Equipment
- glass pedestal bowl
- dessert spoon
- knife
- cutting board