Desserts · Part 2 of 3: Instructions
Decadent Chocolate Cream Caramel Icebox Dessert Step-by-step instructions
- Prep
- Cook
- Total
- Serves
- 8
Before you start
Before beginning, ensure that all ingredients are measured and ready on the workspace. Keep the whipped cream in the refrigerator until the very moment of assembly, as cool temperatures preserve its thick consistency.
Prepare the glass casserole dish by clearing a level space in the refrigerator, as the dish will need to rest there immediately after assembly. Having all necessary tools, including a sturdy spatula and measuring cups, within easy reach will make the assembly process smooth and efficient.
Ingredients at a glance (5)
- 2 cups chocolate crumb crust
- 3 cups whipped cream
- 1/2 cup caramel
- 1/4 cup graham crumbs
- 1/2 cup dark chocolate chunks
Instructions
Base assembly
- Prepare the chocolate basePress the chocolate crumb crust firmly and evenly into the bottom of a 9x9-inch glass casserole dish to create a solid, compact foundation.Look for The crumbs should form an even, compacted bottom layer across the dish.Tip Use the flat base of a measuring cup to compress the crumbs evenly.
The chocolate crumb crust should be dark, aromatic, and uniform. When pressed into the casserole dish, it should form a compact, level layer that covers the entire bottom without any loose crumb patches. The base must feel firmly packed so it does not lift or shift when spreading the cream.
Cream layering
- Layer the whipped creamSpread the thick whipped cream evenly over the chocolate crumb crust in the dish, smoothing the top surface gently with an offset spatula.Look for The cream layer should be smooth, thick, and reach the sides of the dish.Tip Keep the whipped cream chilled before spreading so it holds its shape.
The whipped cream should be thick, opaque, and smooth across the surface. When spread over the chocolate base, it should create a clean line of separation between the two layers.
Ensure the cream reaches all the way to the edges of the dish, highlighting the distinct contrast between the dark crust and light filling.
Topping and chilling
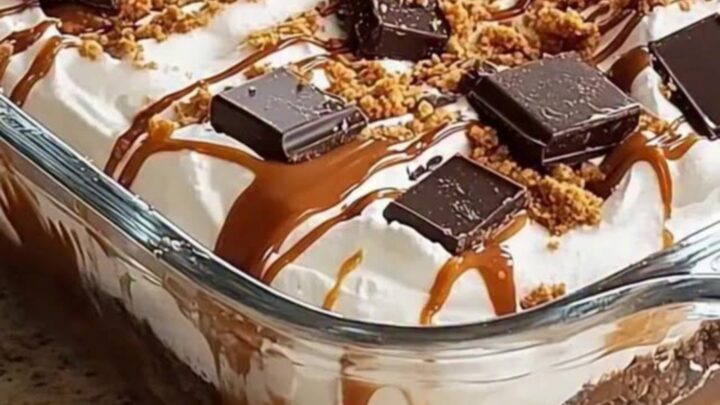
- Add toppings and chillDrizzle the golden caramel smoothly across the whipped cream layer, then scatter the crushed graham crumbs and dark chocolate chunks evenly over the top before transferring the dish to chill.Look for The caramel ribbons pool across the surface, accented with crunch.Tip Chill for at least three hours to allow the cream and base to set.
The caramel should be drizzled in smooth lines across the cream. The crushed graham crumbs and dark chocolate chunks should be scattered evenly to ensure every scoop includes crunch. After chilling, the dessert should be cold to the touch and the layers should look distinct and completely set.
Common mistakes
A common mistake is using whipped cream that has sat at room temperature, which causes the layers to bleed into one another and turn runny. Always keep the cream chilled right up until spreading.
Another error is pressing the crust too loosely, which leads to the base falling apart when scooping; ensure the chocolate crumb crust is compressed firmly into an even, compact layer across the bottom of the dish.
How to tell it’s done
The dessert is considered done when the whipped cream layer feels firm to the touch and the crust has set solidly at the bottom of the dish. Because this is a no-bake dessert, there is no internal temperature requirement for safety.
However, the visual signs of readiness include the caramel maintaining its position on the cream and the chocolate chunks staying on the surface rather than sinking. If the dessert appears too soft after the recommended chilling time, return it to the refrigerator for an additional hour.
Up next · Part 3 of 3
2 variations · storage & make-ahead · 3 answers · printable card
Tips, FAQ & printable recipe (Part 3)← Back to the ingredients (Part 1)