Desserts · Part 2 of 3: Instructions
Decadent Chocolate Cake Roll with Whipped Cream Step-by-step instructions
- Prep
- Cook
- Total
- Serves
- 8
Before you start
Before beginning the assembly, ensure the chocolate sponge cake is completely cool. If the cake is even slightly warm, the whipped cream filling will melt upon contact, resulting in a soggy texture and a loss of definition in the swirl.
Gather all required equipment, including an offset spatula and a clean sheet of parchment paper, to facilitate a smooth and efficient rolling process that avoids unnecessary handling of the delicate sponge.
Ingredients at a glance (4)
- 1 recipe chocolate sponge cake, made ahead
- 1 1/2 cups heavy whipping cream, chilled
- 1/4 cup semi-sweet chocolate chips, for melting
- unsweetened cocoa powder, for serving
Instructions
Whipping the cream
- Prepare the fillingIn a chilled mixing bowl, whip the heavy cream using an electric mixer on medium-high speed until stiff peaks form. Ensure the cream is cold before starting to achieve the best volume and stability for the filling.Look for The cream holds its shape firmly on the whisk.Tip Chill the mixing bowl in the freezer for ten minutes before whipping the cream for faster results.
The cream is ready when it reaches a stiff, stable consistency that holds firm peaks on the whisk. It should look smooth, glossy, and thick, without any signs of separation or buttering, indicating it is properly aerated and ready to be spread onto the sponge layer for assembly.
Assembling the roll
- Assemble the rollLay the prepared chocolate sponge cake flat on a clean surface. Spread the whipped cream evenly over the surface using an offset spatula, leaving a small border at the edges. Starting from one short side, roll the cake snugly to create a tight cylinder.Look for The cream is spread in an even, smooth layer.Tip If the cake feels too dry, brush it lightly with a simple syrup before spreading the cream.
The assembly is successful when the cake is rolled into a tight, uniform cylinder.
The filling should be distributed evenly throughout the interior, and the roll should look structurally sound without significant gaps or air pockets, ready for the final decorative touches and the necessary chilling period.
Finishing the dessert
- Finish and garnishMelt the chocolate chips in a small saucepan over low heat until smooth. Drizzle the melted chocolate over the cake roll in a decorative pattern. Finish by lightly dusting the entire roll with cocoa powder. Ensure the eggs in the sponge are fully cooked to 160°F (71°C). Chill for at least one hour before slicing to ensure clean, beautiful swirls.Look for The chocolate drizzle has set slightly and the cake is firm.Safe temperature 160°F (71°C) internal temperature (egg dishes)Tip Use a warm, dry knife for slicing to ensure the whipped cream does not smear during the process.
The dessert is finished when the chocolate drizzle is applied and the cocoa powder is dusted lightly over the top. The roll should feel cool and firm after chilling, ensuring that the internal structure is set and the slices will come out clean and well-defined when cut with a warm knife.
Common mistakes
A common error is attempting to roll the cake while it is still warm or too dry, which leads to cracking. Additionally, over-whipping the cream can cause it to turn grainy and separate, which ruins the texture.
Avoid using too much filling near the edges, as it will squeeze out during the rolling process, creating a mess and making it difficult to achieve a tight, uniform cylinder shape.
How to tell it’s done
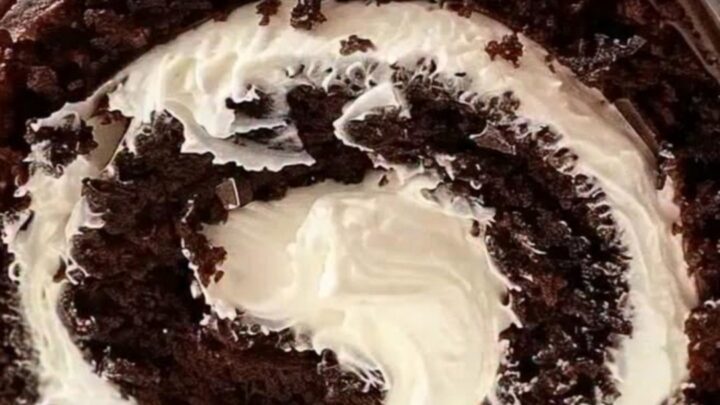
The cake roll is done when the chocolate drizzle has set and the roll feels firm to the touch after chilling. Slicing should reveal a distinct, tight swirl of white cream against the dark chocolate sponge.
Ensure the cake has rested for the full duration in the refrigerator to allow the cream to set, which is vital for achieving those signature, clean-cut slices that highlight the beautiful internal structure of the dessert.
- Egg dishes: 160°F (71°C) in the thickest part
Up next · Part 3 of 3
2 variations · storage & make-ahead · 3 answers · printable card
Tips, FAQ & printable recipe (Part 3)← Back to the ingredients (Part 1)