Desserts · Part 2 of 3: Instructions
Crunchy Chocolate Walnut Date Bark Step-by-step instructions
- Prep
- Cook
- Total
- Serves
- 12
Before you start
Before you start, make sure your dates are soft and pitted. If they're not, soak them in warm water for 10 minutes, then drain and pat dry. Line a cutting board or tray with parchment paper.
Have all your ingredients measured and ready: 300 grams of pitted Medjool dates, 4 tablespoons of creamy peanut butter, 1 cup of raw walnut halves, 150 grams of melted dark chocolate, and any white chocolate and chopped nuts you plan to use. Melt the dark chocolate in a heatproof bowl over simmering water or in the microwave in 30-second bursts, stirring until smooth. Set everything within reach so you can assemble the bark quickly.
Ingredients at a glance (6)
- 300 g pitted soft Medjool dates
- 4 tbsp creamy peanut butter
- 1 cup raw walnut halves
- 150 g melted dark chocolate
- melted white chocolate for drizzling, to taste
- chopped nuts for sprinkling, to taste
Instructions
Build the Layers
- Prepare the Date BaseCut open a pack of pitted soft Medjool dates with kitchen scissors. Arrange the dates on a piece of parchment paper, pressing them tightly together to form a flat, even rectangle. Use your fingers or the back of a spoon to flatten any gaps, creating a solid base for the bark.Look for The dates should form a cohesive, sticky rectangle about 1/4-inch thick.Tip If the dates are very sticky, lightly wet your fingers with water to prevent them from sticking.
- Spread the Peanut ButterUsing an offset spatula, spread 4 tablespoons of creamy peanut butter evenly over the entire surface of the flattened date base. Make sure to reach the edges so every bite has a nutty, creamy layer.Look for The peanut butter should cover the dates in a smooth, even layer.Tip Warm the peanut butter slightly in the microwave for 10 seconds if it's too thick to spread easily.
- Press on the WalnutsPress 1 cup of raw walnut halves into the peanut butter in neat, tightly packed rows. Gently push each walnut half into the peanut butter so they adhere well, creating a crunchy nutty layer.Look for The walnuts should be evenly distributed and slightly embedded in the peanut butter.Tip Use walnut halves for a chunky texture; chop them if you prefer smaller pieces.
- Drizzle with Dark ChocolateDrizzle 150 grams of melted dark chocolate over the walnuts. Use a spoon or a piping bag to create an even, generous layer, ensuring the chocolate reaches the edges. Tilt the tray slightly to help the chocolate spread if needed.Look for The dark chocolate should cover the walnuts in a glossy, even coating.Tip Use a high-quality dark chocolate with at least 70% cocoa for a rich flavor.
At the end of this phase, you'll have a flat date base covered with peanut butter and topped with walnuts. The dates should be pressed into a cohesive rectangle, and the peanut butter should be spread evenly to the edges. The walnuts should be nestled into the peanut butter, creating a textured, nutty layer. The surface should look neat and uniform, with no bare spots of date showing through. This is the foundation of your bark, so take a moment to ensure everything is even and well-packed.
Chocolate and Chill
- Add White Chocolate Drizzle and Chopped NutsFeather melted white chocolate over the dark chocolate in delicate, thin lines. Immediately sprinkle chopped nuts over the entire surface while the chocolate is still wet, so they stick.Look for The white chocolate should form thin, elegant ribbons over the dark chocolate.Tip For a clean drizzle, transfer the white chocolate to a small zip-top bag and snip off a tiny corner.
- Chill Until SolidPlace the bark on a freezer-safe tray or plate and transfer to the freezer. Chill for 20 minutes, or until the chocolate is completely solid and the bark is firm to the touch.Look for The chocolate should be hard and the bark should feel firm when pressed.Tip If you're in a hurry, you can chill for 15 minutes, but 20 minutes ensures a clean slice.
After drizzling the dark chocolate and adding the white chocolate and chopped nuts, the bark should look glossy and inviting. The dark chocolate should cover the walnuts completely, with the white chocolate forming delicate, thin lines across the surface. The chopped nuts should be scattered evenly, adding visual interest and extra crunch. The bark should then be placed in the freezer and chilled until the chocolate is completely solid. When you touch the surface, it should feel hard and not stick to your finger.
Slice and Serve
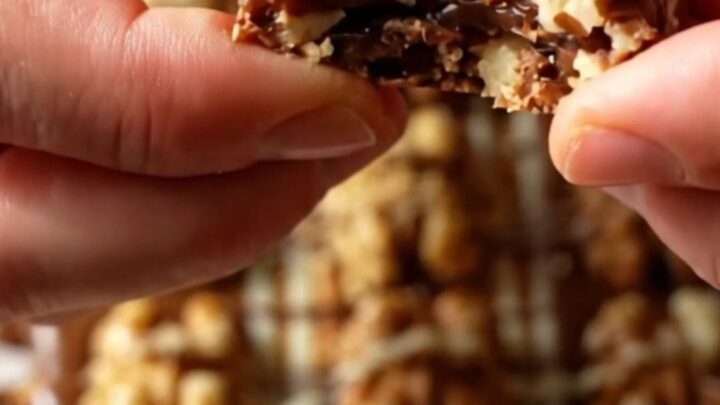
- Slice and ServeRemove the bark from the freezer and place it on a cutting board. Use a sharp chef knife to slice the bark into bars or squares. Press down firmly with a quick, decisive motion to get clean, crisp cuts. Serve immediately.Look for The bark should snap cleanly when cut, revealing layers of dates, peanut butter, and nuts.Tip For the cleanest cuts, slice while the bark is still cold from the freezer.
Once the bark is fully chilled, it should be firm enough to slice cleanly. Using a sharp chef knife, press down firmly to cut through the bark in one swift motion. The slices should have clean edges and reveal the distinct layers: a sticky date base, a creamy peanut butter layer, crunchy walnuts, and a glossy chocolate top.
The bark should snap when broken, and the texture should be a pleasing contrast of chewy, crunchy, and smooth. Serve the slices immediately, or store them in the refrigerator until ready to enjoy.
Common mistakes
One common mistake is using dates that are too dry, which makes them hard to flatten and results in a crumbly base. If your dates are firm, soak them briefly in warm water before using. Another pitfall is not pressing the dates tightly enough—gaps will cause the bark to fall apart when sliced.
Be sure to press the dates into a solid, even rectangle. Also, don't skip the chilling step; if the chocolate isn't fully set, the bark will be messy to cut. Finally, use a sharp knife and slice with a quick, firm motion to get clean edges rather than dragging the knife through the bark.
How to tell it’s done
The bark is done when the chocolate is completely set and firm to the touch. After chilling in the freezer for 20 minutes, the bark should feel solid and not bend when you lift it. When you press a finger gently on the surface, it should leave no indentation.
Slice into the bark with a sharp chef knife—it should snap cleanly, revealing distinct layers of date, peanut butter, walnut, and chocolate. If the chocolate is still soft, return the bark to the freezer for another 5 to 10 minutes. Once sliced, the bark should hold its shape at room temperature for a short time, but it's best served cold.
Up next · Part 3 of 3
4 variations · storage & make-ahead · 5 answers · printable card
Tips, FAQ & printable recipe (Part 3)← Back to the ingredients (Part 1)