Dinner · Part 2 of 3: Instructions
Crockpot Teriyaki Chicken Drumsticks Step-by-step instructions
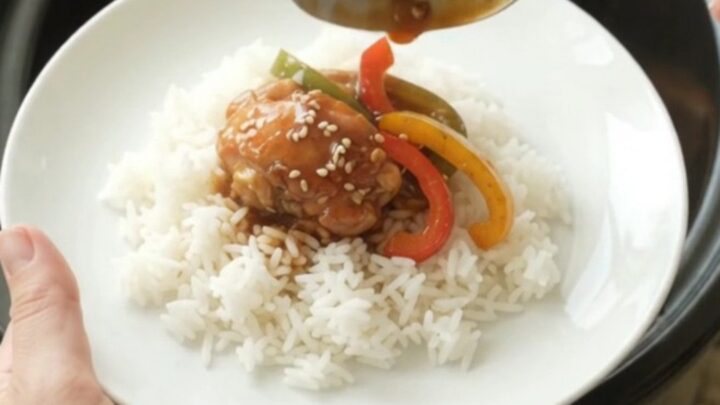
- Prep
- Cook
- Total
- Serves
- 6
Before you start
Before you start, make sure your slow cooker is clean and ready. Pat the chicken drumsticks dry with paper towels—this helps the sauce adhere better. If your drumsticks are very cold, let them sit at room temperature for 15 minutes while you prep the sauce.
Measure out all the sauce ingredients so you can whisk them together quickly. Have your cornstarch slurry ready before you remove the chicken, so you can thicken the sauce right away.
Ingredients at a glance (11)
- 3 lb chicken drumsticks, skin on
- 1/2 cup low-sodium soy sauce
- 1/3 cup honey
- 1/4 cup rice vinegar
- 4 cloves garlic, minced
- 1 tbsp fresh ginger, grated
- 2 tbsp cornstarch
- 3 tbsp water
- 1 tsp toasted sesame oil
- toasted sesame seeds, for garnish, to taste
- sliced green onions, for garnish, to taste
Instructions
Phase 1: Slow-Cook the Chicken
- Make the Teriyaki SauceIn a small bowl, whisk together the soy sauce, honey, rice vinegar, minced garlic, and grated ginger until the honey is fully dissolved. The sauce will be thin and aromatic.Look for The honey should be completely mixed in, with no sticky streaks.Tip Use fresh garlic and ginger for the best flavor—pre-minced versions can taste flat.
- Arrange Chicken in Slow CookerPlace the chicken drumsticks in the slow cooker in a single layer, overlapping slightly if needed. Pour the teriyaki sauce over the chicken, turning to coat each piece evenly.Look for Every drumstick should be coated with sauce; the liquid should come about halfway up the meat.Tip If your slow cooker is small, arrange the drumsticks with the thicker ends facing outward for even cooking.
- Cook on LowCover the slow cooker and cook on low for 4 hours, or until the chicken is tender and cooked through. Avoid lifting the lid during cooking to maintain temperature.Look for After 4 hours, the meat should be pulling away from the bone but not falling apart.Safe temperature 165°F (74°C) internal temperature (poultry)Tip If your slow cooker runs hot, check at 3 1/2 hours to prevent overcooking.
After four hours on low, your kitchen will be filled with the irresistible aroma of soy, garlic, and ginger. The chicken should be deeply browned, and the sauce will have darkened and reduced slightly.
The drumsticks should look plump and juicy, with the meat beginning to shrink from the bone. When you gently press a drumstick with tongs, it should feel tender but still hold its shape. The sauce will be thin but intensely flavored.
Phase 2: Make the Glaze
- Remove Chicken and Keep WarmUsing tongs, carefully transfer the cooked drumsticks to a plate and tent loosely with foil to keep warm. Leave the cooking liquid in the slow cooker.Look for The chicken should be very tender but still hold its shape when lifted.Tip Tenting with foil prevents the chicken from drying out while you make the glaze.
- Thicken the SauceIn a small bowl, stir the cornstarch and water together to make a slurry. Whisk the slurry into the cooking liquid in the slow cooker. Cook on high, uncovered, for 15 minutes, stirring occasionally, until the sauce thickens to a glaze.Look for The sauce should coat the back of a spoon and have a glossy sheen.Tip If the sauce isn't thick enough after 15 minutes, mix another teaspoon of cornstarch with a tablespoon of water and stir in.
- Add Sesame OilStir the toasted sesame oil into the thickened sauce. This adds a nutty aroma and glossy finish.Look for The sauce will darken slightly and smell fragrant.Tip Toasting sesame oil intensifies its flavor; use high-quality oil for the best result.
As the sauce thickens, you'll notice it turning from a watery liquid to a syrupy glaze. It will bubble and reduce, becoming more concentrated and shiny. The cornstarch will give it a velvety texture that clings to the spoon. The addition of sesame oil adds a deep, nutty fragrance that fills the kitchen. The glaze should coat the back of a spoon thickly, and when you tilt the spoon, it should slide off slowly.
Phase 3: Glaze and Serve
- Coat Chicken in GlazeReturn the drumsticks to the slow cooker and turn to coat each piece thoroughly in the glaze. Let them sit in the warm sauce for 5 minutes to absorb the flavors.Look for The chicken should be evenly coated and glistening.Tip For an extra-thick coat, spoon the glaze over the chicken a few times while it sits.
- Garnish and ServeTransfer the glazed drumsticks to a serving platter. Sprinkle with toasted sesame seeds and sliced green onions. Serve hot, with extra glaze on the side if desired.Look for The sesame seeds should stick to the glaze, and the green onions add a fresh pop of color.Tip Serve over steamed rice to soak up the extra glaze.
After coating the drumsticks, they should look glossy and irresistible, with the sauce clinging to every crevice. The sesame seeds and green onions add color and texture, making the dish pop. When you lift a drumstick, the glaze should drip lazily, and the meat should be so tender it nearly falls off the bone. The final dish should be shiny, fragrant, and ready to serve.
Common mistakes
One common mistake is lifting the lid during cooking, which lets heat escape and extends the cooking time. Trust the process and keep the lid on. Another pitfall is using a sauce that's too thin—if you skip the cornstarch slurry, you'll end up with watery sauce.
Also, be careful not to overcook the chicken, as it can become mushy and fall apart. Start checking at the 3 1/2-hour mark if your slow cooker runs hot.
How to tell it’s done
The chicken is done when it reaches an internal temperature of 165°F and the meat is tender enough to pull away from the bone easily. You can test this by inserting a fork into the thickest part of a drumstick—it should slide in with little resistance.
The sauce is ready when it coats the back of a spoon and leaves a clear trail when you run your finger through it. The glaze should be glossy and thick enough to cling to the chicken without running off.
- Poultry: 165°F (74°C) in the thickest part
Up next · Part 3 of 3
4 variations · storage & make-ahead · 5 answers · printable card
Tips, FAQ & printable recipe (Part 3)← Back to the ingredients (Part 1)