Dinner · Part 2 of 3: Instructions
Crockpot Sweet Onion and Bacon Pot Roast Step-by-step instructions
- Prep
- Cook
- Total
- Serves
- 6
Before you start
Before starting, ensure your slow cooker is clean and placed on a flat, heat-resistant surface near an electrical outlet. Prepare your ingredients by chopping the bacon into uniform, bite-sized pieces and slicing the onions into thin, even strips.
Take the beef roast out of the refrigerator about 20 minutes before you begin to take the chill off, which helps the meat cook more evenly from the start. Have your measuring cup ready to pour the beef broth accurately. Once all ingredients are prepped, the assembly process will go quickly, leaving you with a perfectly organized workspace and minimal cleanup.
Ingredients at a glance (5)
- 3 lb beef chuck roast
- 2 large sweet onions, sliced
- 6 slices bacon, chopped
- 1 packet brown gravy mix
- 1 cup beef broth
Instructions
Assembly of the roast
- Prepare the slow cookerPlace the raw beef chuck roast into the bottom of the slow cooker. Ensure the meat is positioned flat to allow for even heat distribution during the long cooking process.Look for The roast sits snugly on the bottom of the cooker.Tip Ensure the beef is completely thawed if using frozen meat to guarantee safe cooking temperatures.
- Layer the aromatics and baconDistribute the sliced sweet onions evenly over the top of the beef. Scatter the chopped bacon pieces across the onions to infuse the roast with savory, smoky flavor as it cooks.Look for Onions and bacon cover the surface of the roast.Tip Slicing onions into uniform strips helps them soften at the same rate as the meat.
At this phase, the raw beef is positioned at the base of the cooker, creating a stable foundation. You should see the onions and bacon layered neatly over the top.
The visual goal is an even distribution of ingredients so that the flavors permeate the meat throughout the cooking process. Check that the roast is flat and not touching the sides of the cooker too aggressively before proceeding to add the seasonings.
Seasoning and liquid addition
- Add seasoning and liquidSprinkle the contents of the brown gravy mix packet directly over the bacon and onion layer. Carefully pour the beef broth into the slow cooker, avoiding washing off the seasoning mix from the top of the meat.Look for Liquid pools at the bottom of the cooker.Tip Pour the broth slowly around the sides of the roast to keep the dry seasoning in place.
The gravy mix should be lightly dusted across the top of the onions and bacon, ensuring it covers the surface area. As the beef broth is poured in, watch for the liquid to settle at the bottom. The smell of the raw onions and the savory mix will be present. Ensure the liquid does not completely submerge the top of the roast, as this allows the bacon and onions to caramelize properly.
Slow cooking to tenderness
- Cook and serveCover and cook on low for 8 hours. Once finished, ensure the beef has reached an internal temperature of at least 145°F (63°C). Allow the roast to rest for 10 minutes before slicing and serving with the accumulated juices.Look for The beef is fork-tender and easily pulls apart.Safe temperature 145°F (63°C) internal temperature (steaks, chops and roasts)Tip Check the temperature at the thickest part of the roast to ensure it is cooked through.
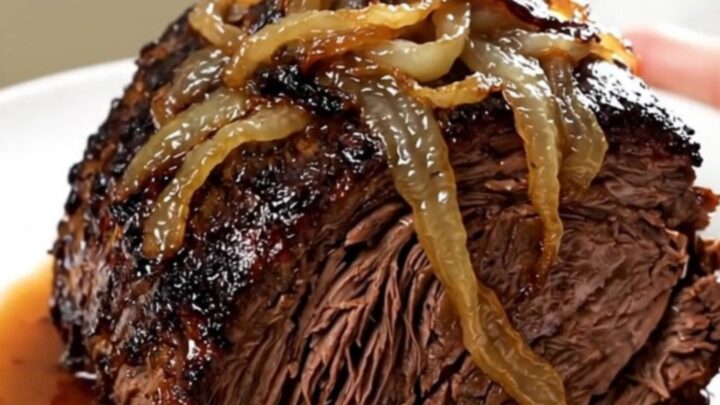
After the 8-hour cooking cycle, the roast will be deeply colored and tender. The house will smell savory and rich. When poked with a fork, the meat should yield easily. Check the internal temperature to confirm it has reached 145°F (63°C). The liquid should be thick and glossy, coating the onions and beef perfectly. Ensure the roast rests for 10 minutes before you begin the final slicing.
Common mistakes
A common mistake is overcrowding the slow cooker with too many ingredients, which can prevent the roast from cooking evenly. Another issue is opening the lid too frequently during the cooking process; every time the lid is lifted, heat escapes and the cooking time increases.
Avoid using a lean cut of beef, as it will likely become dry and tough during the long cooking period. Finally, ensure you do not skip the resting period, as slicing the meat too soon will cause the flavorful juices to leak out, resulting in a drier piece of beef.
How to tell it’s done
The pot roast is done when it is fork-tender, meaning it can be easily pierced and shredded with a fork without resistance. The beef should reach an internal temperature of at least 145°F (63°C) at the thickest point to ensure it is cooked through.
The onions should be soft and translucent, and the liquid at the bottom should have thickened into a flavorful, glossy gravy. Always allow the meat to rest for at least 10 minutes before slicing to ensure the juices redistribute throughout the fibers for the best texture.
- Steaks, chops and roasts: 145°F (63°C) in the thickest part, then a 3-minute rest
Up next · Part 3 of 3
2 variations · storage & make-ahead · 3 answers · printable card
Tips, FAQ & printable recipe (Part 3)← Back to the ingredients (Part 1)