Dinner · Part 2 of 3: Instructions
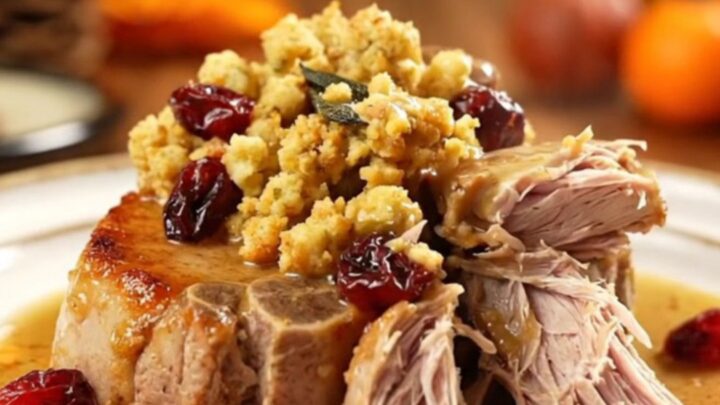
Crockpot Stuffing-Topped Cranberry & Herb Pork Chops Step-by-step instructions
- Prep
- Cook
- Total
- Serves
- 4
Before you start
Before starting, ensure your slow cooker is clean and ready for use. Gather all ingredients and have them measured out to make the assembly process quick.
If you are using frozen pork chops, ensure they are fully thawed in the refrigerator before cooking, as putting frozen meat directly into a slow cooker can lead to uneven cooking and food safety concerns. Prepare a clear space on your counter and have your whisk and bowl ready for combining the soup and broth.
Ingredients at a glance (5)
- 4 boneless pork chops
- 1 can cream of celery soup
- 1/2 cup chicken broth
- 4 cups seasoned sage stuffing mix
- 1/2 cup dried cranberries
Instructions
Assembling the Layered Foundation
- Prepare the BasePlace the four boneless pork chops in the bottom of the slow cooker ceramic insert. In a separate bowl, whisk together the cream of celery soup and the chicken broth until smooth, then pour this mixture evenly over the pork chops to ensure they are well coated.Look for The pork chops should be arranged in a single layer at the bottom of the slow cooker.Tip Ensure the soup and broth are thoroughly combined before pouring to prevent lumps.
The pork chops should be laid flat at the bottom, and the soup-broth mixture should be whisked until completely smooth. Everything should smell like savory herbs and chicken broth, setting the stage for the tenderizing process to come.
Adding the Stuffing and Cranberries
- Layer and SeasonMound the seasoned sage stuffing mix on top of the soup-coated pork chops. Sprinkle the dried cranberries evenly over the top of the stuffing layer to ensure every serving gets a touch of sweetness.Look for The stuffing should sit as a mound on top of the liquid-covered pork.Tip Do not stir the layers; keep the stuffing on top so it remains fluffy while the pork cooks below.
The stuffing should be mounded gently over the pork, and the cranberries should be scattered evenly across the surface. At this stage, the slow cooker should look full and well-organized, with the dry components resting neatly on top of the liquid base.
Slow Cooking to Perfection
- Slow Cook and ServeCover the slow cooker with the lid and set to cook on LOW for 6 hours. Once the time is up, verify the pork chops have reached an internal temperature of 145°F (63°C). Let the meat rest for at least 5 minutes before serving the pork topped with the moist, herb-infused stuffing.Look for The stuffing should be moist and fluffy, and the pork should be tender enough to shred easily.Safe temperature 145°F (63°C) internal temperature (steaks, chops and roasts)Tip Use a meat thermometer to check the thickest part of the chop for accuracy.
After six hours of cooking, the kitchen will be filled with an aromatic, savory scent. The stuffing should appear moist and fluffy, and the pork should be tender, juicy, and fully cooked through to a safe internal temperature.
Common mistakes
A common mistake is overcooking the pork, which can make it tough even in a slow cooker. While the low setting is gentle, avoid exceeding the recommended six-hour window.
Another error is stirring the ingredients together before cooking; keeping the stuffing on top is crucial for the correct texture, as it needs to steam rather than boil in the liquid.
Finally, do not skip the resting period, as letting the meat rest for five minutes helps redistribute the juices throughout the chops.
How to tell it’s done
The pork chops are done when they are tender and have reached a minimum internal temperature of 145°F (63°C). Because they have been braised for several hours, they should be soft and easy to shred with a fork.
The stuffing should be moist and have absorbed the savory juices, with no dry pockets remaining. Always use a digital meat thermometer inserted into the thickest part of the chop to confirm it is safe to eat.
- Steaks, chops and roasts: 145°F (63°C) in the thickest part, then a 3-minute rest
Up next · Part 3 of 3
2 variations · storage & make-ahead · 3 answers · printable card
Tips, FAQ & printable recipe (Part 3)← Back to the ingredients (Part 1)