Dinner · Part 2 of 3: Instructions
Crockpot Sticky Asian Pork Ribs for Easy Weeknight Dinner Step-by-step instructions
- Prep
- Cook
- Total
- Serves
- 4
Before you start
Before starting, ensure the slow cooker insert is clean and dry. Remove the pork ribs from the refrigerator about 30 minutes before placing them in the cooker to allow for more even heat distribution.
Have all ingredients measured and ready to ensure the process remains efficient and organized from start to finish.
Ingredients at a glance (4)
- 3 lb pork ribs
- 1/3 cup honey
- 1 tbsp garlic powder
- 1 cup hoisin sauce
Instructions
Assembly phase
- Prepare the slow cookerPlace the raw pork ribs into the bottom of the slow cooker insert. Ensure the ribs are arranged in an even layer to promote consistent cooking throughout the process.Look for Ribs are settled at the base of the slow cooker.Tip If the ribs are too large, cut them into smaller sections to fit comfortably.
At this stage, the ribs should be arranged neatly at the bottom of the slow cooker. All ingredients are added, and the initial layer of sauce is distributed. Ensure the slow cooker is plugged in and the lid is securely positioned to begin the long, slow heat application that will tenderize the meat.
Cooking phase
- Add seasoning and sauceDrizzle the honey evenly over the ribs. Sprinkle the garlic powder across the surface, then pour the hoisin sauce over the top, ensuring it coats the ribs as much as possible.Look for Sauce covers the ribs.Tip Use a spatula to spread the sauce slightly if necessary.
During the long cooking cycle, the ribs will slowly soften as the collagen breaks down. The hoisin and honey will begin to meld into a rich, dark sauce. Check that the slow cooker is on the correct low setting and that no steam is escaping from the edges of the lid for optimal results.
Resting and serving
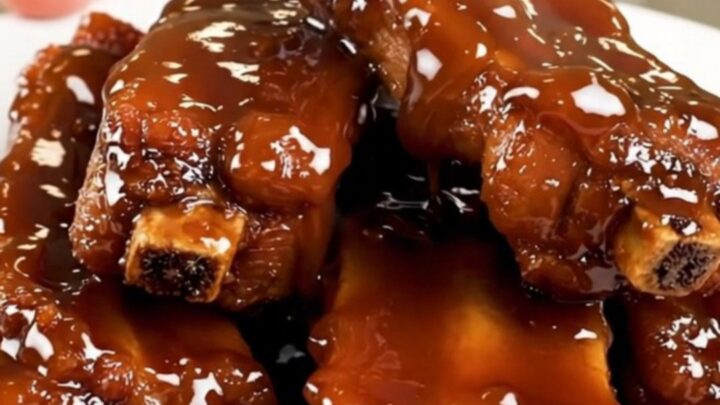
- Cook and serveCover the slow cooker and cook on low for 8 hours. Once finished, check that the internal temperature of the pork has reached 145°F (63°C). Let the ribs rest for 5 minutes before serving.Look for Ribs are tender and glazed.Safe temperature 145°F (63°C) internal temperature (steaks, chops and roasts)Tip Check the temperature at the thickest part of the meat away from the bone.
After the cooking time is complete, the ribs should be resting safely. The sauce should be thick and clinging to the meat.
Before serving, verify the internal temperature is at least 145°F (63°C) and allow the meat to rest for a few minutes to ensure the juices redistribute throughout the ribs for maximum flavor.
Common mistakes
A common mistake is overcrowding the slow cooker, which prevents the ribs from cooking evenly and can result in excess liquid that dilutes the sauce. Ensure there is enough space for the heat to circulate.
Additionally, avoid lifting the lid during the cooking process, as this releases heat and moisture, significantly increasing the time required for the ribs to reach full tenderness.
How to tell it’s done
The ribs are done when the meat is exceptionally tender and easily pulls away from the bone with a fork. Using a meat thermometer, ensure the thickest part of the pork has reached a safe internal temperature of at least 145°F (63°C).
The glaze should appear thick, glossy, and cling to the surface of the meat rather than pooling at the bottom of the cooker.
- Steaks, chops and roasts: 145°F (63°C) in the thickest part, then a 3-minute rest
Up next · Part 3 of 3
2 variations · storage & make-ahead · 3 answers · printable card
Tips, FAQ & printable recipe (Part 3)← Back to the ingredients (Part 1)