Dinner · Part 2 of 3: Instructions
Crockpot Rosemary Dijon Chicken with Tender Potatoes Step-by-step instructions
- Prep
- Cook
- Total
- Serves
- 4
Before you start
Before beginning, ensure your slow cooker is clean and positioned on a stable, heat-resistant surface. Have all your ingredients measured and ready, including the halved baby potatoes, which should be cut into uniform pieces to ensure they finish cooking at the same time as the chicken.
If the chicken breasts are very thick, you may choose to pound them slightly to an even thickness, though it is not strictly necessary for this slow-cooking method. Ensure you have a whisk and a small bowl available for emulsifying the sauce.
Ingredients at a glance (6)
- 4 pieces boneless skinless chicken breasts
- 1 lb baby potatoes, halved
- 1 tsp dried rosemary
- 1 tsp garlic powder
- 1 cup chicken broth
- 1/4 cup Dijon mustard
Instructions
Assembly Phase
- Prepare the Slow CookerPlace the boneless skinless chicken breasts into the base of the slow cooker, ensuring they are arranged in a single layer. Scatter the halved baby potatoes evenly around the chicken pieces.Look for Chicken is arranged on the bottom of the slow cooker.Tip Avoid stacking the chicken to ensure even cooking throughout the process.
The chicken and potatoes are neatly arranged in the slow cooker base. The ingredients look clean and organized, providing the foundation for the upcoming braise. Ensure no chicken pieces are overlapping to guarantee uniform heat distribution throughout the cooking process.
Seasoning and Liquid Phase
- Season and Add SauceSprinkle the dried rosemary and garlic powder over the chicken and potatoes. In a separate small bowl, whisk together the chicken broth and Dijon mustard until smooth, then pour this mixture over the contents of the slow cooker.Look for The liquid should partially submerge the chicken and potatoes.Tip Whisking the Dijon into the broth before adding ensures a uniform flavor profile.
The seasonings are distributed evenly and the Dijon broth has been poured over the ingredients. The slow cooker should appear moist, with the liquid reaching about halfway up the chicken. The kitchen should start to smell faintly of rosemary and garlic as the ingredients begin to settle.
Braising Phase
- Braise and ServeCover the slow cooker and cook on low for 4 hours. Once done, ensure the chicken reaches an internal temperature of 165°F (74°C). Allow the chicken to rest for 5 minutes before serving with the sauce and potatoes.Look for Chicken is opaque throughout and potatoes are fork-tender.Safe temperature 165°F (74°C) internal temperature (poultry)Tip Resting the meat is essential for maintaining moisture in the breasts.
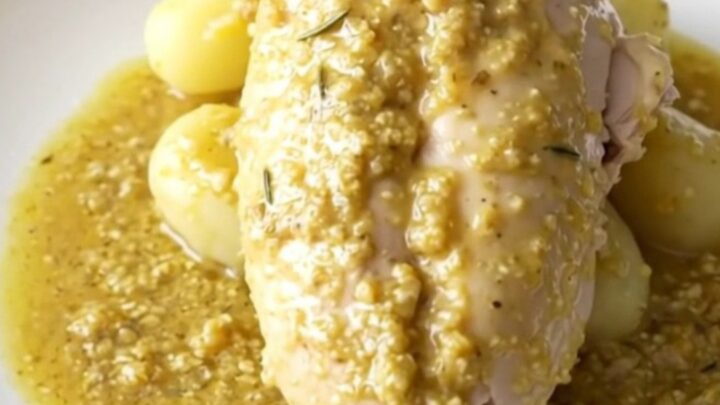
After four hours of low-heat cooking, the chicken is tender and fully cooked to 165°F (74°C). The sauce has thickened into a creamy consistency, and the potatoes are soft. The dish is ready to be plated and served immediately.
Common mistakes
A common mistake is overcrowding the slow cooker, which can lead to uneven cooking and result in some pieces being underdone while others become overcooked.
Another error is checking the lid too frequently; every time the lid is lifted, heat escapes, extending the cooking time and potentially affecting the final texture of the sauce.
Finally, avoid using high heat settings, as this can cause the chicken to become tough and rubbery rather than tender and succulent.
How to tell it’s done
To determine if the chicken is fully cooked, use a meat thermometer inserted into the thickest part of the breast. The internal temperature must reach at least 165°F (74°C). Visually, the meat should be opaque throughout, with no pink remaining in the center.
The baby potatoes should be easily pierced with a fork, indicating they have absorbed the cooking liquid and become tender. The sauce should be thickened and fragrant, indicating the flavors have melded perfectly during the low-heat braising process.
- Poultry: 165°F (74°C) in the thickest part
Up next · Part 3 of 3
2 variations · storage & make-ahead · 3 answers · printable card
Tips, FAQ & printable recipe (Part 3)← Back to the ingredients (Part 1)