Desserts · Part 2 of 3: Instructions
Crockpot Pumpkin Butterscotch Dump Cake Step-by-step instructions
- Prep
- Cook
- Total
- Serves
- 8
Before you start
Before starting, ensure the slow cooker insert is clean and dry. Have all ingredients measured and ready, including the sliced butter, to make the assembly process efficient.
Clear a space in the kitchen for the slow cooker, ideally near an outlet, so it can remain undisturbed during the long cooking time. Ensure there is enough room in the kitchen to safely transport the hot insert if needed after cooking.
Ingredients at a glance (4)
- 1 can pumpkin puree
- 1 box yellow cake mix
- 1 cup butterscotch chips
- 1/2 cup unsalted butter, sliced
Instructions
Layering the components
- Layer the ingredientsPour the pumpkin puree into the bottom of the slow cooker and spread it into an even layer. Evenly sprinkle the dry yellow cake mix over the pumpkin, ensuring the entire surface is covered. Distribute the butterscotch chips over the cake mix layer.Look for The pumpkin is spread evenly and the cake mix layer covers the surface completely.Tip Do not stir the ingredients; the dump cake method relies on the distinct layers to cook properly.
The pumpkin puree should be spread into an even base layer, followed by the cake mix covering the pumpkin entirely.
Ensure the butterscotch chips are scattered evenly to provide consistent flavor in every scoop. Check that no large gaps remain between the layers before covering the slow cooker.
Cooking process
- Add butter and cookPlace the slices of butter evenly across the top of the dry cake mix. Cover the slow cooker with the lid. Cook on high for 3 hours until the cake is set, the edges are golden, and the center is cooked through.Look for The edges look golden and the cake is bubbling slightly throughout.Tip Check the cake halfway through to ensure the edges are not browning too quickly.
The cake should be cooking steadily on high heat. The butter will melt into the dry cake mix, creating a rich, golden topping. Listen for a gentle bubbling sound, which indicates the cake is cooking through. Ensure the lid remains tightly sealed throughout the cooking duration.
Cooling and finishing
- Rest and serveTurn off the slow cooker and remove the lid to allow excess steam to escape. Let the cake rest for 10 minutes before scooping it onto serving plates. Serve warm.Look for The cake has firmed up slightly and is warm to the touch.Tip Serve with a scoop of vanilla ice cream if desired for a classic dessert pairing.
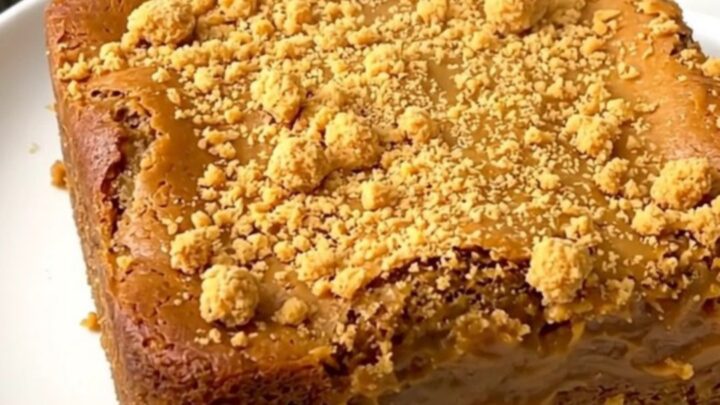
The finished cake should have a deep golden color and a fragrant, sweet aroma. It should be firm enough to hold its shape when scooped. Ensure the slow cooker is turned off and the lid is removed to allow the cake to rest and reach the proper serving consistency.
Common mistakes
Avoid over-mixing or stirring the layers during assembly, as this disrupts the dump cake structure and can lead to a gummy texture instead of a cake-like one.
Do not lift the lid too frequently while cooking, as this lets out essential heat and steam, significantly increasing the cooking time. Ensure the butter is distributed evenly across the surface to prevent dry patches in the cake mix that might not fully absorb the moisture.
How to tell it’s done
The cake is done when the edges are golden brown and bubbling, and the center has set and is no longer liquid. A toothpick inserted into the center should come out mostly clean, with perhaps a few moist crumbs.
The top should appear slightly crisp in areas where the butter has fully melted and integrated with the cake mix. Allow the cake to cool for 10 minutes to help the texture firm up before serving.
Up next · Part 3 of 3
2 variations · storage & make-ahead · 3 answers · printable card
Tips, FAQ & printable recipe (Part 3)← Back to the ingredients (Part 1)